
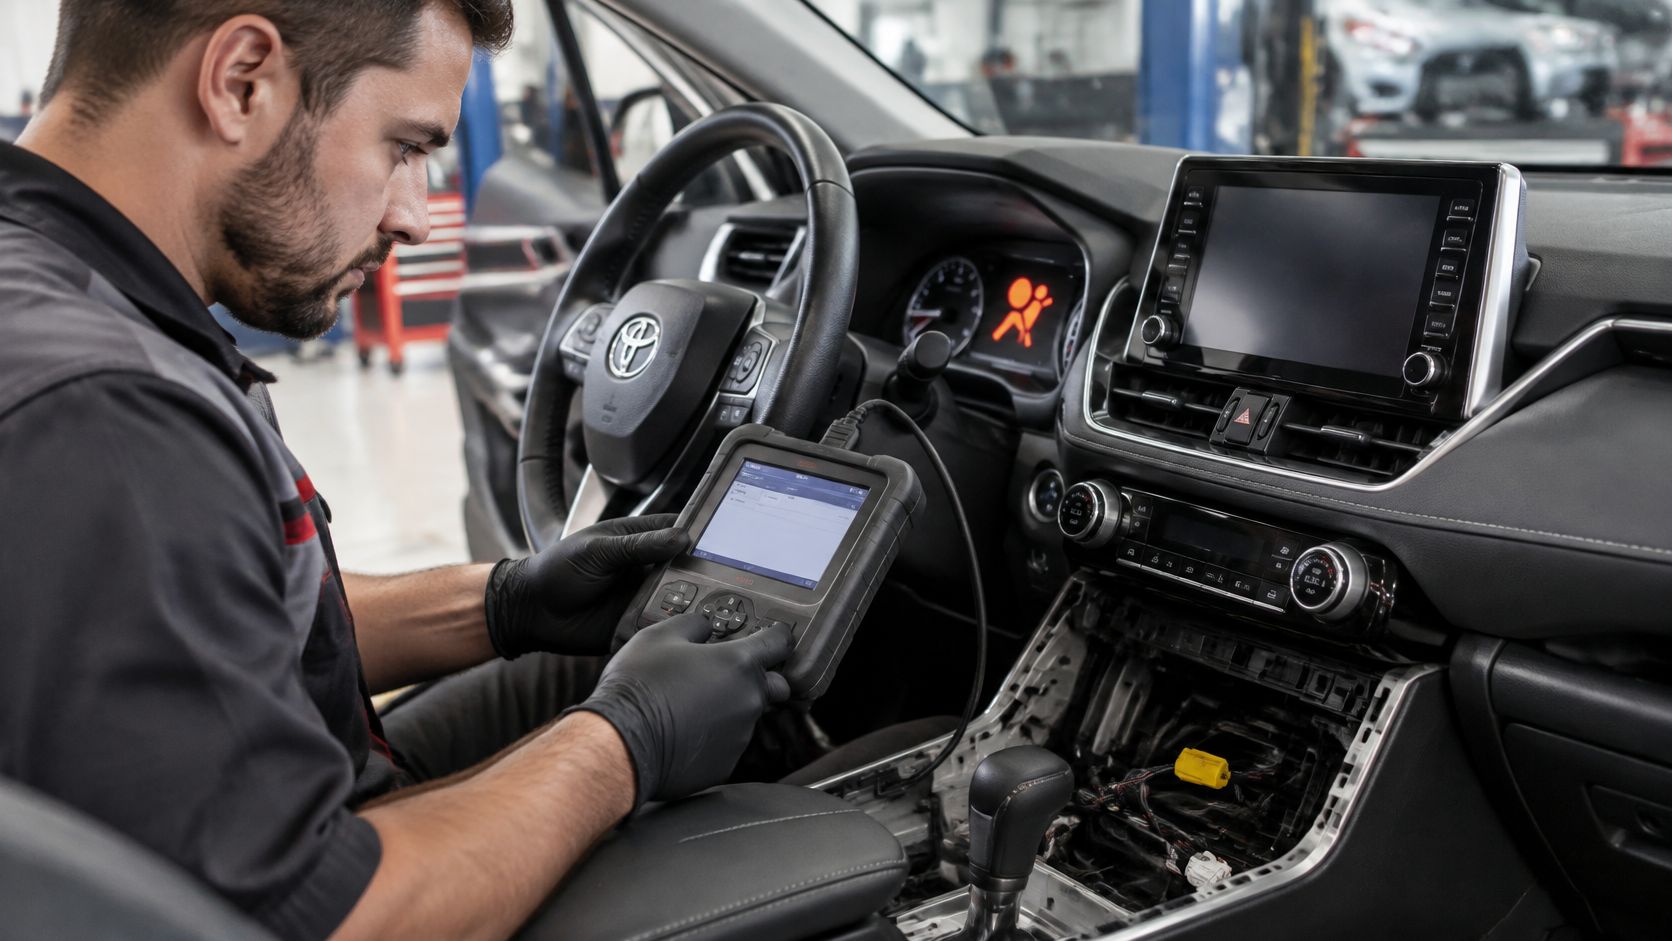
The bodywork looks finished, the bumper fits, and the car starts and drives. Then you turn the key and the airbag light stays on. That's the moment many owners discover a collision repair isn't finished just because the visible damage is gone, and guessing at the restraint system is the fastest way to pay twice.
Table of Contents
- Why the Airbag Light Stays On
- Diagnose the SRS Before Any Reset
- Remove and Ship the Airbag Module
- Choose a Repair Path You Can Trust
- Reinstall the Module and Prove It Works
- Send Your Module for a Safe Reset
Why the Airbag Light Stays On
A car can leave the paint booth looking finished, with a new steering wheel airbag and a clean interior, yet the SRS lamp may remain on. The owner is ready to drive, but the warning calls for a safety check before the repair is considered complete.
The lamp signals a fault in the Supplemental Restraint System, or SRS, which controls airbags and seat belt pretensioners. A vehicle can feel normal while a restraint fault remains. If the system is disabled or configured incorrectly, the problem may only become clear when the restraints are needed.
What the Module Does
The airbag control module is a computer in vehicles equipped with an airbag system. It acts as the controller and is linked to impact sensors, seat belts, airbags, and the clockspring. It evaluates crash-related inputs and can retain a brief technical record of an event.
The module records a short window around a crash, not your whole trip. NHTSA describes event data recorders associated with these modules as capturing vehicle dynamics before a crash, driver inputs, crash severity, restraint use, deployment status, and selected data afterward, typically measured in seconds rather than minutes. That limited record is distinct from ordinary SRS fault codes.
Two Kinds of Stored Events
NHTSA documentation identifies non-deployment events and deployment events. A non-deployment event may be recorded after a minimum velocity change of approximately 5 mph, even when no airbag fires, and a later qualifying event may overwrite the record. A deployment event occurs when an airbag or related restraint activates. In many systems, the airbag ECU cannot overwrite or delete that data.
The distinction affects the repair decision. A stored record after a minor impact is different from a deployment that fired pyrotechnic devices and locked seat belts. Clearing the lamp without identifying the event does not repair a fired restraint or confirm the rest of the SRS is functional.
A lamp that's off is not proof the restraint system is complete. Proof takes diagnosis, repaired hardware, and a passing self test.
NHTSA estimated that frontal airbags saved 2,790 lives in 2017 among occupants aged 13 and older, and 50,457 lives from 1987 through 2017. It also reported fatality reductions of about 14% for unbelted occupants and 11% for belted occupants in its lives saved estimates. Airbags work alongside seat belts and cannot substitute for them.
Treat a persistent lamp as a vehicle-level fault with several possible causes: stored crash data, a fired pretensioner, a deployed airbag, a damaged sensor, or broken wiring. A module reset addresses stored data; it does not replace deployed restraints, resolve an open recall, or make an untrustworthy used module safe. Determine what failed and what must be repaired before deciding whether a reset is appropriate.
Diagnose the SRS Before Any Reset
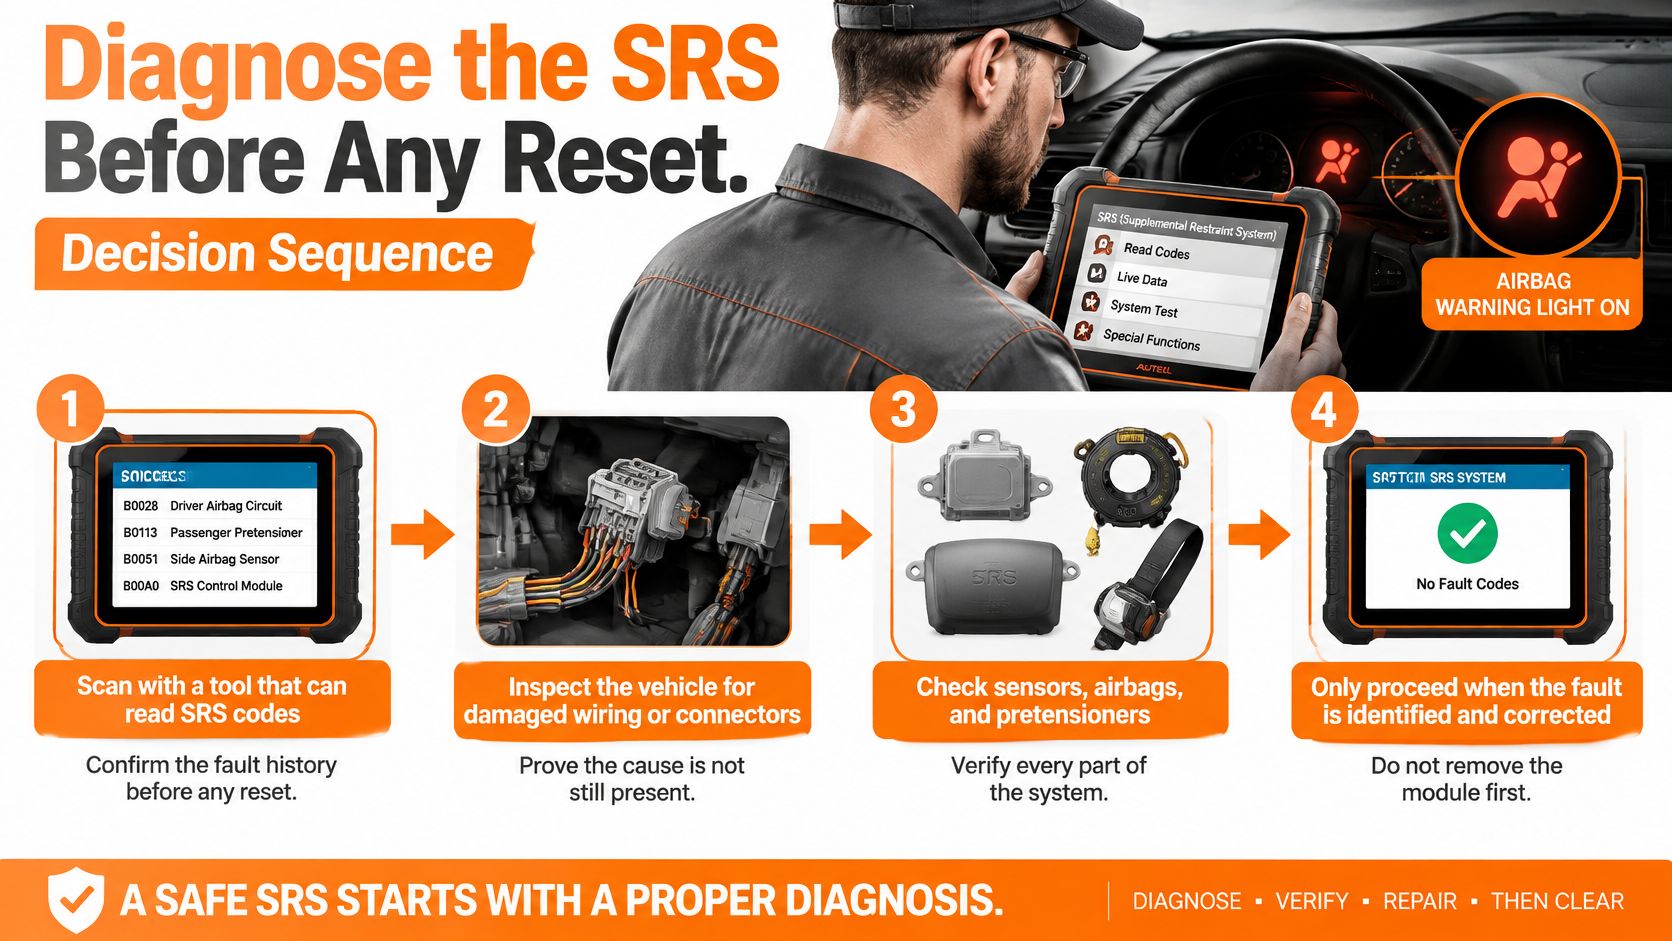
After a collision, the airbag light may reflect several faults at once. Diagnose the whole SRS before removing the module: a reset cannot repair a fired pretensioner, damaged wiring, or incorrect software. Decide whether the original module is a suitable reset candidate only after checking the scan results, restraint hardware, and recalls for that VIN.
An SRS module reset service may be relevant if the vehicle was in an accident or crash, or was bought from a salvage yard with deployed airbags or blown or locked seat belts. Those circumstances do not, by themselves, confirm that a reset is the right repair. Base the decision on evidence from the vehicle.
The diagnostic order matters: scan and document first, inspect the system, then decide whether to reset the module.
Scan and Save Everything First
Use a manufacturer-compatible diagnostic tool that can communicate with the vehicle's restraint system. A basic engine-code reader is not enough. Scan the SRS, save every diagnostic trouble code and available freeze-frame record, and keep the report before anyone clears codes.
Translate the scan into a fault list. Check for deployed airbags, fired pretensioners, suspect impact sensors, damaged wiring, and power or ground problems. One collision can set multiple codes, but each code needs its own cause and repair.
- Record the starting point: Save the DTCs, freeze-frame data, VIN, and module part number before clearing codes.
- Separate crash data from circuit faults: Stored deployment data and an open pretensioner circuit are different issues and may require different repairs.
- Inspect the hardware: Check connectors, harness routing, sensor mounting, and belt assemblies, including buckle pretensioner circuits that may fire in a crash.
- Repair root causes first: Repair or replace the parts that set the codes before deciding whether the module itself is serviceable.
A separate no-start fault on a salvage vehicle may call for a different diagnosis. Read about when an immobiliser reset can help, but keep that system separate from the SRS. An immobiliser reset does not diagnose or repair airbag faults.
Check Recalls by VIN
Run the recall check before anything else. A 2026 Honda recall identified SRS software with deployment thresholds that could misinterpret road impacts as side collisions, creating a risk of inadvertent deployment. Honda's remedy is dealer reprogramming or replacement with improved parameters, not a generic crash data clear. A module reset will not correct defective deployment logic.
Check the VIN through the manufacturer or an official recall database. If an open SRS recall applies, have the required dealer remedy completed before paying for a reset. Clearing crash data on a module that needs corrected software leaves the underlying safety issue unresolved.
Know the Stop Points
Some findings rule out a routine reset. Water intrusion, corrosion, a cracked case, or impact damage to the module calls for a different repair decision. Follow the OEM procedure for the exact part number as well, particularly if it requires module replacement after the recorded event.
Stop condition: If the module is physically damaged, wet inside, or affected by an open recall, do not send it for a reset before addressing the damage or recall through the appropriate OEM or dealer procedure.
Check for internal faults, too. A module that will not communicate, or reports electronic failures beyond stored crash data, is not the same as a functioning unit holding an event record. Ask the technician to document why the module is, or is not, suitable for reset.
Repair deployed restraints, wiring, sensors, power, and grounds before making the module decision. The scan and physical inspection should establish whether the original unit is serviceable, or whether the vehicle needs a different repair path.
Remove and Ship the Airbag Module
Removal is careful, boring work, and that's exactly how it should feel. You're handling a controller connected to pyrotechnic circuits, so speed isn't a virtue here. Rushing, probing the wrong terminals, or yanking connectors can create faults that weren't in the car before you started.
Start by disabling the system the way the vehicle maker specifies. OEM safety instructions commonly require disconnecting and isolating the negative battery cable and waiting for capacitor discharge, and one NHTSA published procedure specifies a two minute wait. Our customer guidance is to disconnect the negative battery terminal and wait at least 5 minutes, and your vehicle's own service information controls whenever published intervals differ.
Find It and Document It
You'll usually find the SRS module under the center console, under the dash, or under a front seat. Access varies, and trim removal often takes longer than the module bolts themselves. Photograph the mounting position, connector orientation, and harness routing before you disconnect anything, so reinstallation isn't guesswork later.
Then unbolt the unit and disconnect the wire harness by its connector body. Don't probe pyrotechnic circuits with unsuitable test equipment, and don't use a test light on airbag wiring. If a connector resists, find its lock instead of forcing it, because a damaged terminal will bring the lamp straight back.
Write down the identifying details while the module is in your hand.
- Vehicle identity: Record the VIN, year, make, model, and trim.
- Module identity: Photograph the manufacturer label, part number, and connector configuration.
- Event evidence: Keep the pre repair DTC report and note whether airbags or pretensioners deployed.
- Condition notes: Document water marks, corrosion, cracked mounting ears, or impact damage.
Pack It Like Electronics, Not Scrap
Use controlled electrostatic handling and keep the work area clean and dry. Bag the module so its pins don't rub against loose hardware, cushion it in a sturdy box, and don't throw bolts or trim clips in beside it. Loose connectors and crushed corners turn a serviceable unit into a questionable one.
If the vehicle itself has to move to a different shop for the rest of the collision work, you can arrange pickup and delivery for your car instead of driving it with an unrestored SRS. The module, however, travels on its own. Customers mail their seat belt or airbag module to Safety Restore at 40 Main Street, Westfield, MA 01085 for repair, and only the removable module goes in the box.
Don't ship undeployed airbags or whole seats with it. Include your contact details and order information inside the package, and keep your own copy of the part number photos and scan report. That paper trail proves the unit that returns is the unit that left.
One last judgement call happens at the bench. A module with obvious impact damage, flood corrosion, or a burnt connector isn't a routine reset candidate, no matter how clean the label looks in a photo. Crash data can also be incomplete if power was lost during the collision, and once deployment is commanded the associated data can become locked, which is why the pre repair evidence matters so much.
Ship only after deployed hardware has a repair plan. A reset module arriving back to a car still fitted with fired pretensioners helps nobody. The box should contain a labeled original unit, and the car left behind should already be moving through its component repairs.
Choose a Repair Path You Can Trust
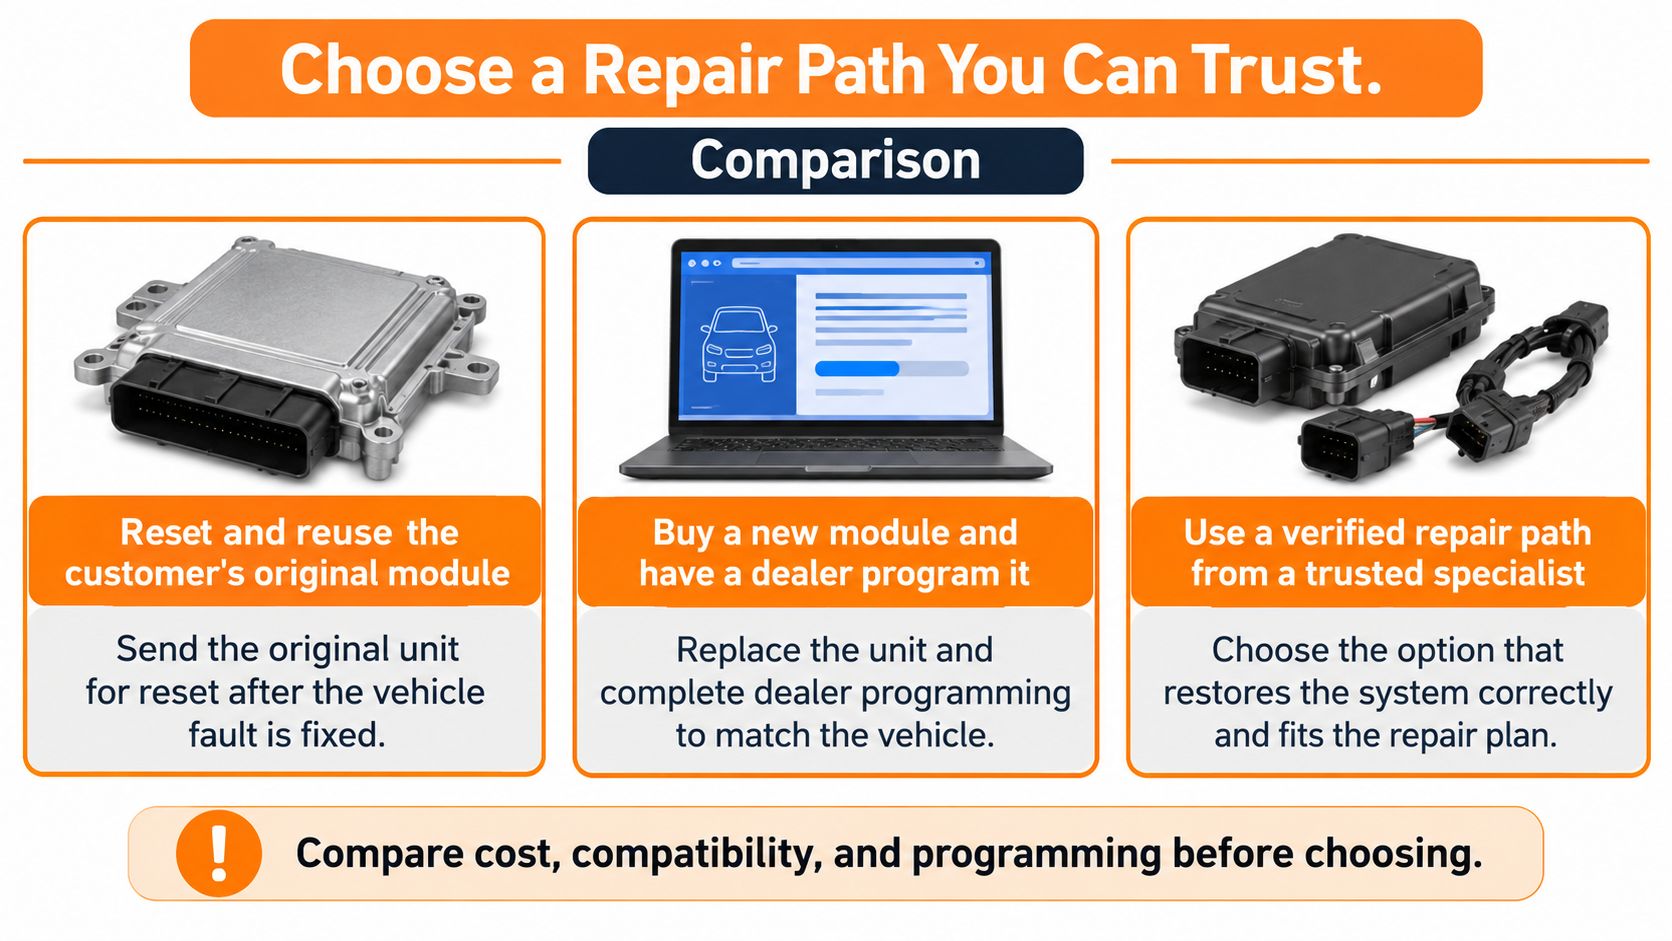
Three paths show up in almost every post crash conversation, and they aren't interchangeable. Resetting your original module, buying a new one from a dealer, and installing a used unit from another car differ in provenance, programming, and risk. Choosing by price alone is how rebuilders end up with a lamp that returns a week later.
This side by side view frames those choices before you spend anything.
Compare the Three Real Options
Reset and reuse your original keeps the controller the car was built with. A specialist connects directly to the EEPROM chip inside the module and erases the crash data and hard codes stored in the SRS unit, the kind of data a basic OBD airbag scan tool cannot clear. After that reset, no further programming is needed and the module comes back like new, ready to be installed.
Buy new and program it is the traditional dealer route. Before mail in reset services existed, buying a new module and spending hundreds of dollars at the dealer was the only solution after deployment, and thousands of serviceable SRS units went to trash. Installing a different module generally requires programming it to the vehicle's VIN at a dealer, and that step is part of the job, not an optional extra.
Install a used module looks cheap until you ask where it lived. Provenance matters at scale, since NHTSA reports approximately 67 million Takata airbags have been recalled, with Do Not Drive warnings for some vehicles, which shows why unknown salvage restraint history is a genuine safety problem. A used controller can carry unknown crash history, flood exposure, wrong variant coding, or association with an outstanding recall.
| Path | Best fit | Programming | Main risk |
|---|---|---|---|
| Reset original module | Undamaged unit holding stored crash data | None after a proper reset | Resetting before vehicle faults are repaired |
| New dealer module | Damaged module or OEM requires replacement | Dealer programming to the VIN | Highest cost and dealer scheduling |
| Used module | Verified, traceable unit only | Usually dealer programming to the VIN | Unknown history, coding, or flood damage |
Run a Provenance Check Before You Buy
Shops that document this well protect their customers and themselves. You can read how the mail in reset and seat belt repair process is structured to see where module service fits in the wider repair. Shops explaining these options to local customers sometimes even look at AI commercials for auto service centers to communicate services clearly, but advertising never substitutes for a traceable part and a written test result.
The short video below walks through the service in visual terms, which helps owners see what leaves and returns.
Before accepting any repaired or used unit, get the exact part number, the donor or original VIN context, and confirmation of correct vehicle configuration. Keep scan reports from before and after service, and confirm the returned unit is your original module or have any replacement clearly identified in writing. Ask for warranty terms and test limitations on the invoice, not by phone.
Remember the governing rule. Some OEM procedures permit programming after crash data is present, and others require replacement when programming fails, so the exact part number's service procedure wins over any general claim. A trustworthy path follows that procedure and says no when the module doesn't qualify.
Reinstall the Module and Prove It Works
After the module returns, reinstalling it is only the start of the final safety check. A dark dashboard does not confirm that every SRS component is working. Verify the full restraint system, from the controller to each pretensioner and sensor, before returning the vehicle to service.
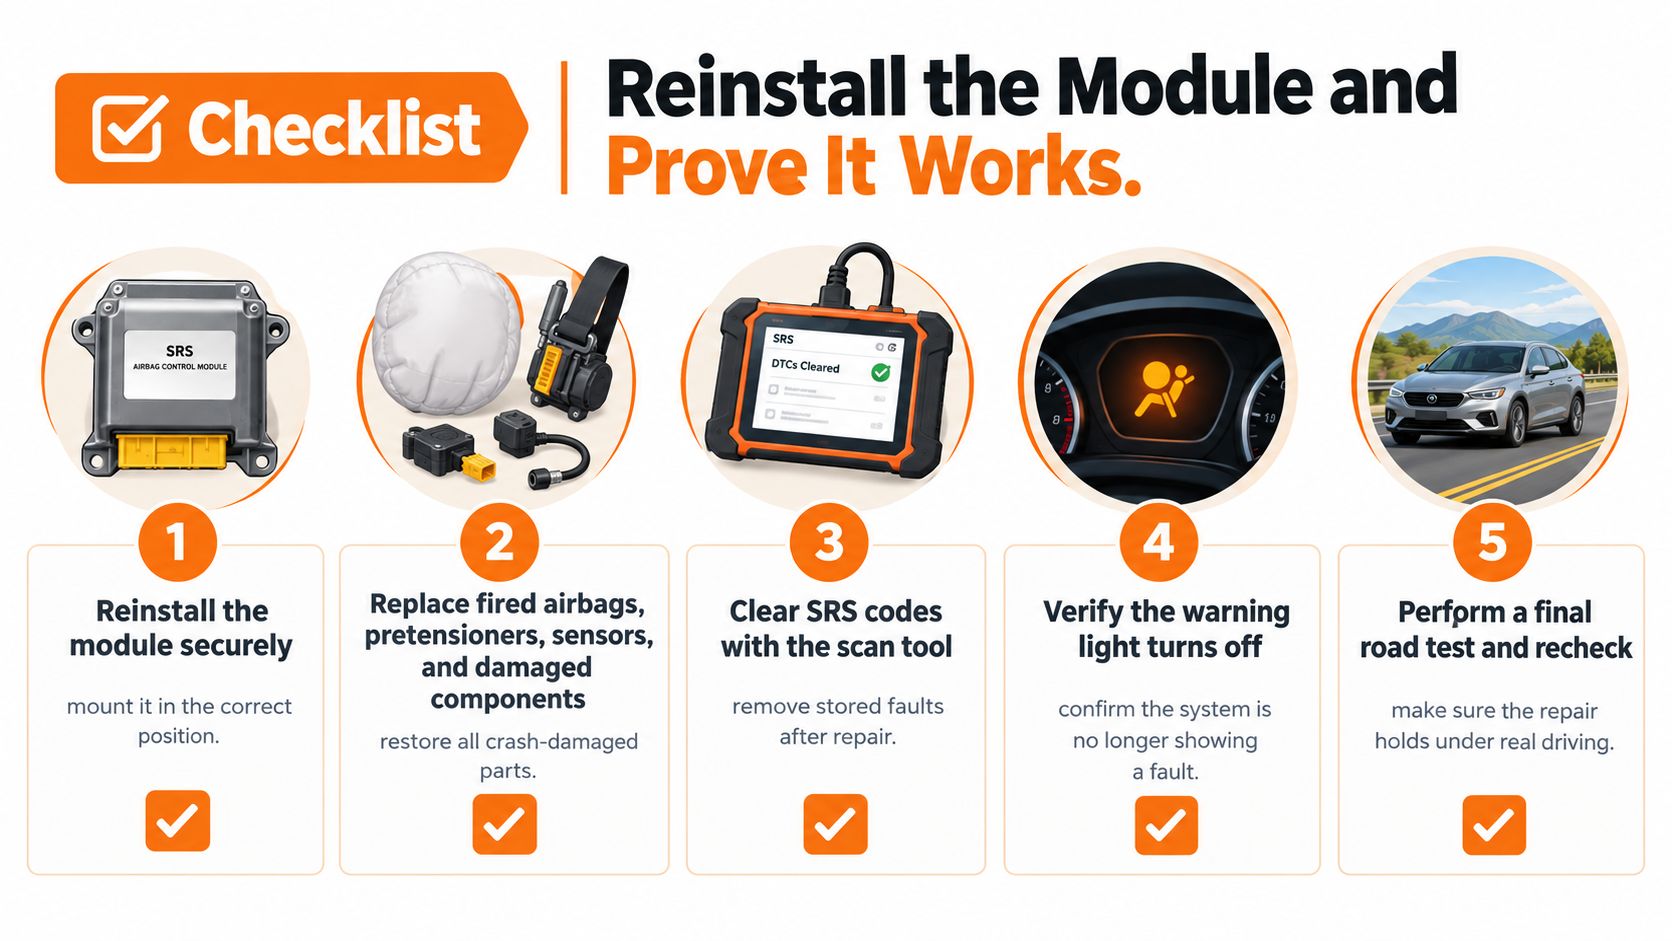
Use this sequence to document installation and final checks.
Reinstall in the Right Order
Mount the original module in its specified position and orientation, referring to your removal photos. Seat the harness connectors fully and lock them in place. Check that wiring is clear of the console and seat rails. Restore battery power only after all SRS connectors have been reconnected.
Confirm that deployed restraints and damaged components have been addressed first. Deployed airbags, faulty sensors, broken wiring, and fired seat belt pretensioners can leave active faults even after crash data has been cleared. Arrange the seatbelt buckle pretensioner repair service where needed, and include seat belt repair after an accident on the same repair order so related restraint work is tracked together.
Clear codes only after the underlying faults have been repaired. An open circuit can trigger a fault again as soon as the system runs its checks. Follow the vehicle's OEM procedure for coding or configuration, then clear any remaining diagnostic trouble codes.
Watch the Lamp Self Check
Switch the ignition on and observe the SRS lamp. One manufacturer procedure specifies approximately 6 to 8 seconds of illumination before the lamp goes out during the self-check. After coding and repair, confirm the lamp follows the procedure for that vehicle, as described after coding and repair. A lamp that never illuminates also needs investigation.
Then scan the complete SRS again. Communication with the module alone does not verify system safety. Open circuits, incompatible sensors, damaged connectors, or software faults may remain even when the controller responds to a scan tool. Road-test the vehicle only when the OEM procedure permits, then cycle the ignition and perform a final scan before sign-off.
If the SRS lamp returns, park the vehicle, rescan the system, and repair the returning fault before driving.
Write Down the Acceptance Criteria
Record the pass conditions on the repair order so another technician can review the work.
- Correct coding confirmed: Variant and configuration settings match the vehicle build.
- No relevant hard DTCs: The post-repair scan shows the original fault profile resolved.
- Normal lamp self test: The indicator illuminates briefly, then goes out.
- Reports filed together: Before-and-after scans stay with the invoice and parts list.
If programming fails, or the OEM procedure requires replacement for that part number, follow that procedure. Some modules may clear and code successfully with crash history present; others may not. The documented scan results and applicable OEM instructions determine whether the repair passes.
Send Your Module for a Safe Reset
If the original module is undamaged and the restraint components have been repaired or are scheduled for repair, resetting that module may be the cleanest option. It already matches the vehicle, while a different module must be programmed to the vehicle's VIN, a step that requires a dealer. A reset addresses stored crash data and hard codes. It does not repair fired airbags, seat belts, or other damaged SRS components.
Compare the costs before choosing a path. A dealer replacement can easily exceed $1,000, while a used module may cost a few hundred dollars and still require VIN programming. Safety Restore offers an OEM airbag module reset service for $99.99, with free shipping and one repair price.
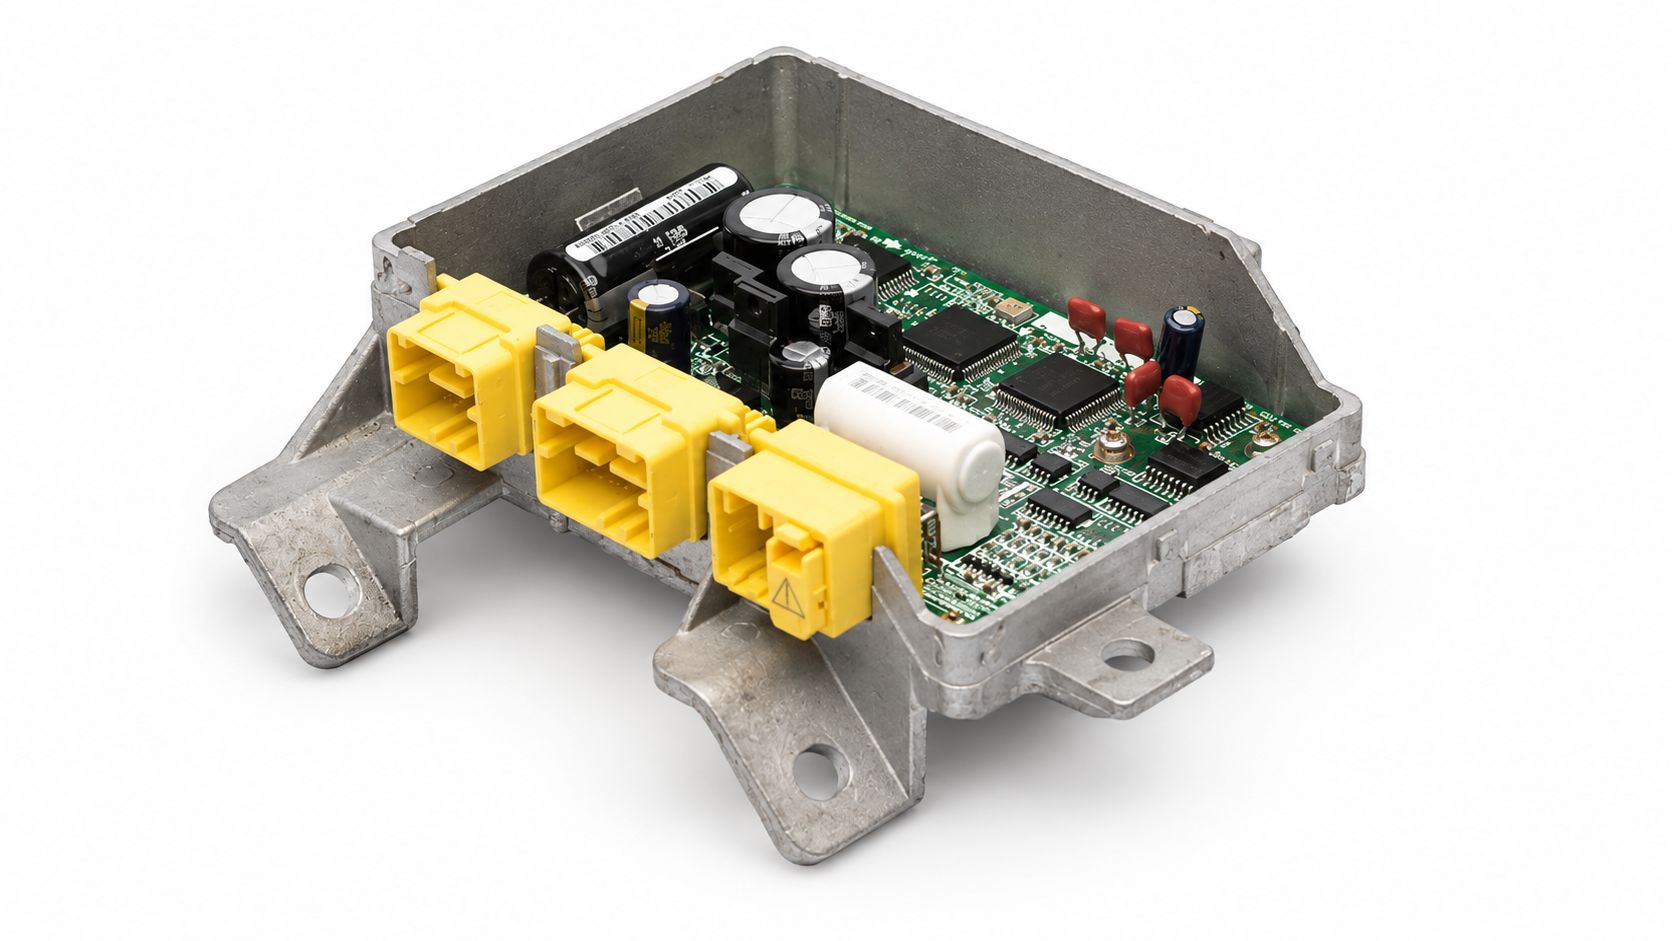
The SRS Airbag Module Reset clears crash data and hard codes after an accident. Follow the removal and shipping steps in the earlier section, and include the labeled module with your order details. The service resets the original unit, avoiding the VIN programming required when installing a different module.
What Still Counts as a Dealer Stop
A reset is appropriate only when the module itself is a suitable candidate. Follow the OEM replacement procedure if programming fails and the procedure calls for replacement. Water intrusion, corrosion, impact damage, or a burnt connector also rule out a routine reset. These findings need a repair decision based on the vehicle and the applicable service procedure, not just a cleared code.
Keep the scan reports with the repair order. A fleet manager can file the before and after scans with each vehicle's invoice so the repair history can be reviewed later. That record helps distinguish a reset from repairs to fired restraints or other SRS faults.
Once the module returns, complete the acceptance checks in the reinstall section before calling the job finished. A reset is one part of the repair, not proof by itself that the vehicle's restraint system is ready for the road.
If diagnosis confirms stored crash data in an otherwise sound original module, send that unit to Safety Restore for reset and retain the scan reports with the repair order. The service clears crash data and hard codes; the remaining SRS faults and any fired restraints still need their own repairs.

