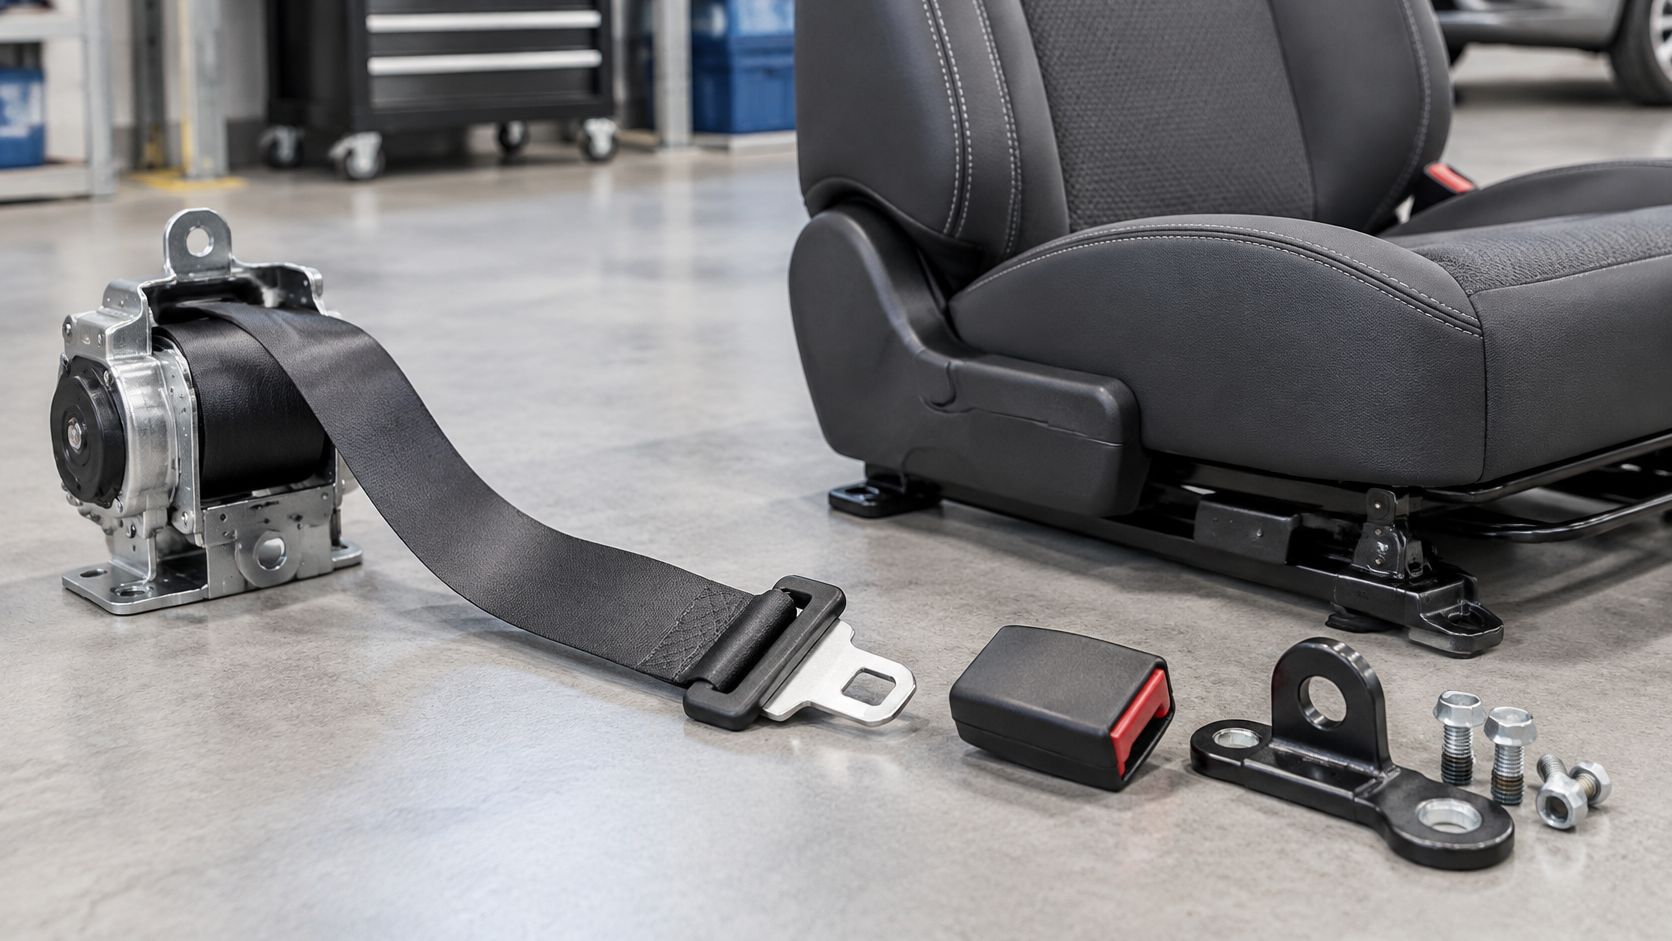
You climb into a car after a collision, pull the belt across your chest, and hear the buckle click. The strap looks fine, so it's tempting to call that part of the repair finished. Then you notice it won't rewind, the airbag lamp stays on, or the anchor moves against the seat.
A click confirms a latch, not a complete restraint system. Before buying hardware for belts, separate a crash deployment from a recall, damaged anchorage, misuse, or an ordinary movement problem. The right first step might be a manufacturer remedy rather than a paid repair.
Table of Contents
- Hardware for Belts and What Each Part Does
- How Retractors Lock and Pretensioners Fire
- Inspect a Belt That Already Clicks
- Sort a Locked Belt Before You Pay
- OEM Hardware Versus a New Assembly
- Confirm the Repair Before the Car Goes Back
Hardware for Belts and What Each Part Does
Seat belt hardware lookup
| Part | Job | Failure sign | First action |
|---|---|---|---|
| Anchor | Transfers belt load into floor, pillar, or seat | Bent bracket, cracked mount, corroded cable | Stop use and inspect the structure |
| Buckle | Latches the tongue and signals belt use | Tongue won't latch or release, or belt warning stays wrong | Test latch and buckle circuit before replacing webbing |
| Bolt | Clamps anchor or buckle at specified torque | Loose, missing, or wrong fastener | Verify torque and bolt specification; don't reuse damaged fasteners |
| Retractor | Pays out, rewinds, and locks webbing | Slow rewind, no lock, or permanent lock | Check movement, then separate crash, corrosion, and recall causes |
| Pretensioner | Removes slack in a crash, often with a gas charge | Deployed, locked belt, burned connector, or SRS fault | Treat as single-use pending qualified evaluation and the vehicle's repair instructions |
| Webbing | Carries the occupant load | Cut, frayed, faded, or chewed fabric | Replace damaged webbing; don't stitch a field repair |
Follow the load from the occupant to the body
The visible strap is webbing, but its performance relies on everything attached to it. An anchor is the attachment at the floor, pillar, or seat frame that transfers belt load into the vehicle structure. A straight bracket attached to cracked sheet metal isn't a sound mounting point.
The buckle holds the tongue, the metal tab you push into the latch. On modern vehicles, its switch also reports whether the belt is fastened to the supplemental restraint system, or SRS. A buckle can have a mechanical problem, an electrical problem, or both.
The bolt clamps that joint together. Its thread, strength, shoulder, spacers, and tightening specification matter, so a similar-looking fastener from a shop drawer isn't an acceptable substitute. Don't assume that tightening a loose bolt corrects damage already present around the hole.
Separate movement parts from load-bearing fabric
The retractor is the male-side assembly from which the webbing feeds. Inside are a spool, return spring, and locking mechanism that stops payout during sudden stops or crashes. Don't confuse the retractor assembly with the tongue because the tongue enters the buckle.
A pretensioner actively removes slack during a crash. Depending on the vehicle, it may act at the retractor, buckle, or anchor, which explains why a short cable beside the seat can be part of the restraint system rather than an ordinary seat adjustment.
Webbing isn't a fastener, but it carries the occupant's load between those components. Cuts, fraying, and dog-chewed edges require more than cleaning; professional seat belt webbing replacement addresses the fabric rather than disguising it with a sleeve or patch.
Pick the matching row before buying anything. A warning-switch fault doesn't justify replacing good fabric, and fresh fabric won't correct a damaged anchor.
How Retractors Lock and Pretensioners Fire
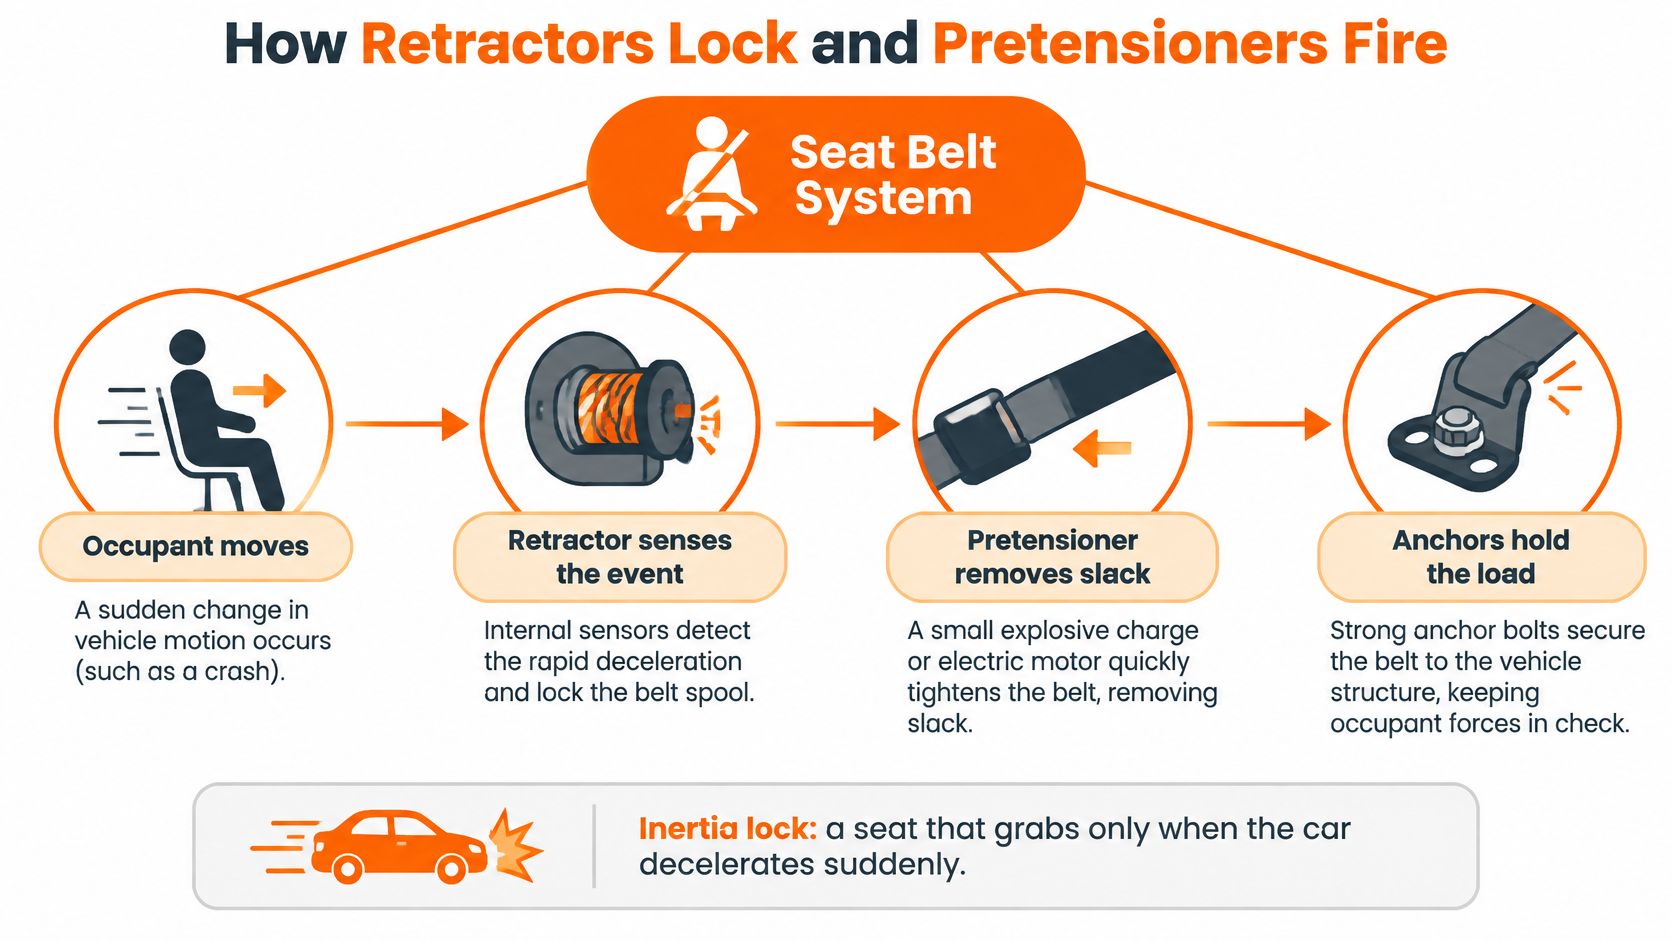
Lean forward slowly to reach the dashboard and the belt normally pays out. Stop abruptly and the retractor should resist that movement. Think of the inertia lock as a mechanism that grabs during sudden deceleration, not one that prevents every ordinary movement.
The restraint system combines several actions, although they don't necessarily happen in a simple, fixed sequence. The occupant moves relative to the car, the retractor responds to the event, the pretensioner removes slack when commanded, and the anchors transfer the resulting load into the structure.
This diagram separates those jobs visually.
Locking and rewinding have different jobs
The lock stops payout; the spring gathers slack during normal use. A belt that retracts smoothly hasn't necessarily demonstrated that it can lock correctly, just as a locked spool hasn't demonstrated that its return spring works.
Under Federal Motor Vehicle Safety Standard No. 209, an emergency-locking retractor must lock before webbing payout exceeds 25 mm at 0.7 g, and the standard specifies 1–7 N of retraction force for a combined torso-and-pelvis system. Those are controlled test requirements, not measurements you can establish with a hand tug in the parking lot.
That distinction matters after impact. A damaged pawl, altered sensor, distorted spool, or excessive friction can leave the strap looking normal while changing how the mechanism behaves. Don't lubricate the internals or adjust the spring to make an unexplained problem disappear.
Shop rule: A movement check can reveal a defect. It cannot certify crash-load performance.
Pretensioners need their own diagnosis
A pretensioner uses an actuator to take slack out quickly. It isn't the same thing as the reusable inertia lock, even when both mechanisms share a housing. Deployment diagnosis must account for the particular assembly, its wiring, and the manufacturer's replacement instructions.
Some assemblies have separate deployment stages and connectors. An apparently intact connector or housing doesn't prove that every stage remains unused. Identify the assembly through its label and vehicle information, not connector appearance alone.
A buckle pretensioner also needs attention when the belt spool appears normal. Keep pyrotechnic diagnosis with trained technicians: don't apply power to an initiator or probe its terminals with an ordinary test light.
The video below provides another view of the mechanism.
For shop screening, confirm normal payout, controlled rewind, and locking using the vehicle's prescribed procedure. Correct installed orientation matters because a removed or tilted retractor may lock differently from one mounted properly in the car.
Inspect a Belt That Already Clicks
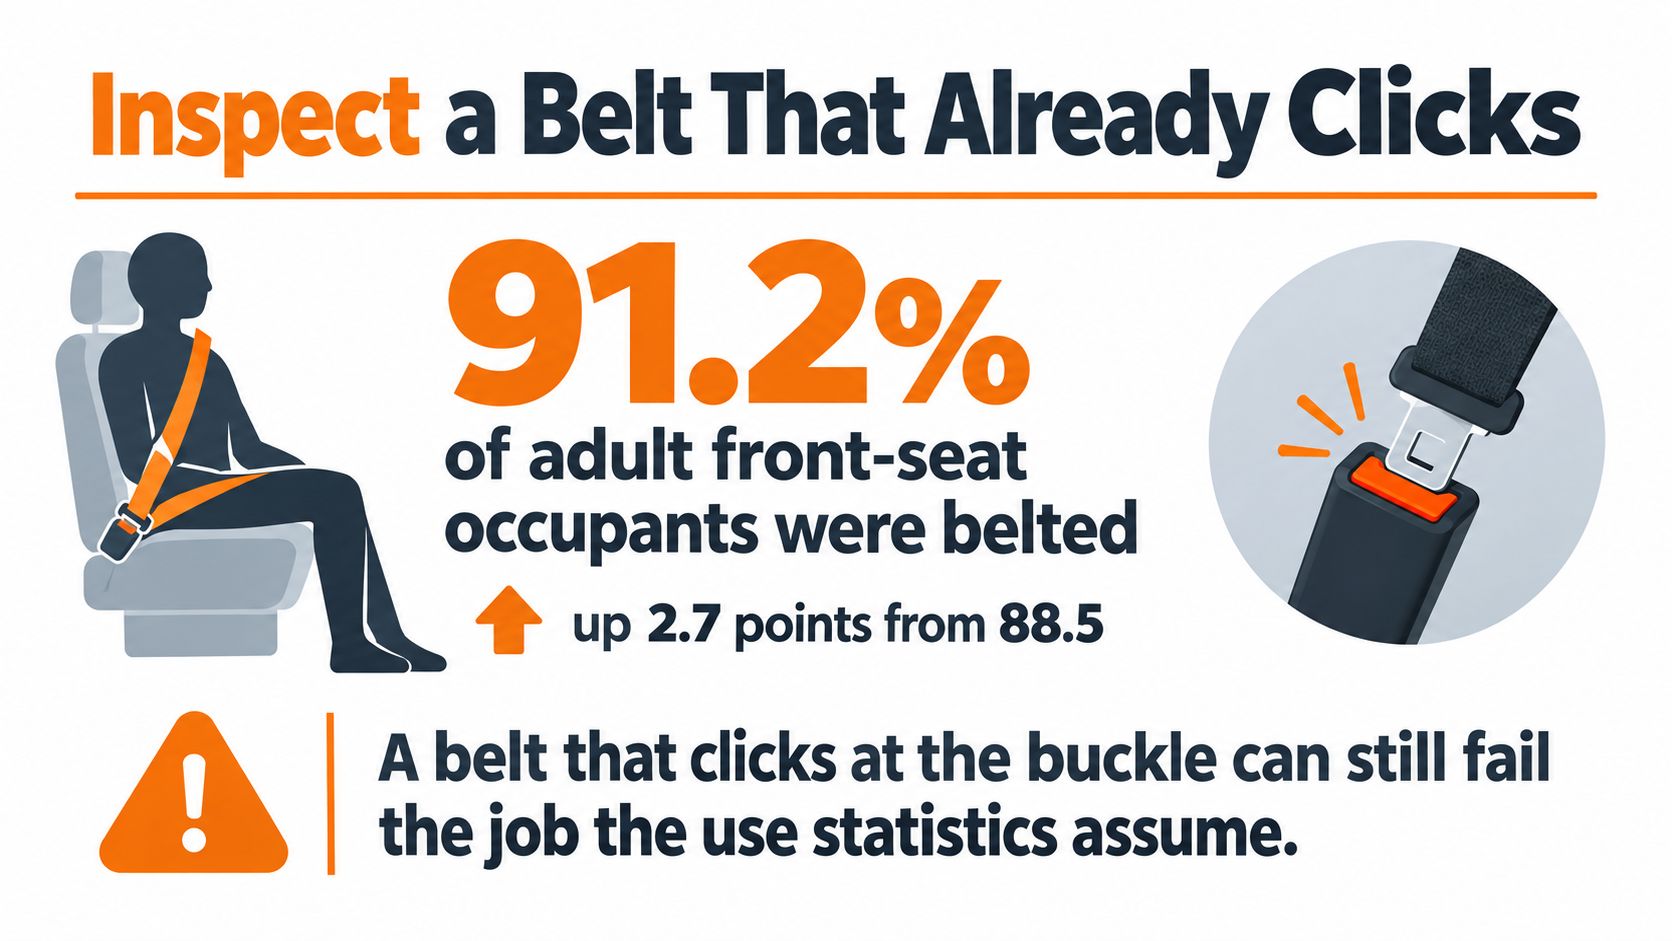
NHTSA's National Occupant Protection Use Survey estimated that 91.2% of adult front-seat occupants wore seat belts in 2024, compared with 88.5% in 2015. Those observations describe daylight belt use, not the mechanical condition of individual assemblies.
That's the distinction a collision inspection must preserve. A customer who always buckles up can still have a damaged retractor, a defective switch, or an anchor hidden behind trim that needs repair.
The national use figures provide context, not a substitute for a hands-on check.
Inspect the complete seating position
Start with the vehicle stationary and the retractor installed in its correct position. Before disconnecting restraint components or removing seats, use the vehicle-specific SRS disabling procedure.
- Expose the webbing. Pull it out through its usable travel and inspect both faces and edges. Look for cuts, pulled threads, stiff contamination, heat damage, fading, and chew marks, including areas normally wound onto the spool.
- Watch the return. Let the belt retract under control without letting the tongue strike trim. Note hesitation, rubbing, twists, or a strap that remains loose against the seat.
- Check locking appropriately. Use the specified functional check. A sharp pull is a useful screen on suitable designs, but its result alone isn't a complete pass or fail for every retractor.
- Operate the buckle. Latch and release it repeatedly, then pull on the latched tongue to check retention. Confirm that the warning indication agrees with the occupied seat and buckle condition.
- Inspect the attachments. Examine accessible floor, pillar, and seat mounts for distortion, cracked finishes around stressed joints, corrosion, missing spacers, and incorrect fasteners.
Record observations, not assumptions
Write down what happened: the belt stopped halfway through rewind, the tongue released without pressing the button, or the anchor bracket moved. “Seat belt bad” doesn't give the next technician enough information to distinguish a trim obstruction from deployment.
Don't force a locked belt with pliers or repeatedly yank it until something moves. That can add damage and erase useful evidence about the original condition.
A clean strap and a working buckle don't establish that the hidden mechanism survived a collision.
After a crash, combine the physical inspection with the manufacturer's restraint replacement criteria. Some required actions follow the collision history even when you can't see damage.
Sort a Locked Belt Before You Pay
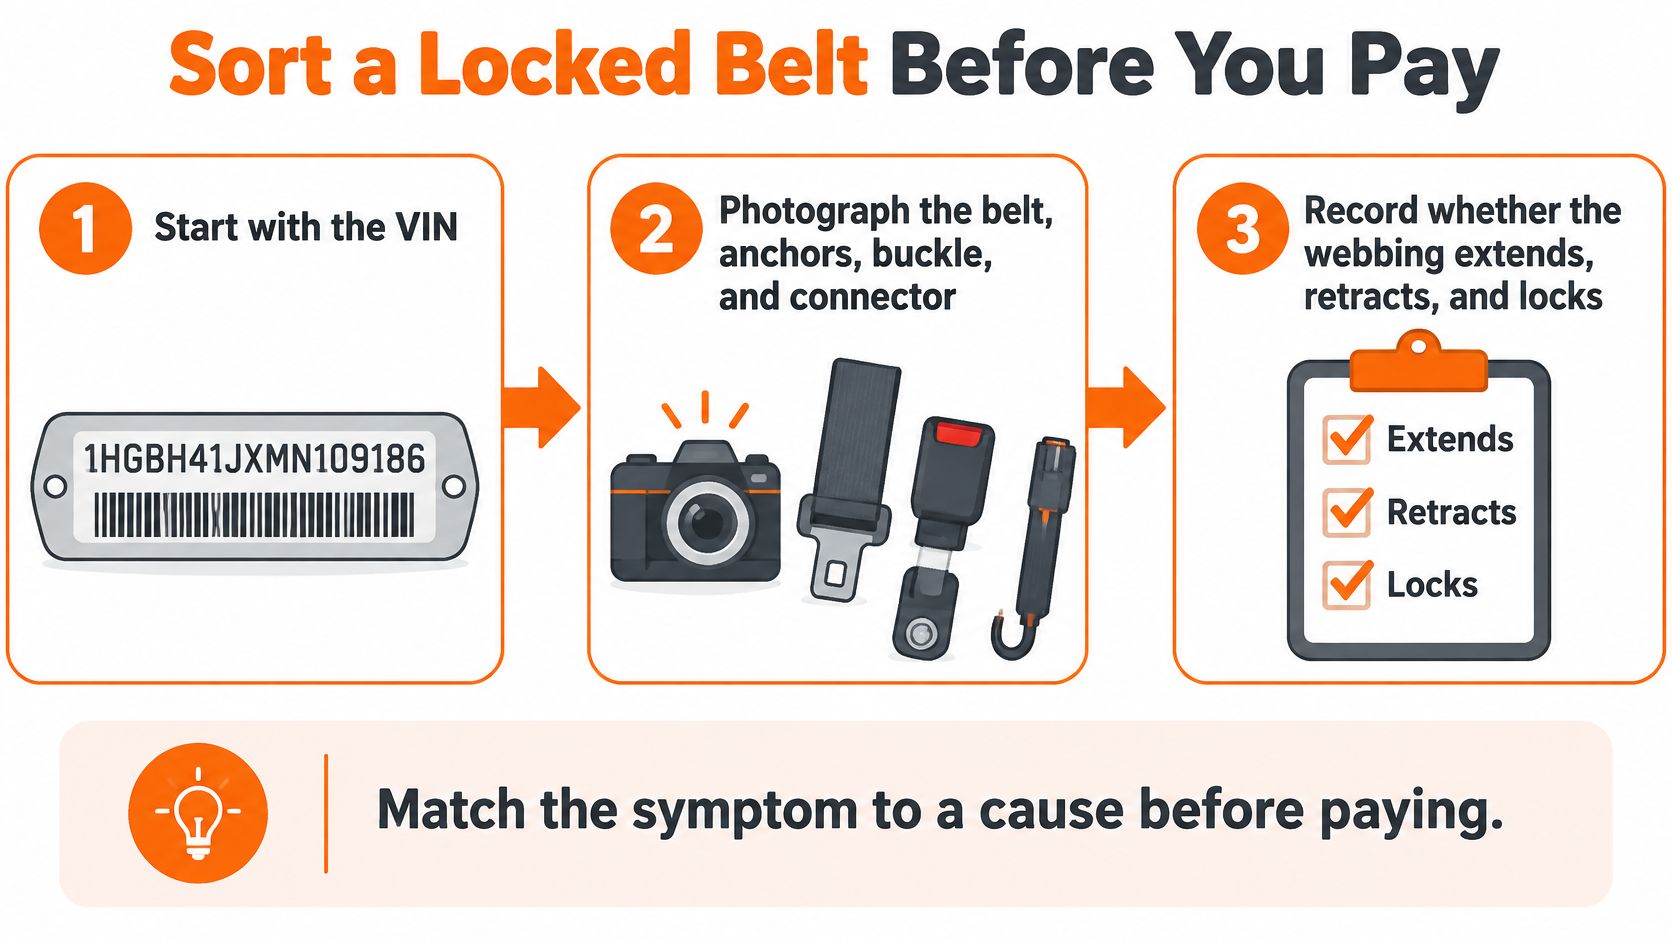
Start with the VIN and the vehicle's history, not an online repair order. Check for applicable open recalls through the manufacturer or the relevant national recall service. Record the result with the repair file so the customer and technician are working from the same information.
Photograph the belt label, anchors, buckle, and accessible connector area before removal. Record whether the webbing extends, retracts, and locks, and whether the problem began after a collision, seat removal, interior work, or repeated misuse.
The first decisions should happen before parts leave the car.
Separate deployment from a campaign condition
A locked belt after a collision belongs in a restraint-system diagnosis. Deployed airbags, damaged connectors, and changes in buckle or anchor position are evidence to document, not reasons to assume the retractor alone needs work.
A lock without a reported collision deserves a different investigation. NHTSA's Ford recall report concerning inadvertent pretensioner deployment demonstrates why a locked belt can be a manufacturer campaign issue rather than an owner-funded crash repair. A recall example doesn't establish eligibility for another vehicle; the VIN and campaign instructions determine that.
Loose attachment hardware is a separate failure family. In 2023, Volvo recalled 2,911 vehicles because second-row seat-buckle and lower-belt-anchor bolts might not have been tightened properly, as recorded on NHTSA's Volvo recall page. An internal retractor repair wouldn't correct that joint.
Locked or weak belt causes
| What you see | Likely family | Do this first |
|---|---|---|
| Locked after a crash or with airbags fired | Deployment | Inspect pretensioner, buckle, and SRS together |
| Locks with no crash and an open campaign | Recall | Check the VIN and use the manufacturer remedy |
| Belt won't stay tight or anchor cable is rusty | Corrosion or anchor defect | Inspect anchors; replace the assembly if the structure is damaged |
| Damage after sitting on a buckled belt | Misuse | Confirm the campaign or service bulletin before parts swapping |
| Slow rewind but still locks in a tug | Spring, dirt, or friction | Clean and test only if there are no deployment signs and the approved procedure permits it |
| Warning lamp after the belt looks replaced | Stored or current SRS fault | Scan before clearing codes |
Check the structure and electronics separately
Corrosion at an anchor cable or mounting joint isn't a cosmetic spool problem. Inspect the complete load path, including the structure underneath the attachment. Don't cover rust with paint and treat free belt movement as proof that the mounting is sound.
For slow rewind with no deployment evidence, inspect belt routing, twisted webbing, and trim contact before condemning the spring. Use only manufacturer-approved cleaning methods. Don't spray solvent or lubricant into the retractor.
The electronic record can help explain what happened. NHTSA documentation on SRS control modules and event recording describes systems calculating vehicle delta-V from accelerometer information at 10-millisecond intervals, with event records that can include belt-switch status. That information must be interpreted alongside the vehicle's physical condition and diagnostic trouble codes.
A history of sitting on a buckled belt should also be documented rather than dismissed as a comfort habit. Check applicable service information for the exact vehicle, and don't assume every manufacturer uses the same detection or repair strategy.
Use a locked seat belt after an accident assessment only after identifying whether the problem belongs to deployment, fitment, corrosion, or a campaign. The symptom is the starting point, not the diagnosis.
OEM Hardware Versus a New Assembly
The choice is fitment and documented function, not loyalty to a badge. Keeping an original assembly can preserve its mounting geometry, connector, and identification tags, but that advantage disappears if the original load-bearing parts are damaged or the vehicle's repair instructions require replacement.
Likewise, a new assembly isn't suitable merely because its tongue clicks into the buckle. Match the vehicle application, seating position, mounting arrangement, pretensioner configuration, and electrical connections.
Keep, repair, or replace
| Condition | Better path | Why |
|---|---|---|
| Open manufacturer recall | Dealer or stated remedy | An applicable free campaign can supersede paid work |
| Bent, cracked, or heavily corroded anchor | Correct replacement assembly and sound structure | Internal repair cannot restore a damaged load path |
| Locked retractor or spent pretensioner, housing intact | Qualified restoration only where permitted by applicable repair requirements | Preserves original mounts, plugs, and tags without assuming eligibility |
| Cut, frayed, or chewed webbing only | Qualified webbing replacement if the remaining assembly passes evaluation | The metal hardware may still be serviceable |
| Wrong connector, stage count, or mounting | Correct OEM-specification assembly | Physical fit doesn't establish SRS compatibility |
| Airbag lamp after parts are installed | Diagnosis and appropriate module service after hardware correction | Clearing memory doesn't correct a remaining defect |
Judge the complete assembly
Original hardware is especially worth identifying carefully when replacement sourcing is difficult. Don't remove tags or discard spacers before documenting the installation. A usable-looking donor part without reliable application and collision history introduces uncertainty rather than resolving it.
For a parts-car purchase, separate vehicle paperwork from component suitability. Car Removals Whangarei's guide to registration rules for parts cars provides context for that paperwork question; it isn't evidence that a donor restraint assembly is safe to install.
Webbing replacement also requires more than matching color and width. The material, stitching, attachment, and finished assembly need appropriate safety performance, not a cosmetic sew-on.
Before approving either path, answer these questions:
- Campaign status: Does a manufacturer remedy govern this repair?
- Structural condition: Are the mounts and surrounding body or seat structure sound?
- Application match: Does the complete assembly match the original mounting and electrical configuration?
Don't authorize restoration because the housing looks intact. Eligibility requires a qualified assessment, and the vehicle manufacturer's instructions may call for replacement regardless of appearance.
Confirm the Repair Before the Car Goes Back
Close the job with an installation record, not just a shipment receipt. Keep the VIN recall result, pre-repair photographs, component identification, repair documentation, and diagnostic reports together.
The installing technician remains responsible for the complete vehicle. A serviced component can't correct a damaged seat frame, misrouted harness, or unresolved sensor fault elsewhere in the SRS.
Document the work and verify installation
- Resolve campaign requirements. Confirm that the applicable remedy was completed rather than running an unrelated paid repair alongside it.
- Verify the mounting joints. Repair damaged supporting structure, fit the specified fasteners and spacers, and tighten anchor and buckle bolts with a calibrated torque wrench to the vehicle specification. Don't reuse damaged fasteners.
- Confirm routing and movement. Check that trim doesn't pinch the webbing and seat travel doesn't stretch or trap the wiring. Perform the prescribed payout, rewind, latch, release, and locking checks.
- Complete diagnostics. Use an SRS-capable scan tool and the manufacturer's procedure to resolve current faults and verify the warning-lamp self-check.
For eligible customer-supplied assemblies, our retractor repair process includes releasing the belt, rebuilding the mechanism, replacing the gas charge, and installing a new sensor. We rebuild repaired belts to factory condition using 100% OEM parts and test them with a dual-pro system. Those component-level checks don't replace the vehicle-level checks after installation.
Treat module service as a separate operation
Module service is conditional on the physical repair and the vehicle's requirements. Clearing stored crash information isn't permission to leave damaged initiators, wiring, or restraint hardware installed.
NHTSA's airbag safety guidance states that airbags are single-use and must be replaced after deployment by an authorized service technician. A reset cannot make a deployed airbag reusable.
Release standard: Document what was repaired, what was replaced, and how the completed vehicle was checked.
Don't return the car on the strength of a dark warning lamp alone. Finish the mechanical inspection and diagnostic verification before signing off the restraint work.
Safety Restore offers mail-in repair of customer-supplied seat belt mechanisms and webbing, along with SRS module services. Once you've checked recalls and confirmed which components are eligible for restoration, visit Safety Restore to arrange service for the original parts and plan their proper reinstallation.