You’re sitting in the waiting area with an auction receipt, a repair invoice, and a car that looks fine from ten feet away. Then the inspector points at a lit SRS lamp, a seat belt that won’t retract right, or a belt that was locked after a crash, and the whole day changes fast. That’s the moment motorists realize a vehicle safety inspection isn’t a paperwork exercise, it’s a hard look at whether the car is ready to carry people safely.
For shops, dealers, owners, and fleet managers, the pain isn’t the stamp, it’s the failure that shows up after you’ve already booked the appointment. The expensive part is usually not the test itself, it’s the surprise defect that sends you back to the bay, back to parts ordering, or back to the body shop. If you’ve ever had a collision repair nearly finished and then watched a warning light kill the retest, you already know why the details matter.
Table of Contents
- The Inspection That Caught You Off Guard
- What a Vehicle Safety Inspection Actually Covers
- Brakes, Tires, and Lights, Where Most Vehicles Actually Fail
- Seat Belts and Airbags, The Hidden Failure Points
- Repair or Replace When a Restraint System Fails Inspection
- What a Mail-In Seat Belt and SRS Repair Looks Like
- Your Pre-Inspection Checklist and Retest Timeline
- Choosing the Right Path When Your Vehicle Fails
The Inspection That Caught You Off Guard
The customer usually doesn’t walk in expecting a forensic exam. They expect a quick check, a sticker, and maybe a small list of bulbs or tires. Then the inspector opens the door, sees evidence of a prior crash, and the conversation turns to restraint systems, warning lights, and components that were never put back into service correctly.
Why the surprise happens
That surprise comes from a simple mismatch between how a car looks and how it behaves under inspection. A vehicle can drive fine around town and still fail because the safety systems the inspector checks are either worn, broken, or electronically disabled. A deployed belt retractor, a locked buckle, or a lit airbag lamp doesn’t care that the paint is shiny.
Practical rule: if the car has crash history, assume the inspection will look past cosmetics and straight at safety hardware.
The same thing happens on used car purchases and auction buys. Buyers see fresh detail work and good tires, but the inspection lane is looking for the pieces that were stressed in the collision, not the ones that got wiped down afterward. That’s why body shops and rebuilders need to think like inspectors before the car leaves the bay.
A proper vehicle safety inspection exists to decide whether the car is roadworthy for everyone around it, not just whether it can be registered. That means defects in brakes, lighting, glass, steering, suspension, exhaust, and restraint systems can all stop the process. The guide below is the one most drivers wish they’d read before they pulled up to the lane.
What a Vehicle Safety Inspection Actually Covers
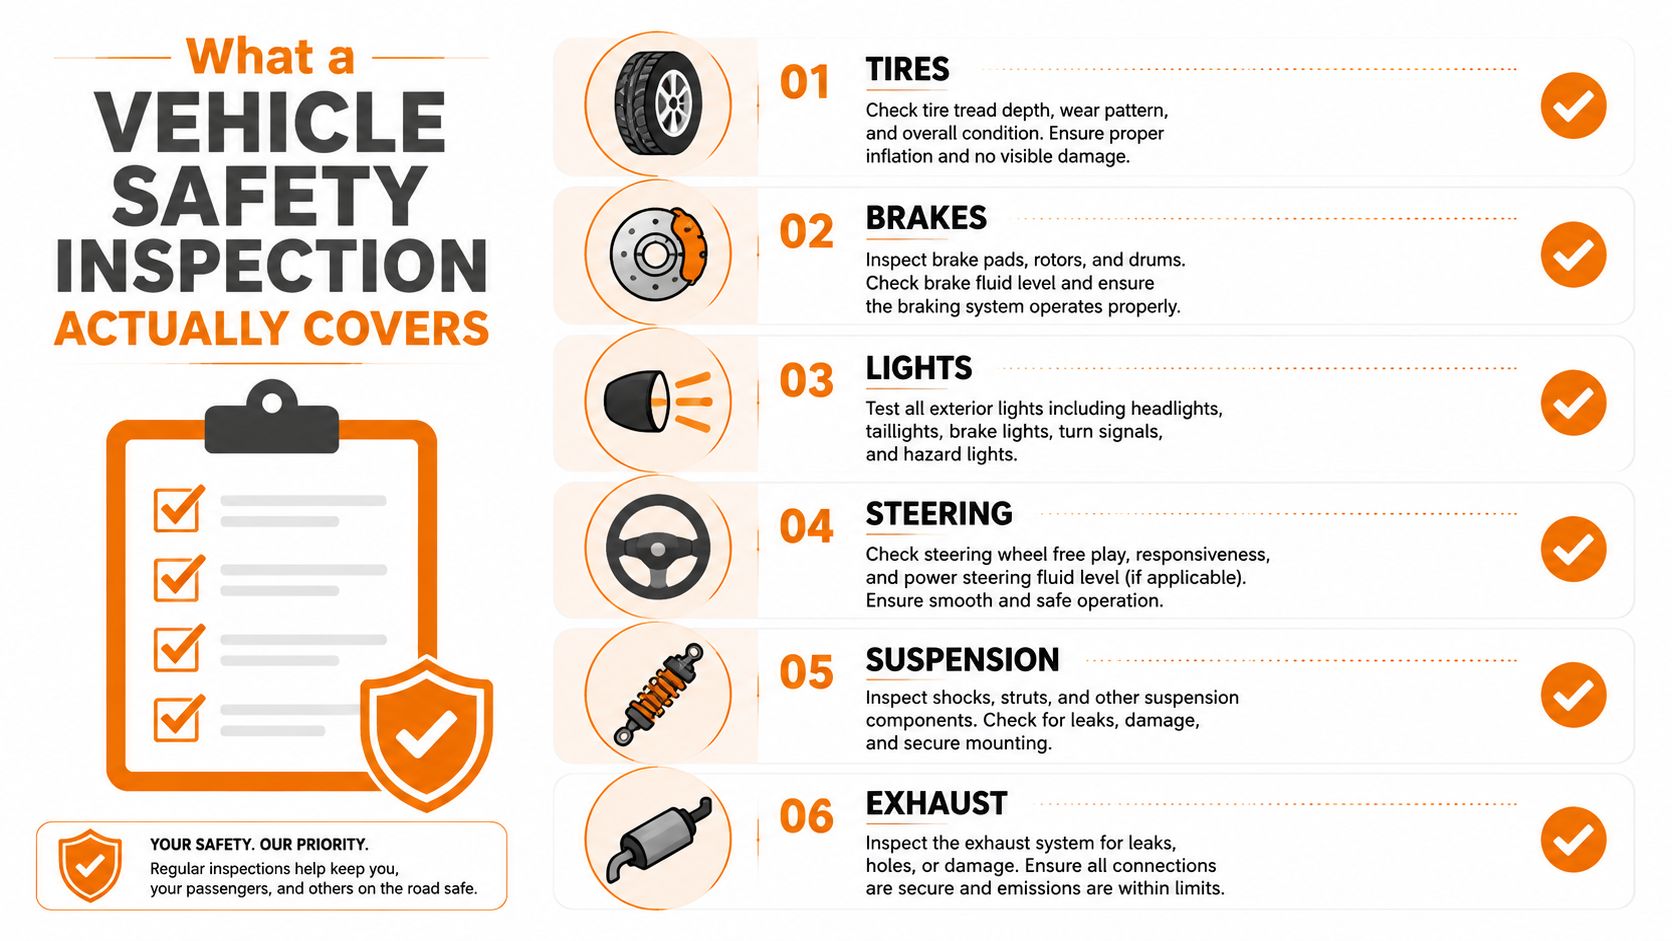
A vehicle safety inspection is a jurisdiction-run safety check, separate from emissions testing. The exact checklist changes by state, but the categories repeat because the underlying failure modes are the same: stopping power, grip, visibility, control, and occupant protection.
The universal core categories
- Brakes: Inspectors look for pad and rotor condition, fluid issues, warning lights, and anything that suggests the car can’t stop consistently.
- Tires: Sidewall damage, uneven wear, mismatched condition, and tread that’s too far gone will get attention fast.
- Lights: Headlights, brake lights, turn signals, and plate illumination have to work as intended.
- Glass and windshield: Cracks, clarity problems, and wiper-related visibility issues can become a pass or fail item depending on severity and location.
- Steering and suspension: Excess play, worn joints, leaks, and unstable control parts matter because they change how the vehicle tracks and responds.
- Exhaust and mounting: Leaks, broken hangers, or damaged routing can create both noise and safety concerns.
The easiest way to think about inspection day is this, the inspector is not servicing the car, they’re documenting whether the car still meets the safety threshold. If a defect is found, it’s written up, not repaired on the spot. That’s why a quick pre-check by the shop, dealer, or owner saves so much time.
For a consumer-friendly overview of those categories, find out what a safety inspection covers is a useful reference to compare against your own state rules.
The one category that gets overlooked most often after collision repair is restraint systems. That’s where seat belts, airbags, and the SRS warning light become inspection-killers even when the car otherwise looks finished.
Brakes, Tires, and Lights, Where Most Vehicles Actually Fail
The-world failure list is usually shorter than people expect. Brakes, tires, and lights take most of the day-to-day heat because they’re visible, measurable, and easy to verify before the inspector does. In roadside enforcement coverage, tire-related issues still make up a large share of vehicle out-of-service problems, and that lines up with what shops see in the bay.
What inspectors actually catch first
Brakes fail inspection when the basics are off. Thin pads, scored rotors, low fluid, soft pedal feel, or a warning lamp that points to an active fault all suggest the system needs attention before the car goes back on the road. Tires fail when the tread is worn out, the sidewall is damaged, or the assembly isn’t correct for the vehicle.
Lighting failures are simpler but just as disruptive. A burned-out bulb, cracked lens, dead brake lamp, incorrect headlight aim, or missing license plate light can send a car right back for correction. These are the kind of defects owners can find in the driveway with a walk-around and a helper.
| System Category | Share of Out-of-Service Violations | Typical Failure Trigger |
|---|---|---|
| Tires | 21.4% | Worn tread, sidewall damage, wrong condition for service |
| Brakes | Not provided in the verified data | Pad wear, rotor scoring, fluid problems, warning lights |
| Lights | Not provided in the verified data | Burned-out lamps, cracked lenses, failed operation |
The bigger point is practical. These three categories are the easiest to self-diagnose before an appointment, so they’re the lowest-cost failures to prevent. A shop that does a five-minute pre-inspection walk-around can save a customer a retest cycle and a dealer from a pointless handoff.
If you’re choosing replacement parts, a brake pad fitment guide can help you avoid the common mistake of buying a pad set that fits in theory but doesn’t match the actual application. That matters because an inspection lane won’t care that the part almost works.
Shop note: if a vehicle is borderline on brakes or tires, fix it before the appointment. Retests cost time, and time is usually the part customers remember most.
Seat Belts and Airbags, The Hidden Failure Points
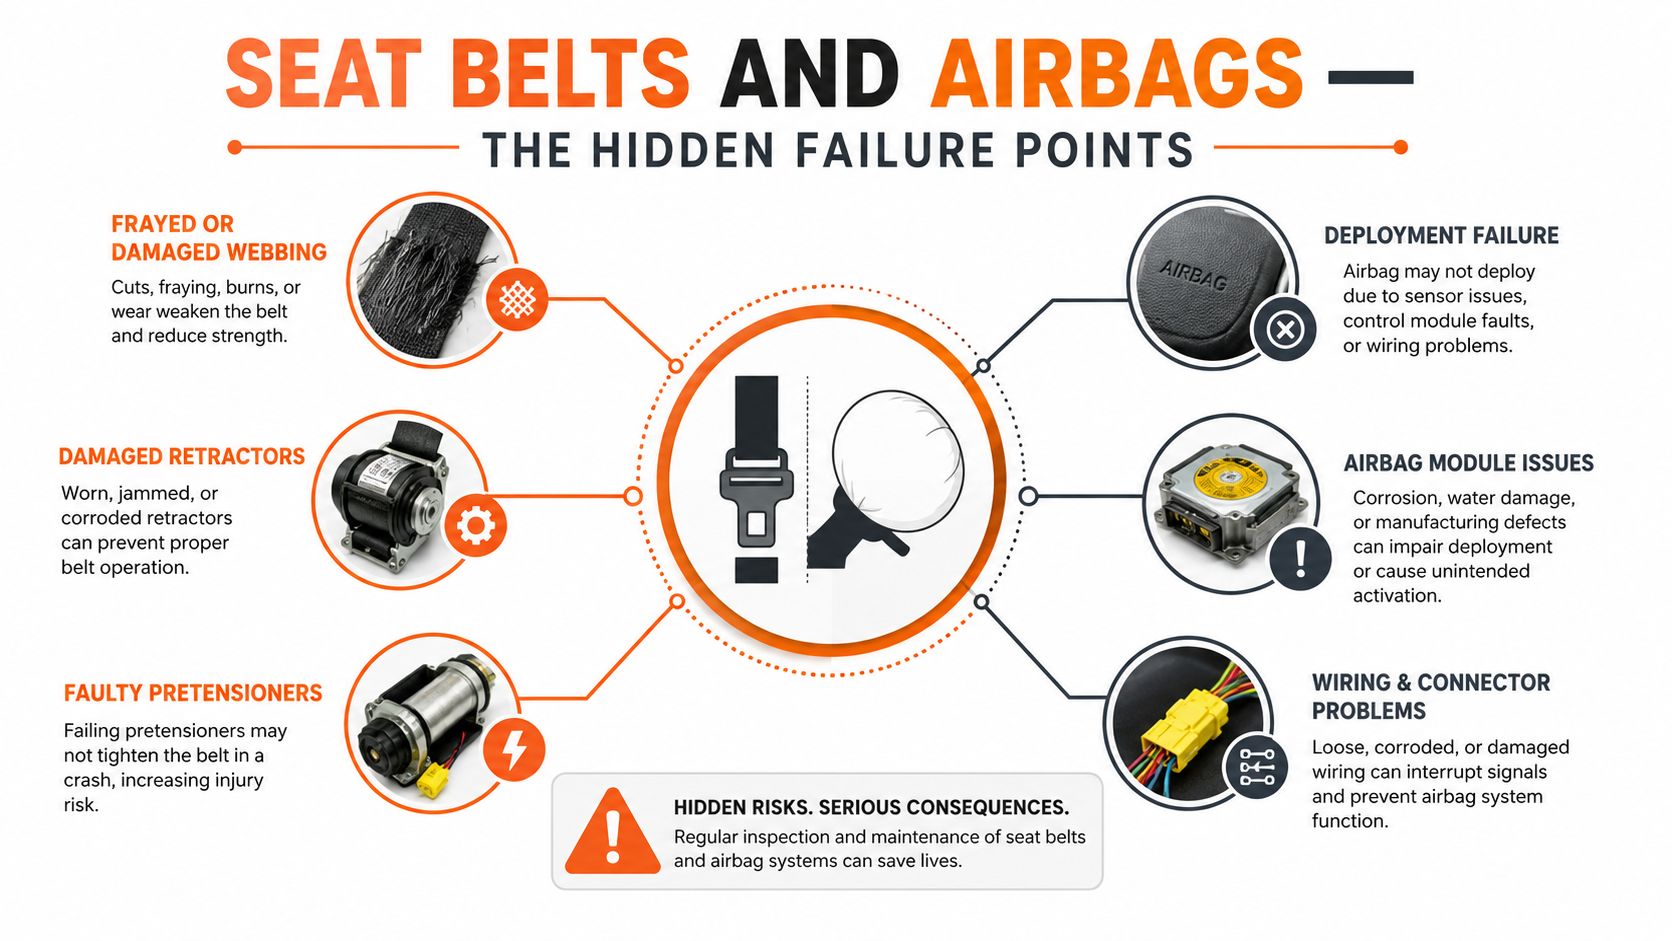
Seat belts and airbags fail inspections in ways that catch even experienced owners off guard. The car may drive fine, the dash may look clean, and the interior may seem complete, but a restraint system defect is still a hard stop because it affects crash survival, not comfort.
Mechanical failures inspectors flag
Seat belt webbing gets rejected when it’s frayed, cut, or significantly stretched. Inspectors also watch for retractors that don’t extend and retract properly, belts that won’t lock on a sudden pull, twisted webbing, and buckles that don’t latch or release as they should. In inspection regimes that test restraint systems explicitly, those problems aren’t cosmetic, they’re load-path failures.
The reason is simple. A belt has to manage crash energy and hold the occupant in the correct position. If the webbing is damaged or the retractor can’t lock, the belt can’t do that job correctly.
Electronic faults that end the test
A deployed or fault-indicated airbag system is treated as a safety defect in major inspection markets. Virginia’s rules reject vehicles when the airbag warning light is continuously on or the system shows defects, and New Jersey requires compliance with FMVSS 208 for certification after deployment repairs, which reflects the same basic logic, the SRS light is a sign that the restraint system isn’t ready.
That warning light usually points to a stored fault, not just a dashboard annoyance. Common codes like B0020, B0028, B0091, and U0151 are linked to driver squib, passenger squib, side impact, or lost communication conditions, which means the problem sits inside the restraint circuit or module network, not in a bulb you can swap in ten minutes.
Clearing the light without fixing the fault just wastes a trip. If the system still sees a crash record or an open defect, the car will fail again.
Late-model cars can also tie seat belt usage sensors and crash data recorders into the same loop, so the module can keep its fault state even when the interior looks repaired. That’s why post-collision work has to be checked from the module outward, not just from the outside in.
For a practical component-level walkthrough, the internal guide at https://www.safetyrestore.com/content/4-about-airbag-reset-seat-belt-repair lines up with the way these systems are diagnosed in the shop.
Repair or Replace When a Restraint System Fails Inspection
The right fix depends on the failure, not just the price tag. A torn belt, a deployed inflator, or a physically broken buckle pushes you toward replacement. A locked retractor, crash data in the SRS module, or a belt assembly that needs internal restoration can often be handled without replacing every visible component.
| Option | Typical Cost | Downtime | Warranty | Best For |
|---|---|---|---|---|
| OEM dealer replacement | High, varies by vehicle | Longer, parts and programming can delay return | Factory-backed when applicable | Newer vehicles, warranty work, exact VIN-linked fitment |
| New aftermarket seat belt assembly | Variable | Moderate | Depends on supplier | Common applications where fitment is straightforward |
| OEM-quality rebuild | Usually lower than full replacement | Short if the part is repairable | Depends on the rebuilder | Older vehicles, repairs that preserve original hardware |
| Mail-in repair and reset | Structured per-item service | Short once shipping is included | Service-dependent | Fleet work, collision repair, and original-part restoration |
How to choose without guessing
Dealer replacement makes the most sense when the vehicle is under warranty, the belt is physically torn, the inflator deployed, or the part has to be coded or matched exactly to the VIN. It’s the cleanest path when the car is new enough that compliance and warranty risk matter more than parts savings.
Aftermarket assemblies can work, but fitment isn’t automatic and trim matching can be a problem on interiors that aren’t black. That matters to body shops trying to return a car that looks like it never took a hit.
For the original hardware path, the internal replacement service at https://www.safetyrestore.com/seat-belt-repair-service/11-seat-belt-webbing-replacement.html shows the kind of repair route owners use when they want the assembly restored instead of swapped. That approach is often a better fit for repaired collision cars and fleet units where downtime matters more than showroom packaging.
What a Mail-In Seat Belt and SRS Repair Looks Like
A mail-in repair workflow is straightforward when a shop has done it before. The order starts with the specific service, single or double seat belt rebuild, SRS airbag module reset, or both, and the customer gets shipping instructions and a label so the parts move without guesswork.
The bench-to-box process
The affected belt or module comes out of the car, usually after a battery disconnect and a short removal job. On many vehicles, that’s a quick pull compared with the time it takes to source a new assembly and wait for dealer stock.
At the repair bench, the unit is disassembled, the internal gas charges and pretensioner parts are replaced where needed, the webbing is checked and re-stitched if required, and the retractor is tested before it leaves the bench. For the module side, the SRS unit is reset with OEM-level diagnostic equipment so stored crash data and hard fault codes are cleared properly.
The practical value here is downtime control. The service model is built around a 24 to 48 hour turnaround once the part is received, and shipping usually adds a few business days each way, so the vehicle owner can plan around roughly a week off the road instead of sitting on a parts backorder.
You can see the module-reset workflow directly through https://www.safetyrestore.com/airbag-module-reset-service/8-airbag-module-reset.html, which is the same kind of repair path shops use when a post-collision inspection gets hung up on crash data.
Before reinstalling, make sure any residual codes are cleared with a scan tool. A repaired belt or module still needs a clean verification pass before retest.
Your Pre-Inspection Checklist and Retest Timeline
A clean inspection starts a few days before the appointment, not at the lane. The most reliable prep is a short 7-to-14 day window that gives you time to catch obvious defects, order parts, and schedule a retest if the first pass finds something.
What to check before you roll in
The night before, walk the car and look at the tires, brake pads, and every exterior lamp. If the tread looks uneven, the pads are thin, or one light is out, fix it before you hand over the keys. Inside the cabin, verify that the seat belts retract smoothly, latch cleanly, and don’t show obvious webbing damage.
Also confirm windshield wipers, washer fluid, and the horn, since those small items can become annoying retest problems when everything else is already on the edge. If the SRS light is on, don’t clear it blindly, confirm the repair first so you’re not masking a real restraint-system fault.
- Paperwork ready: Bring registration, proof of insurance, and the previous inspection report if this is a retest.
- Retest window: Many jurisdictions use a 10 to 30 day retest window, but the station rules can vary.
- Day-of timing: Arrive with a warmed engine and expect the station portion to take 20 to 45 minutes.
If the car fails on-site, budget repair drive time separately from inspection time. That matters for fleets and dealers that need to plan pickups, parts ordering, and return visits without tying up the same technician twice.
Choosing the Right Path When Your Vehicle Fails
For body shops and mechanics, the rational move on a failed belt or SRS fault is usually to repair the original restraint hardware when the failure is mechanical webbing damage, retractor lock-up, or a crash-data module issue. That’s where a mail-in service like Safety Restore fits naturally, because it preserves the original part, cuts the wait, and avoids replacing more hardware than the defect demands.
For individual owners and fleet managers, dealer replacement still wins when the belt is torn, the inflator has deployed, the buckle is physically damaged, or the vehicle is still under factory warranty. In those cases, the safest decision is to replace the damaged component and document the work cleanly for the retest lane.
If the failure is a mechanical webbing problem or a software crash-state issue, ship it. If the failure is a deployed airbag or a torn strap, replace it.
If your vehicle failed on seat belts, airbags, or an SRS warning light, Safety Restore handles mail-in seat belt repair and airbag module reset work for the original parts you already have. Visit Safety Restore to review the available repair paths, compare the restraint-system options, and get the component back on the road-ready track before your retest.