It wouldn’t be an exaggeration to say that seat belts are one of the single most important inventions in the history of the automobile industry. In fact, these safety devices alone have managed to substantially improve the chances of survival and reduce the risk of death and serious injury by 45%!
Given how essential it is to your vehicle and your safety, it’s in your best interest to make sure that your seat belt is working properly. One of the most important things you’ll have to keep an eye on is your seat belt’s retractor. To see if this is working properly, just try to pull on your seat belt, and it should spool and unspool smoothly. If this isn’t the case, then it’s likely that there may be something wrong with your retractor.
Now, it’s best to replace your retractor as soon as possible if there are any functional complications. But how should you go about doing this? If you want to know the answer to this question, read on as we guide you through your seat belt’s retractor replacement:
Necessary Preparations
There are necessary preparations that you need to make before replacing your seat belt retractor.
The first thing you have to do is to check the car manual and see if there are any specific preparations that you need to make before you work on your seat belt. The next thing you want to do is to prepare the necessary tools and equipment that you’ll need for the replacement, For the most part, all you’ll need is a screwdriver, adjustable pliers, and the replacement retractor.
Once you have all the tools, be sure that you are in a well-lit and stable area. The last thing you want is to damage your seat belt even more due to external factors such as poor lighting.
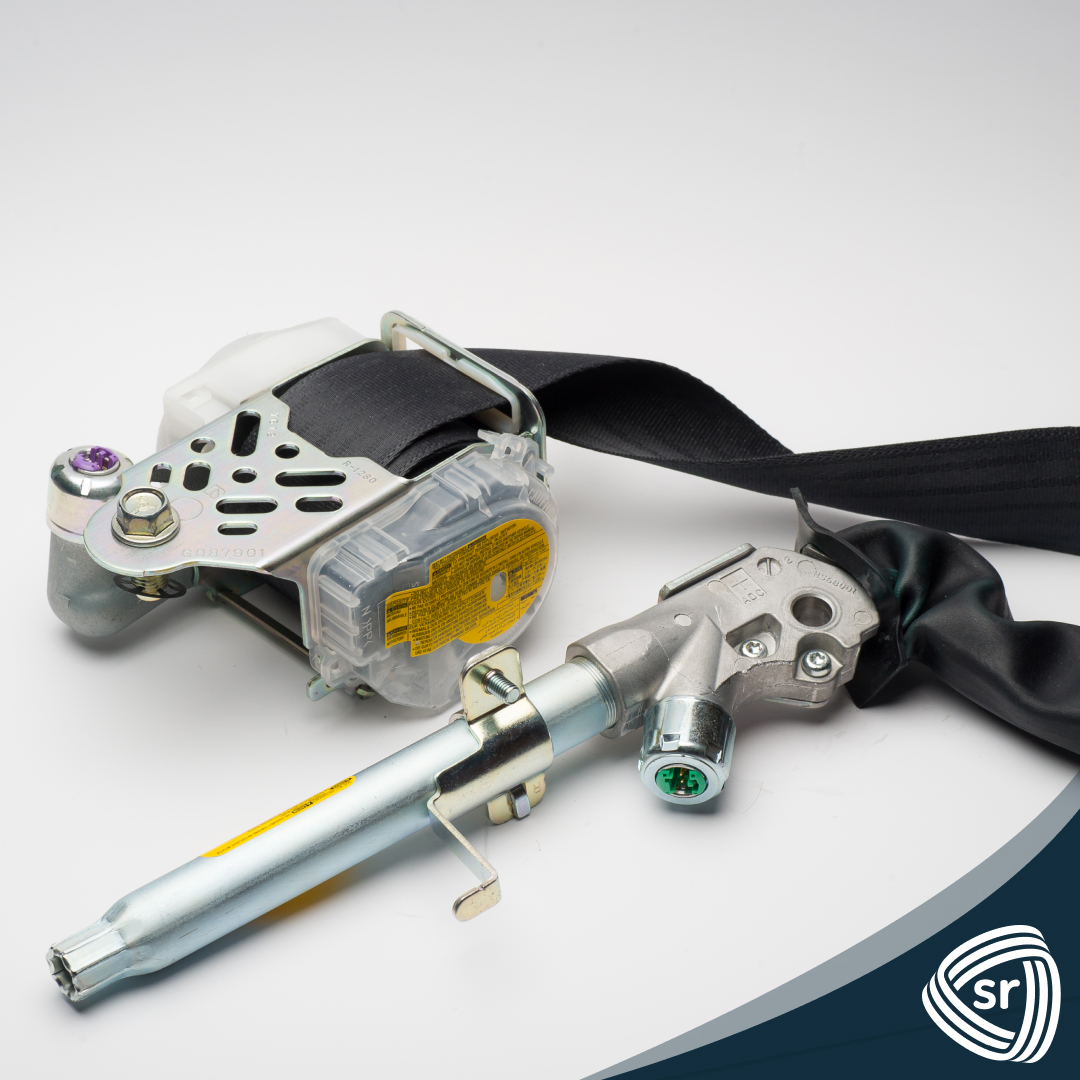
How to Replace Your Retractor
Before you start, consider if you are prepared and well equipped to do this yourself. While it can be fairly simple to replace, there’s a chance that you may end up making a mistake that can damage your seat belt even further. If you aren’t confident doing this yourself, it would be best to utilize our seat belt repair and replacement services.
Now, it’s time for a step-by-step breakdown on how to replace your retractor:
- Remove the retractor’s cover below the seat belt’s shoulder mount and the screws that keep the cover in place.
- Put the pliers on the retractor’s mounting bolt and turn them counterclockwise to remove it. Do the same for the lower lap belt mounting bolt by using the pliers and turning it in a clockwise direction.
- Hold the retractor with one hand, pull it down, and turn off the free end of the seat belt.
- Insert the seat belt into the new retractor by sliding it up towards the mounting point.
- Replace the bottom belt mounting bolt and tighten it with the pliers by moving in a clockwise direction.
- Replace the retractor adjustment bolt using the pliers to tighten it in a clockwise direction.
- Realign the retractor bolt hole on the mounting bracket. Then, insert the mounting bolt using the pliers to tighten it.
- Replace the cover, insert the mounting screws, and use the screwdriver to tighten them.
Conclusion
We hope this guide proves to be useful when it comes to replacing your seat belt’s retractor. Be sure to inspect your seat belt on a regular basis to catch any complications and issues before it’s too late. Remember, your safety on the road should always be your top priority!
If you need help with any issues regarding your seat belts, we’ve got you covered. We here at Safety Restore specialize in repairing and rebuilding faulty seat belts. For your seat belt repair and part replacement needs in Westfield, MA, don’t hesitate to contact us today!