
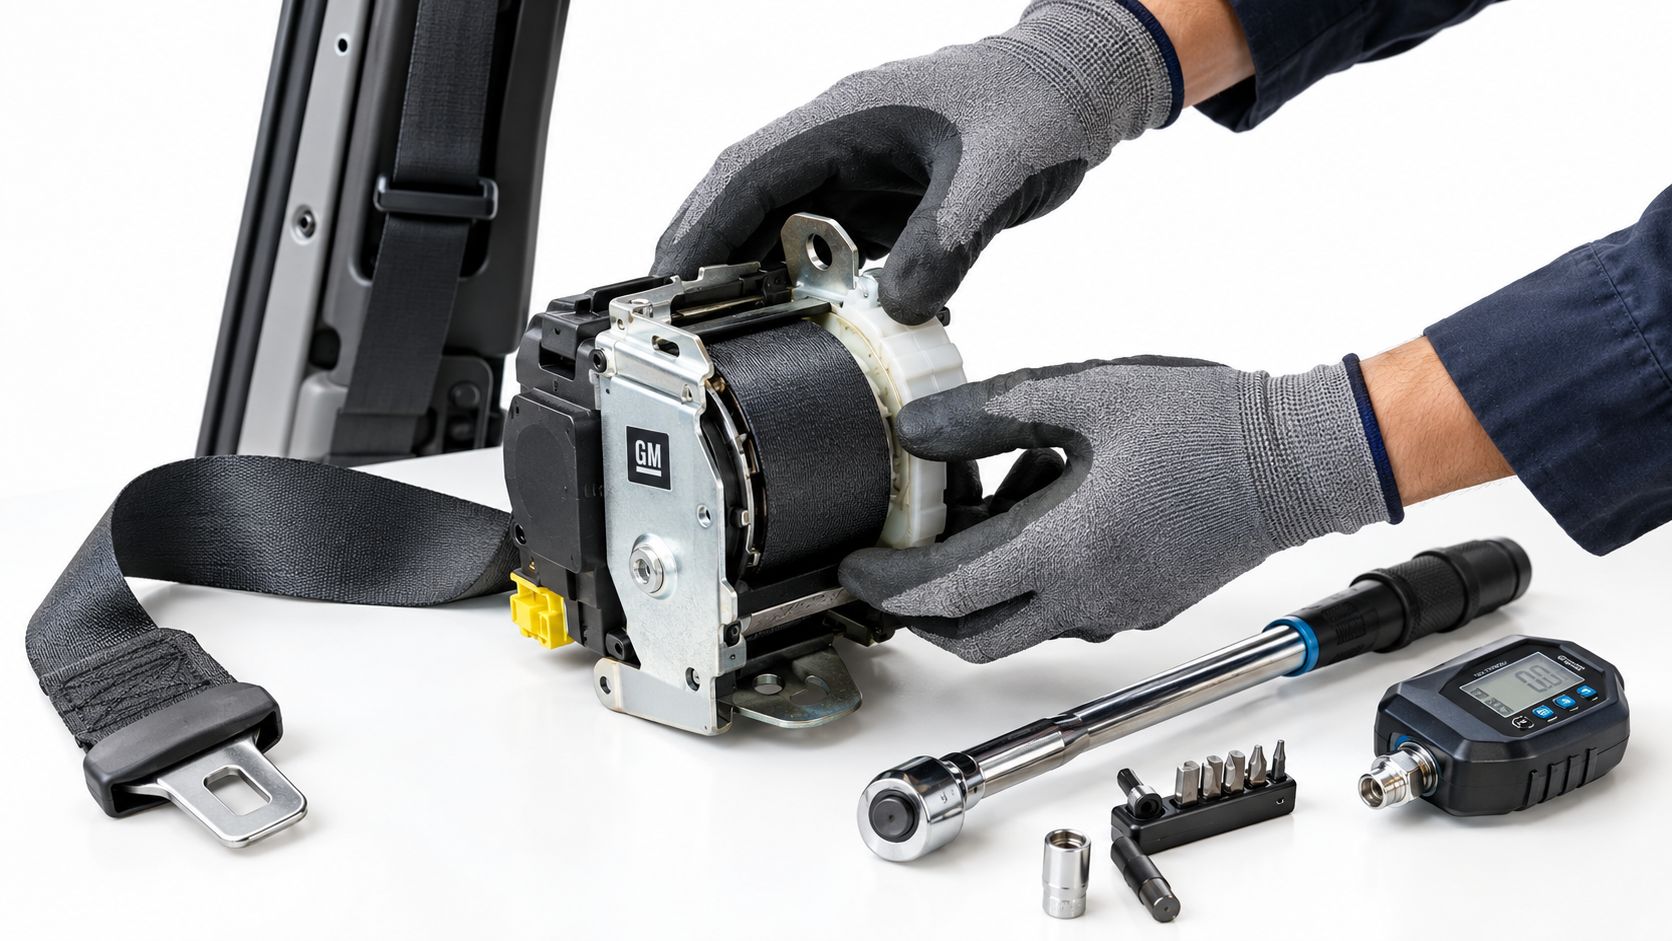
You pull the belt across your chest, hear an unexpected click, and the webbing stops halfway. Or the belt locked during a collision, the airbag light stayed on, and the dealership quoted a complete assembly that costs more than expected. Before ordering parts or forcing the spool, identify what GM's service procedures consider a temporary lock and what they treat as a failed retractor.
GM seat belt retractor repair starts with diagnosis, not disassembly. A retractor can look intact while its locking mechanism, pretensioner, or internal spring has already been affected by a crash. The practical decision is whether the unit passes repeat functional checks, not whether it appears usable from the outside.
Table of Contents
- Diagnosing GM Seat Belt Retractor Failures
- Safely Removing GM Seat Belt Assemblies
- Evaluating OEM Replacement Versus Professional Repair
- Navigating the Mail-In Repair Process
- Reinstalling and Testing the Repaired Retractor
- Essential Tips for Long-Term Seat Belt Maintenance
Diagnosing GM Seat Belt Retractor Failures
A GM retractor that feels stuck may need only a controlled release test, but the test must be performed gently. Don't yank the belt repeatedly, rotate the housing, or open the mechanism on the vehicle. The GM diagnostic procedure uses a short extraction and slow retraction sequence before the unit is judged defective. GM service instructions for seat belt retractors specify extracting 15 to 25 mm, or 5/8 to 1 inch, of webbing, allowing it to retract slowly, and repeating the process up to three times.
Use the release test before removing the unit
Park the vehicle securely and keep the belt aligned with its normal path. Pull out only the specified short amount of webbing, then allow it to return without snapping it back. Repeat the cycle carefully. This helps distinguish a belt caught by a temporary locking condition from a retractor that won't release internally.
If the spool releases and the belt retracts smoothly, check whether the webbing is twisted, trapped against trim, or routed incorrectly through the guide. A misaligned belt can create the same complaint as a damaged retractor. Correct the routing first, then repeat the extension and retraction check.
The threshold is deliberately strict. If the retractor still won't release after the permitted attempts, GM's procedure directs replacement rather than deeper field repair. That instruction matters because forcing the spool can damage the locking pawl, disturb the pretensioner assembly, or create a unit that appears to work once but fails later.
Practical rule: A retractor that passes one movement test but fails during repeated cycling isn't ready for service. Intermittent locking is a failure pattern, not a successful repair.
Separate emergency locking from ALR operation
A functioning retractor should respond to a sharp belt movement by locking, while a slow pull should allow controlled extension. Many GM assemblies also include an Automatic Locking Retractor, or ALR, used when securing a child restraint. The ALR must engage and release consistently, not merely click once during a casual inspection.
A belt that locked during a collision deserves additional caution even if it now extends. Crash loading and pretensioner events can leave internal components compromised without producing an obvious external break. If the retractor fails the release procedure, shows inconsistent lock behavior, or is associated with a restraint warning, remove it from service and have the assembly evaluated by a qualified repair provider or replace it according to the vehicle's service information.
Safely Removing GM Seat Belt Assemblies
Removal begins with the SRS, not the trim panel. A seat belt retractor may include a pyrotechnic pretensioner, and its wiring can connect directly to the vehicle's supplemental restraint system. Disconnect the negative battery cable using the vehicle manufacturer's procedure, then allow the SRS system's stored energy to discharge for the period specified in the applicable service information.
Don't probe a pretensioner connector with a test light, multimeter, or improvised jumper. Don't pull on the wires to separate the connector. Use the correct connector release method, keep the terminal faces protected, and route the harness away from sharp brackets while removing the assembly.
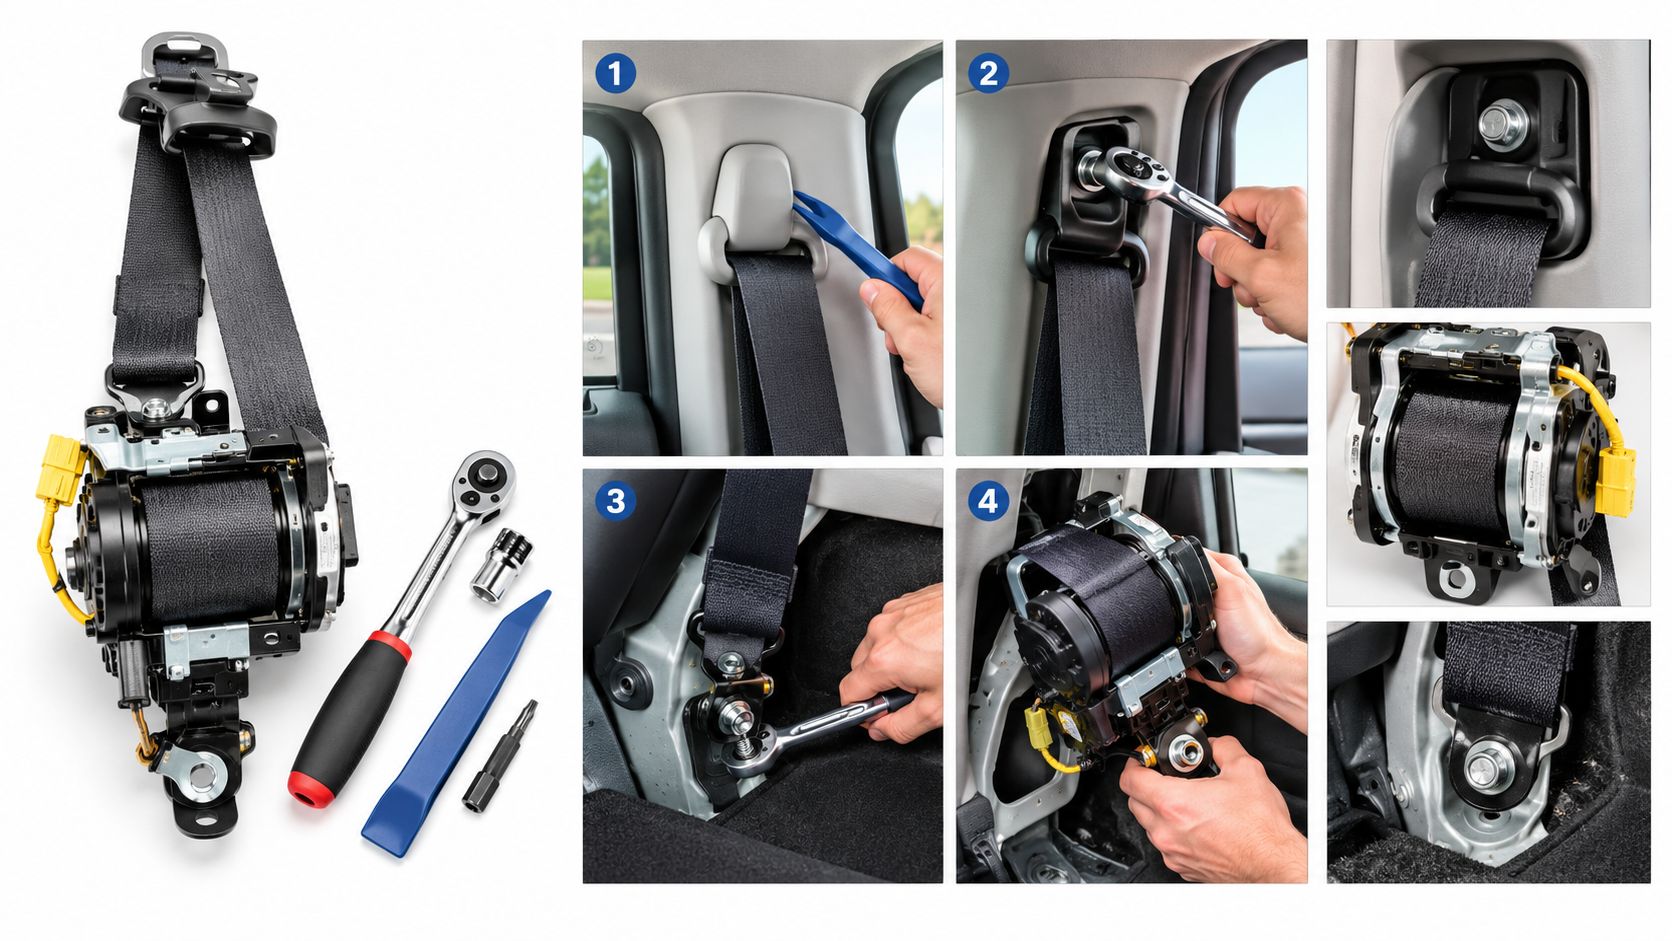
Remove trim without loading the spool
Move the seat as needed for access, then remove the sill trim, pillar trim, or seat components that block the retractor. Use a trim removal tool rather than a screwdriver against visible plastic surfaces. GM clips can remain in the body or pull out with the panel, so collect each fastener and inspect the panel before reinstalling it.
Before unbolting the assembly, photograph the belt path and connector position. That simple record prevents a common reassembly mistake, especially when the webbing passes through a guide or height-adjuster channel.
With the trim clear, support the retractor while removing its mounting fasteners. Some restraint fasteners may be torque-sensitive or intended for replacement after removal. Don't substitute a generic bolt, stack washers to change alignment, or guess at torque. Use the correct repair information for the exact GM vehicle.
Protect the removed assembly
Keep the retractor in its normal installed orientation. Avoid dropping it, rotating it aggressively, or letting the webbing unwind across the shop floor. Place the pretensioner connector in a protected position and inspect the housing, mounting bracket, webbing, and guide for crash damage.
GM post-collision guidance calls for inspection of complete retraction and secure locking. For higher-severity collisions, the recommended remedy can include replacement of the entire seat belt system, including the buckle, guide, and retractor assembly, rather than selective repair. GM's collision inspection guidance also describes repeated ALR verification and replacement when the retractor fails during any part of six cycles.
Evaluating OEM Replacement Versus Professional Repair
A new GM assembly is the straightforward dealership solution when the original unit has severe housing damage, contaminated webbing, or a collision history that makes restoration inappropriate. It also preserves the manufacturer's replacement path. The drawbacks are practical: vehicle-specific ordering, uncertain availability, labor, and a component price that may be difficult for an owner or independent shop to absorb.
Professional mail-in repair takes a different route. The original retractor is removed, shipped to a specialist, inspected, restored where appropriate, and returned for installation. That preserves the vehicle-specific mounting arrangement and avoids the compatibility uncertainty that can come with a used salvage assembly.
The choice isn't simply “new versus cheap.” The right question is whether the original housing and webbing are suitable for professional restoration. A cracked housing, severely damaged mounting point, or webbing that can't be safely restored may still require replacement. A locked or deployed mechanism in an otherwise serviceable original assembly may be a reasonable candidate for specialized repair.
| Feature | Dealership OEM Replacement | Specialized Mail-In Repair |
|---|---|---|
| Original fitment | Uses a replacement assembly matched to the vehicle | Retains the customer's original mounting and vehicle-specific assembly |
| Diagnosis | Often begins with replacement once the unit fails the OEM procedure | Starts with inspection of the submitted retractor |
| Cost structure | Part, availability, and installation can vary | Typically based on the selected service and submitted component |
| Downtime | Depends on parts availability and shop scheduling | Requires removal, shipping, repair, and return shipping |
| Crash-related damage | Replaces the assembly when required by the repair procedure | Restores only components that are suitable for professional service |
| Best use | Severe physical damage, unsuitable webbing, or manufacturer-directed replacement | Locked or deployed mechanisms that remain structurally suitable |
A mail-in service also shifts some work to the repair shop or vehicle owner. Someone must remove the assembly safely, package it properly, and reinstall it correctly. That trade-off can make sense for independent repair facilities that already handle interior trim and SRS procedures. Shops organizing a broader repair area may also find an automotive facility supplies catalog useful for carts, storage, and handling equipment.
The economical option is not the one with the lowest purchase price. It's the option that addresses the actual failure without adding unknown crash history or fitment risk.
Navigating the Mail-In Repair Process
A mail-in repair succeeds or fails partly on logistics. Once the GM assembly is removed, leave the retractor in its normal orientation and keep the webbing from spilling out. If the spool is already locked, don't force it open to make the package smaller. The technician needs to receive the mechanism in the same condition in which it was removed.
Prepare the part for shipment
Wrap the assembly in clean protective material, then place padding around the housing, bracket, and pretensioner. The connector should not be allowed to strike the box wall, and the webbing should not be folded against a sharp edge. Use a rigid shipping carton with enough space to prevent the part from moving during transport.
Include the order information and describe the symptom clearly. Useful details include “locked after collision,” “won't retract,” “intermittent lock,” or “restraint light remains on.” If the vehicle has scan results, include the relevant code and identify the seating position. Clear information helps the repair provider compare the complaint with its bench findings.
Don't ship loose tools, trim pieces, or unrelated wiring unless the service provider specifically requests them. Photograph the assembly and package before sealing the carton. That record helps confirm the part's condition and makes tracking easier if the carrier reports damage.
Choose the service carefully
Verify that the provider accepts GM retractors and the specific type of assembly being sent. Ask how it handles deployed pretensioners, damaged webbing, buckle components, or an assembly that fails inspection. A reputable provider should explain what happens if the housing or webbing is unsuitable instead of treating every unit as automatically repairable.
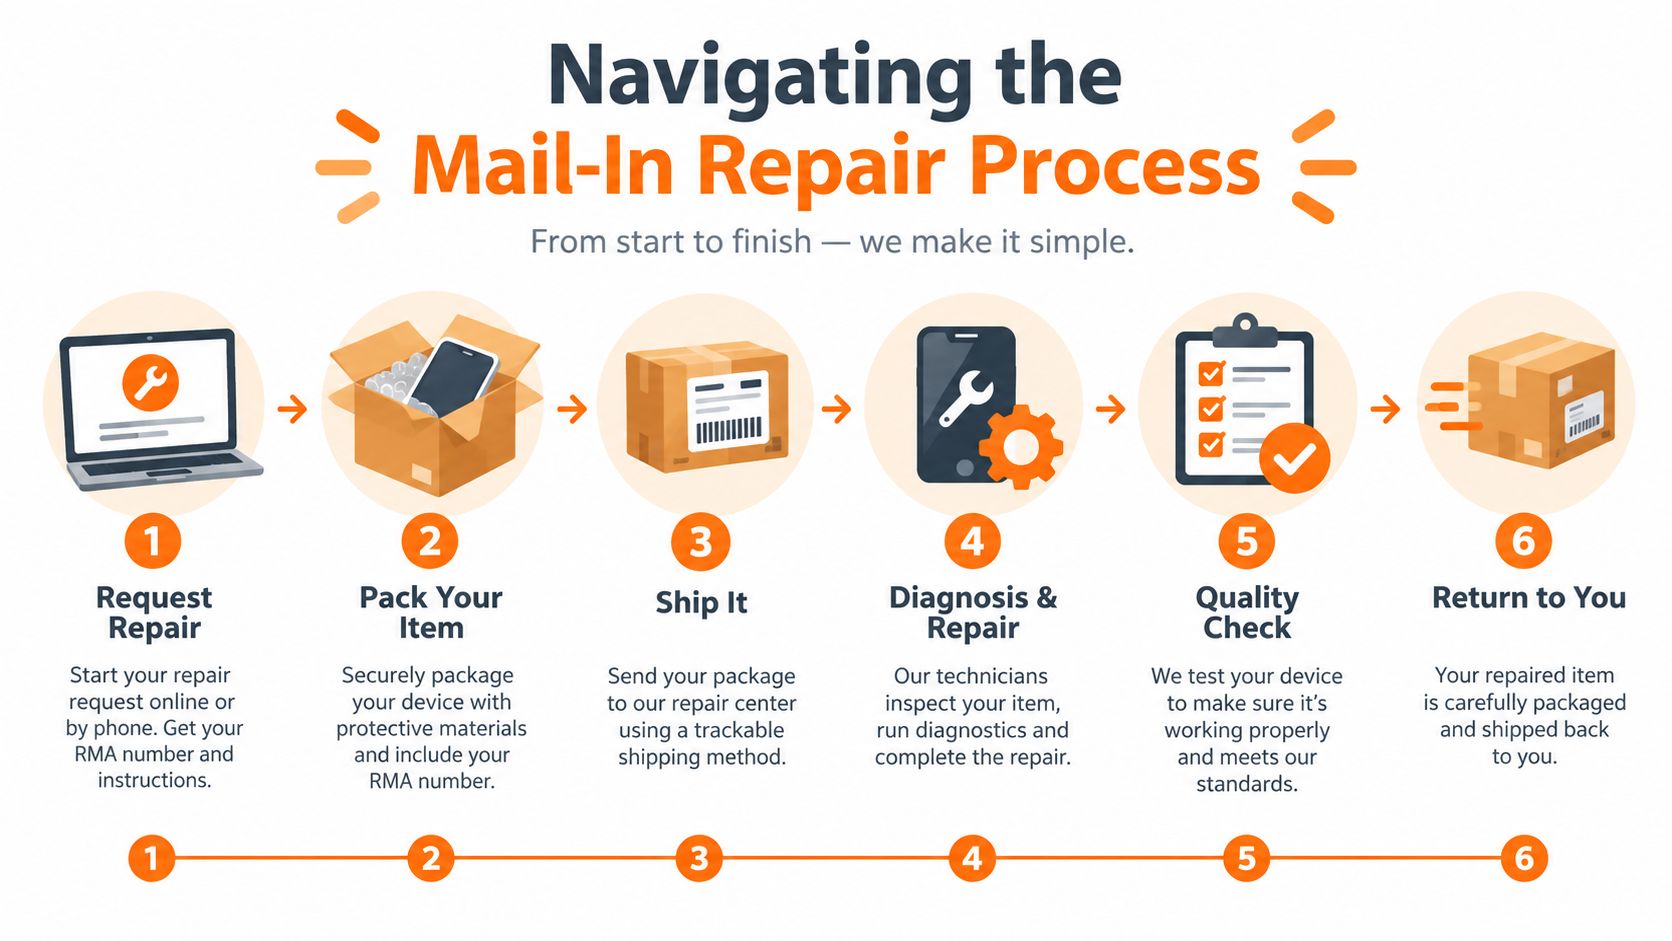
The workflow generally follows a clear sequence:
- Place the order: Select the applicable retractor or seat belt service and record the order details.
- Remove the assembly: Follow SRS precautions and protect the connector and webbing.
- Pack the part: Immobilize the housing and cushion the pretensioner area.
- Ship with tracking: Keep the carrier receipt until the repaired unit returns.
- Review the return: Check the housing, webbing, connector, and mounting points before installation.
- Reinstall and test: Follow the vehicle procedure and perform functional checks before driving.
Specialized providers commonly advertise a 24-hour turnaround after the package arrives. Treat that as repair-facility time, not total door-to-door time. Carrier transit, order processing, weekends, and an assembly that needs additional evaluation can extend the vehicle's overall downtime, so track both the shipment and the service status.
Reinstalling and Testing the Repaired Retractor
Reinstallation should restore the original belt path before any trim panel goes back into place. Position the retractor in its factory orientation, start every mounting fastener by hand, and verify that the bracket sits flat against the body. Tighten the fasteners to the exact specification for the GM vehicle. A belt anchor is a safety component, so a guessed torque value or reused torque-to-yield fastener isn't an acceptable shortcut.
Reconnect the pretensioner harness only after the assembly is secured. Make sure the connector is fully seated and the wiring is routed away from the spool, guide, seat track, and sharp metal edges. Reinstall trim carefully, checking that no panel edge presses against the webbing or restricts the retractor's movement.
Perform the mechanical checks
Pull the belt slowly through its full usable range. It should extend without scraping, binding, or sudden stops, then return without leaving excessive slack. Check the latch and buckle separately, and confirm that the webbing lies flat through every guide.
Test the emergency locking response with controlled, safe pulls. Then verify the ALR function by following the vehicle's child-restraint belt procedure. The belt should switch into its locking mode and return to normal operation when released according to the manufacturer's instructions.
Testing standard: Don't approve the installation because the belt retracts once. A safety assembly earns approval through stable, repeatable locking and release behavior.
Check the SRS system
Reconnect the battery using the vehicle procedure and scan the SRS with a compatible diagnostic tool. A basic OBD2 reader may not access manufacturer-specific restraint faults, so use equipment capable of communicating with the GM airbag and seat belt modules.
Clear a stored fault only after the underlying issue has been corrected. If the airbag or seat belt warning remains illuminated, don't assume the repaired retractor is defective. Inspect the vehicle-side connector, wiring, SRS module status, and crash-related codes, then follow the diagnostic tree for that vehicle. The car should not return to normal use until the restraint warning is resolved and the belt passes its mechanical checks.
Essential Tips for Long-Term Seat Belt Maintenance
Seat belts usually provide early warning before a complete lock. A slow return, uneven webbing, gritty movement, repeated clicking, or a belt that catches during ordinary use deserves attention. Test the belt while it is correctly routed, because a twisted strap or obstructed guide can imitate an internal retractor problem.
Keep the belt path clean and free of trim debris. Dust, spilled drinks, salt residue, and accumulated grime can interfere with smooth webbing movement, while heat, moisture, and ultraviolet exposure can weaken materials over time. Don't use harsh chemicals or soak the webbing in an attempt to remove a stain. If the material is cut, burned, heavily frayed, mold-contaminated, or structurally degraded, cleaning won't restore its strength.
For interior care, use a product-appropriate method such as this guide on how to clean leather car seats, while keeping cleaners away from restraint webbing and pretensioner connectors. Leather care and seat belt care are separate jobs, and a clean seat surface doesn't make damaged webbing safe.
Use this decision framework:
- Inspect early: Address slow retraction, unusual noise, or intermittent locking before the belt becomes completely stuck.
- Stop after a failed procedure: Follow the GM release sequence rather than forcing or opening the housing.
- Treat crash involvement seriously: A belt can look normal after a collision and still require professional evaluation.
- Choose repair selectively: Mail-in restoration can preserve a suitable original assembly, but severe physical damage may call for complete replacement.
- Verify after installation: Check mechanical operation, ALR behavior, wiring, and SRS warning status before returning the vehicle to service.
Safety Restore accepts customer-supplied seat belt retractors and SRS components for mail-in inspection and repair, then returns suitable parts for reinstallation. If your GM retractor is locked, deployed, or failing its release cycles, visit Safety Restore to review the service and shipping instructions before removing the assembly.