
A fender bender can leave a Jeep looking drivable while the driver's shoulder belt stays locked against the seat. The buckle may release normally, the webbing may look clean, and the dashboard may show an SRS warning that tells you something in the restraint system still needs attention. That combination sends many owners straight to an online parts listing, but buying a retractor before identifying the failed component can waste money and leave crash damage unresolved.
Jeep seat belt repair starts with diagnosis, not parts shopping. A locked belt can point to a deployed pretensioner, a damaged retractor, a faulty buckle, wiring trouble, a shifted mounting point, or an open manufacturer recall. The repair decision changes depending on which of those conditions is present.
Table of Contents
- Why Your Jeep Seat Belt Is Stuck After a Collision
- What Counts as a Repairable Belt and What Does Not
- Removing a Jeep Seat Belt Assembly the Right Way
- Dealer Replacement, Aftermarket Parts, and Mail-In Repair Compared
- How the Mail-In Seat Belt Repair Workflow Works
- Reinstalling, Torquing, and Retesting the Seat Belt
- Final Checklist and Common Questions About Jeep Seat Belt Repair
Why Your Jeep Seat Belt Is Stuck After a Collision
The first pull after a crash is usually revealing. You reach for the belt, give it the normal steady tug, and get only a short amount of webbing. Pull harder and the belt stays fixed. The latch plate may still click into the buckle, but the shoulder belt remains tight instead of feeding out across the driver.
That doesn't automatically mean the retractor failed as an isolated mechanical part. A sudden deceleration can activate the restraint system, including the pretensioner. The pretensioner pulls the belt tight around the occupant, and the retractor can remain locked afterward. A visibly contracted pretensioner cable, damaged housing, or an SRS warning may support that diagnosis, but none of those signs replaces a full system inspection.
Shop-floor rule: A locked belt is a symptom. It isn't a diagnosis.
Collision damage can also reach parts that aren't obvious from the driver's seat. The buckle may have absorbed load, the belt webbing may have pulled against a sharp trim edge, and the anchor or seat structure may have shifted. Wiring beneath the seat can be stretched or disconnected during impact, especially when the seat moved on its tracks. A child restraint tightened aggressively against the belt can create a separate mechanical complaint, while spilled liquid and contamination can make an older retractor slow or sticky.
Why movement alone proves very little
A belt that eventually retracts isn't automatically safe. The emergency-locking mechanism, pretensioner, buckle, mounting hardware, and SRS controller all contribute to occupant protection. I-CAR's collision guidance distinguishes between a restraint involved in a collision with automatic-restraint deployment and one involved in a minor event without deployment. In the former situation, the complete system generally requires replacement rather than treatment as a single isolated repair. In the latter, careful inspection may establish that undamaged parts can remain in service.
Before ordering a replacement, document the crash history, read the SRS codes, and inspect the belt where it sits. Don't clear the codes first. The stored information can help identify whether the problem involves a pretensioner, buckle, circuit, controller, or another restraint component.
The first decision
If the crash caused deployment, visible webbing damage, a deformed housing, or a compromised mounting point, stop treating the problem as a simple locked retractor. If the belt locked without deployment, with intact webbing and no structural damage, a specialist may be able to assess and restore the affected assembly. Either way, the vehicle-specific service information controls the final decision.
What Counts as a Repairable Belt and What Does Not
The phrase “the belt works” hides too many failure points. A belt can extend, retract, and latch while the pretensioner has fired or the anchor has yielded. A post-crash inspection must assess the complete restraint path, from webbing and latch plate to retractor, buckle, pretensioner, wiring, and body attachment.
Start with the conditions that should push the assembly toward replacement or professional structural evaluation. Frayed, cut, heat-damaged, contaminated, or chemically degraded webbing isn't a cosmetic issue. Stretched stitching and pulled edges can change how the belt manages load. A pretensioner housing that has fired, vented, swollen, or otherwise shows deployment damage shouldn't be treated like a dirty spool.
A buckle that won't retain the latch plate securely is another hard stop. So is an anchor point that has pulled, distorted the pillar, or moved with the seat. The restraint may bolt back into place, but a damaged mounting structure can defeat the belt during the next impact.
Conditions that need a closer decision
Some faults are more nuanced. A retractor may have internal lockup while the webbing remains intact and the housing has no collision deformation. A slow spool can result from contamination or internal wear rather than deployment. A pretensioner may require replacement of its spent deployment component while the original assembly remains suitable for specialist rebuilding, but that determination belongs to a qualified repair provider using the correct parts and test process.
The following comparison is a screening guide, not permission to bypass Jeep service information.
| Component | Repairable signs | Replace instead |
|---|---|---|
| Webbing | Clean, intact webbing with no pulled stitching or deformation | Fraying, cuts, burns, chemical damage, pulled stitching, or crash stretching |
| Retractor | Internal lockup or sluggish movement with an intact housing | Crushed, cracked, distorted, or collision-damaged housing |
| Pretensioner | Specialist confirms the assembly can receive an approved replacement component | Fired, vented, swollen, damaged, or unverified pyrotechnic unit |
| Buckle | Positive latch and release with no looseness or damage | Won't retain the tongue, sticks, cracks, or shows impact damage |
| Anchor and hardware | Correctly positioned mounting point with undamaged fasteners | Yielded pillar, shifted seat structure, damaged threads, or deformed hardware |
| Wiring and connectors | Positive locking with no pulled terminals or damaged insulation | Cut, stretched, melted, corroded, or unsecured SRS wiring |
Inspect before you ship
The most useful inspection happens before the assembly leaves the vehicle. Record the VIN, crash circumstances, SRS codes, deployment status, and exact symptom. Photograph the routing and connector position before removal, especially if more than one belt is being serviced.
A normal electrical reading isn't proof that a deployed pretensioner will protect an occupant. Don't probe a pyrotechnic circuit with an improvised tester, and don't install a resistor to turn off the warning lamp. Those shortcuts can hide the fault without restoring the restraint.
Removing a Jeep Seat Belt Assembly the Right Way
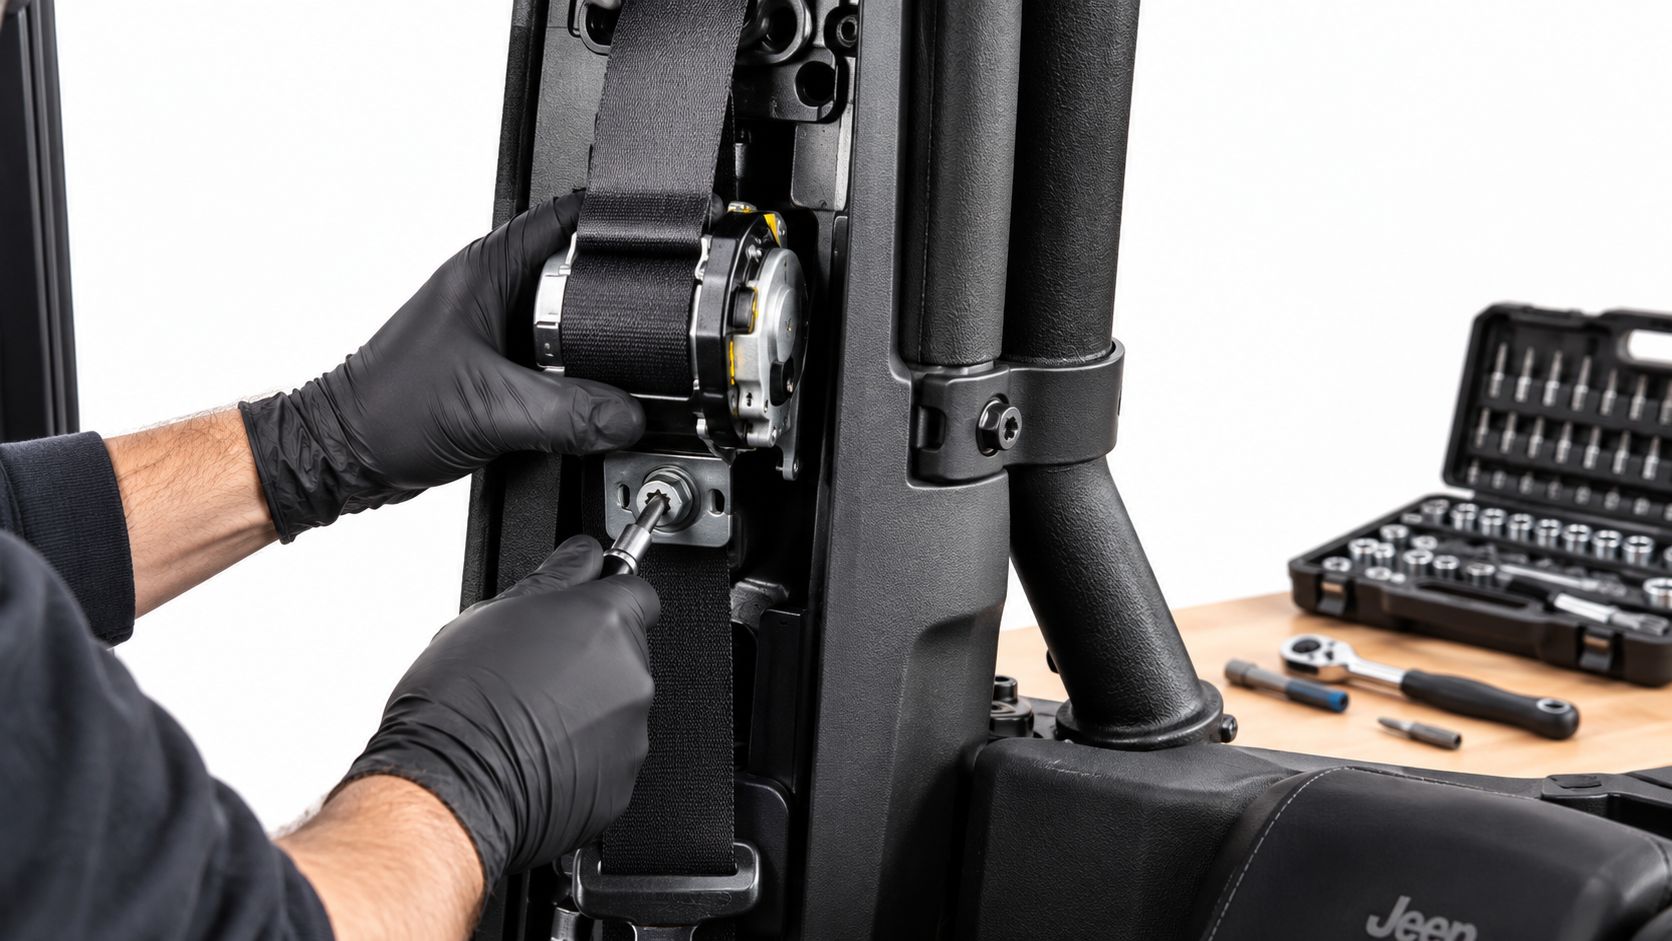
Removal varies between Wrangler generations, Grand Cherokee platforms, trim levels, and model years. Use the Jeep service information for the exact vehicle before touching an SRS connector. The safe sequence begins with the ignition off, the vehicle secured, and the restraint system's power source isolated according to the manufacturer's procedure.
Move the seat to create working room without pulling on the belt. Manufacturer procedures may specify a particular seat position, so follow that instruction rather than relying on a universal frontward or rearward position. Remove the lower trim and the upper anchor cover carefully with a plastic trim tool. Save every clip, spacer, cover, and fastener in a labeled container.
Disconnect before unbolting
After the required SRS isolation period has passed, locate the pretensioner connector. Jeep connectors often use a secondary locking feature, so release the lock as designed and pull the connector straight apart. Don't twist the pretensioner canister, pull on the webbing to lift the assembly, or pry against the terminals.
The belt may have separate upper, lower, retractor, and buckle attachments. Remove them in the order specified for the platform. Start each fastener by hand during reassembly, because cross-threading a high-load restraint attachment can damage the mounting point before the bolt feels tight.
A useful removal record includes:
- Assembly identity: Mark driver, passenger, or rear outer position before boxing the part.
- Connector position: Photograph the harness routing and locking-tab orientation.
- Hardware location: Keep bolts, spacers, washers, and trim clips with the correct assembly.
- Original condition: Photograph webbing, pretensioner housing, buckle, and mounting points.
- Fastener information: Record the vehicle's specified torque values from the service information.
Torque is vehicle-specific
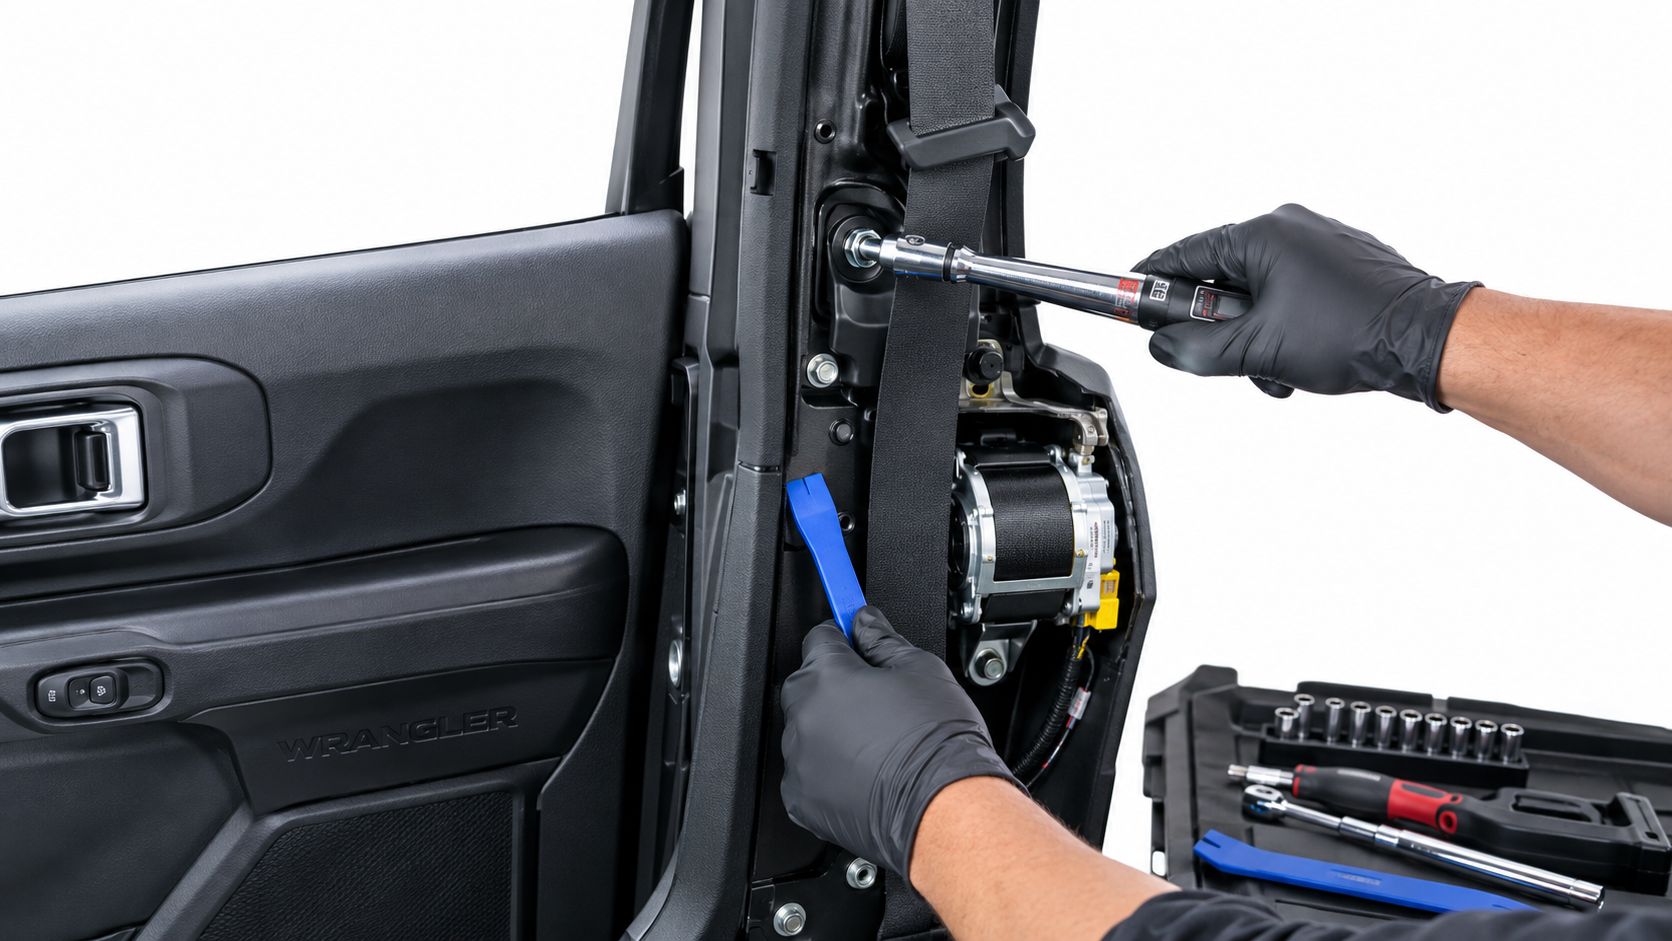
Don't transfer a torque value from another Jeep or another manufacturer. The NHTSA-published Honda procedure, for example, specifies 39 N·m, or 29 lb-ft, for a pretensioner mounting bolt in that documented application, but that value isn't a universal Jeep specification. Your Jeep's service information takes priority.
If the assembly is damaged at the body, seat frame, or mounting threads, removal should stop until the structure has been assessed. A repaired belt cannot compensate for a compromised attachment point.
Dealer Replacement, Aftermarket Parts, and Mail-In Repair Compared
Once diagnosis identifies the affected assembly, four paths usually appear. A dealer can supply and install a new OEM assembly. An aftermarket supplier may offer a new replacement. A salvage-yard assembly can be less expensive to acquire, but its crash history may be unknown. A specialized mail-in service can assess and restore the customer's original unit when the housing and related structure remain suitable.
Each option solves a different problem. Dealer replacement offers strong vehicle-specific fitment and a documented installation path, but the total invoice may include more than the belt itself. Aftermarket parts require careful confirmation of connector design, pretensioner configuration, webbing routing, and SRS compatibility. A mismatch can create a warning light or prevent correct system communication.
| Option | Approx. Cost (USD) | Downtime | Fitment / SRS Risk | Warranty |
|---|---|---|---|---|
| Dealer OEM assembly | Varies by vehicle and repair scope | Depends on parts availability and shop scheduling | Lower fitment uncertainty when VIN-matched | Dealer or manufacturer terms |
| New aftermarket assembly | Varies by supplier and component | Depends on stock and shipping | Connector, resistance, trim, and calibration compatibility must be confirmed | Supplier-specific |
| Used salvage assembly | Varies by source and condition | Often dependent on locating the correct part | Unknown crash history and hidden deployment risk | Limited or source-specific |
| Mail-in repair | Varies by diagnosis and service provider | Includes removal, shipping, repair, and return | Preserves original fitment when the assembly is accepted for service | Provider-specific |
Where each option fails
A used belt can look perfect while carrying the same crash damage you're trying to eliminate. An aftermarket unit can bolt in yet communicate incorrectly with the SRS system. Dealer replacement can be the right choice when the housing, mounting structure, or complete system is compromised. Mail-in repair makes more sense only after the original unit passes inspection and the provider can replace the failed internal components safely.
Review the provider's ordering and service terms before shipping a safety-critical assembly. Confirm what the quoted service includes, whether the provider accepts pretensioner-equipped units, what testing is performed, and how rejected parts are handled.
How the Mail-In Seat Belt Repair Workflow Works
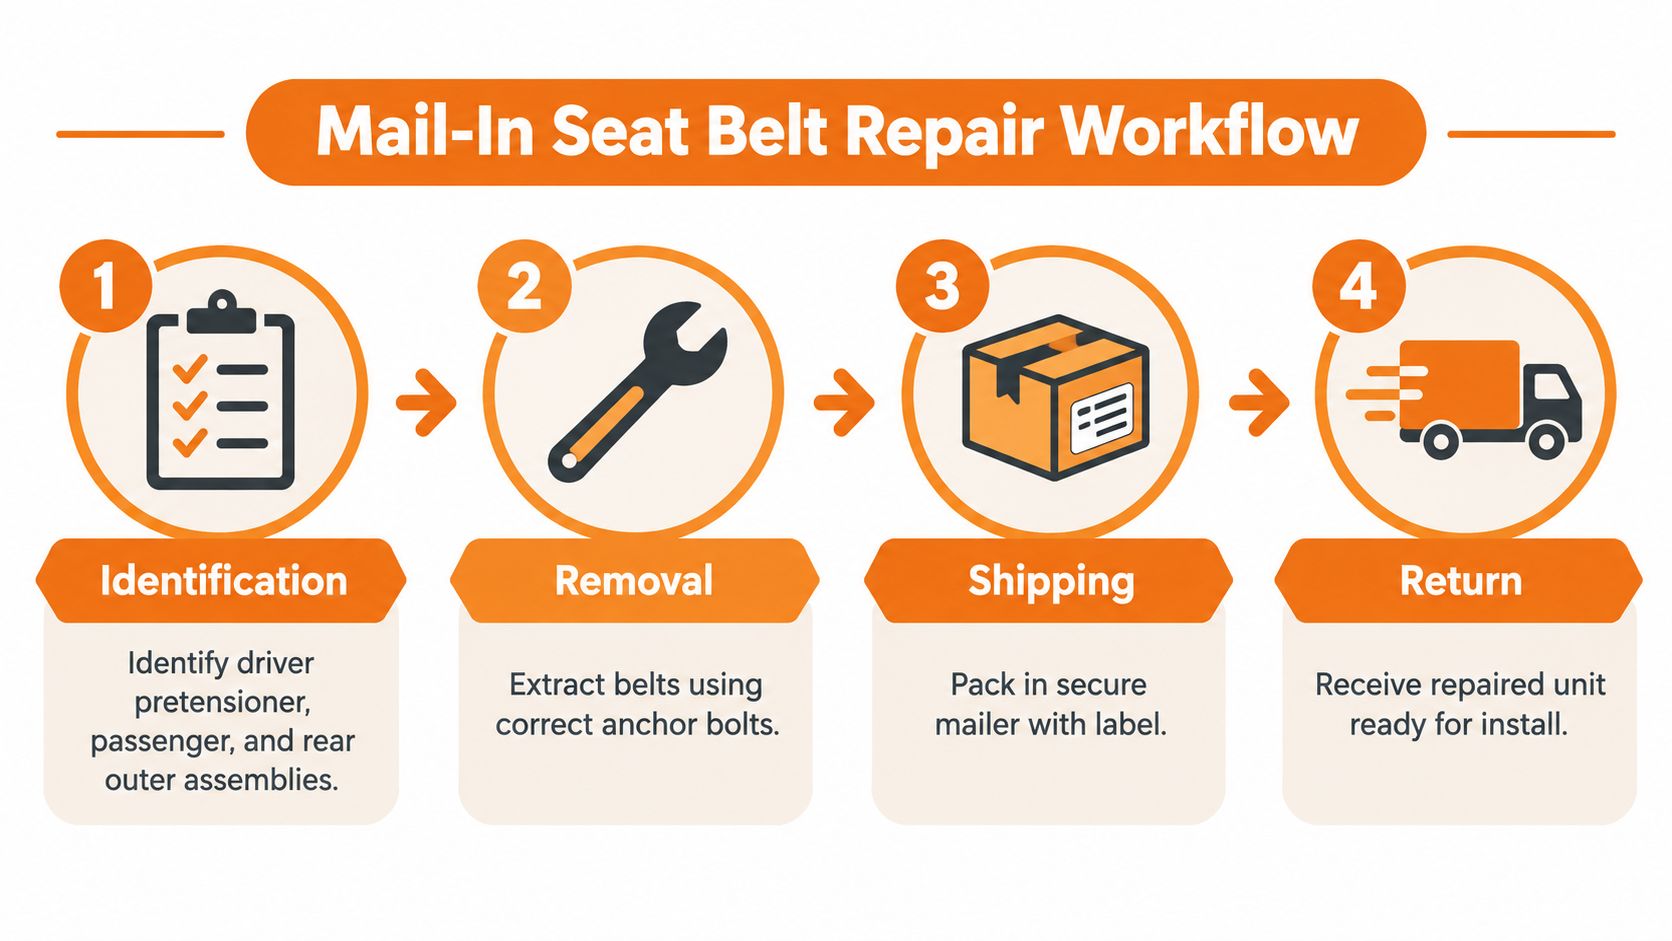
A mail-in repair begins with accurate identification. List every assembly that needs attention, such as the driver pretensioner retractor, passenger belt, rear outer belt, or buckle. Don't assume the locked belt is the only affected component when the SRS scan or collision inspection points elsewhere.
The order or repair form should include the VIN, model, trim, belt position, crash history, airbag deployment status, and the exact complaint. “Locked” gives the technician a starting point. “Slow retraction,” “twisted webbing,” “pretensioner deployed,” or “SRS fault after impact” provides more useful direction.
Prepare the parts correctly
Remove the assemblies using the manufacturer's procedure, then label them by position. Package each part in a sturdy box with padding that prevents movement. Protect the pretensioner canister from impact during transit, and don't cut the webbing or open the retractor yourself. Include the relevant covers, brackets, spacers, and hardware only when the provider requests them.
A practical packing sequence is:
- Identify the unit: Match the label to the repair form and vehicle position.
- Protect the mechanism: Wrap the assembly so the housing and pretensioner can't strike the box.
- Prevent webbing damage: Keep the belt flat and free from sharp bends or compression.
- Add documentation: Include contact information, return address, VIN, symptoms, and deployment details.
- Record the shipment: Keep the tracking information with the vehicle repair file.
What happens at the repair facility
The provider should inspect the housing, webbing, retractor, buckle where applicable, and pretensioner before deciding whether the unit is serviceable. Approved work may include replacing damaged webbing, resetting or replacing the retractor mechanism, replacing the spent pretensioner component, restoring tension, and bench-testing extension, retraction, locking, and latch operation.
Ask what returns with the unit. The expected result should be an identified assembly ready for installation, with the correct webbing specification or color, required hardware information, and written warranty terms. Turnaround depends on the provider's workload, shipping time, parts availability, and whether the first inspection finds additional damage. Treat any advertised window as an estimate rather than a promise until the shop confirms receipt and scope.
For ordering details, use the provider's mail-in repair process and confirm the exact Jeep assembly before sending it.
Reinstalling, Torquing, and Retesting the Seat Belt
Reinstallation isn't complete when the last trim clip snaps into place. The belt must sit in its original path, the anchors must clamp the correct surfaces, the SRS connector must lock positively, and the system must pass both a scan and a physical function check.
Begin with the vehicle battery and SRS precautions still managed according to Jeep's service procedure. Position the retractor and start the mounting fastener by hand. Reinstall the upper guide, lower anchor, buckle, and pretensioner attachment in the specified order. Keep the webbing flat and make sure it hasn't crossed behind a trim panel or twisted around the guide.
Use the factory torque specification
There isn't a universal Wrangler or Grand Cherokee belt torque value that can safely replace the service manual. Torque varies with the attachment, platform, model year, fastener, and seating arrangement. Under-torquing can allow movement in a crash. Over-torquing can damage threads, distort brackets, or alter the intended clamping load.
Use a calibrated torque wrench and record each value in the repair file. The 39 N·m, or 29 lb-ft, specification documented in the cited NHTSA procedure applies to that specific Honda application, not automatically to a Jeep. The NHTSA recall procedure also illustrates why restraint work must follow model-specific documentation, including physical pretensioner checks and a defined removal sequence.
Verify the connector and belt path
Reconnect the yellow SRS connector only after inspecting the terminals and harness. Push it together until the secondary lock is fully seated. A connector that looks connected but lacks positive locking can produce an intermittent fault when the seat moves.
Then check the belt physically:
- Extend and retract it through its usable travel several times.
- Confirm smooth movement without scraping, binding, or webbing twist.
- Give the shoulder belt a quick, controlled pull to verify emergency locking.
- Insert the latch plate and confirm a positive buckle engagement.
- Press the release and confirm clean, complete disengagement.
- Check the anchor covers, guides, and trim for interference.
Finish with a complete SRS scan using equipment that can communicate with the Jeep restraint module. The warning lamp must perform its required self-check and go out as specified. If a code such as B0020 remains, don't keep clearing it. Recheck the connector, circuit, pretensioner, buckle, controller, and physical damage, then follow the diagnostic chart for that Jeep.
Final Checklist and Common Questions About Jeep Seat Belt Repair
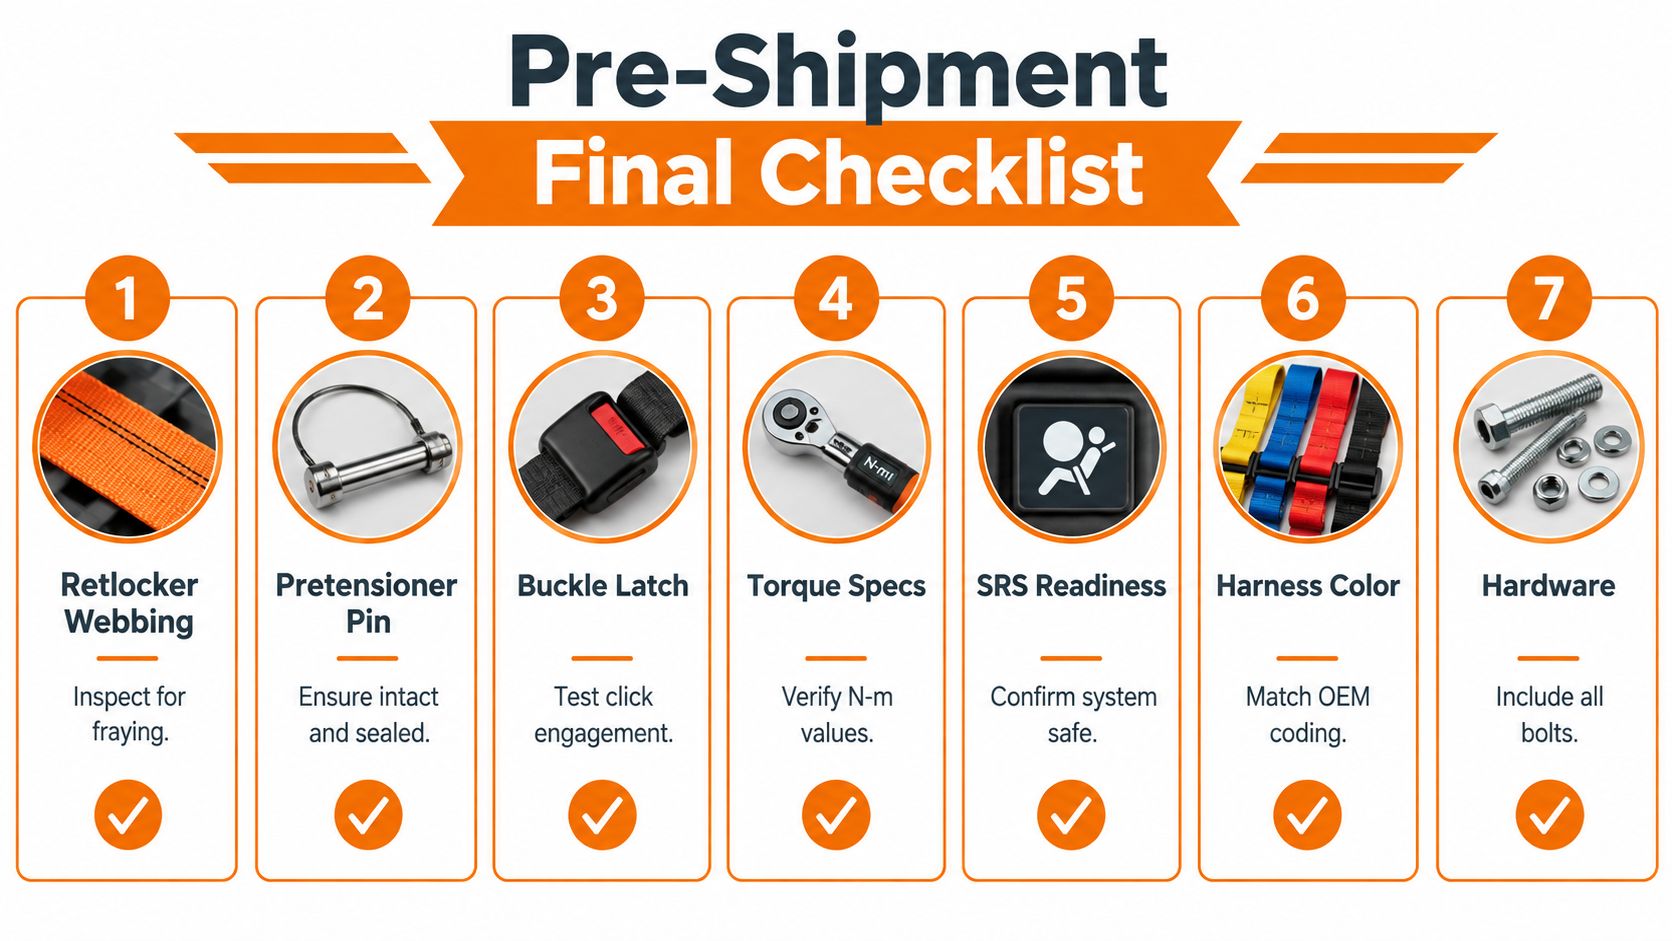
Before boxing a belt or returning a vehicle to service, compare the part and the paperwork. The inspection should cover the retractor, webbing, pretensioner, buckle, connector, anchor, and surrounding structure. The NHTSA recall instructions demonstrate why technicians inspect the complete pretensioner assembly and related buckle and connector areas rather than relying on belt movement alone.
Questions technicians ask before shipping
Can a deployed pretensioner be repaired? It must be assessed by a qualified provider using an approved replacement or rebuilding process. Never reuse a fired or visibly damaged pyrotechnic component.
How long will a mail-in repair take? Shipping and inspection determine the actual schedule. Ask the provider for a current estimate after it identifies the Jeep model, belt position, and requested work.
What warranty applies? Get the warranty in writing before shipment. Confirm whether it covers the retractor, webbing, pretensioner work, labor, and return-service conditions.
Can I reuse the mounting bolts? Don't assume so. Follow Jeep's service information, inspect the threads and bolt condition, and replace hardware whenever the manufacturer requires new fasteners.
How do I know the SRS codes are cleared? A battery disconnect isn't confirmation. Perform a complete SRS scan after installation, correct all active faults, and verify the warning lamp's normal self-check.
Will insurance pay for mail-in work? Ask the adjuster before authorizing service. Provide the inspection findings, photographs, scan results, estimate, and final invoice.
Before paying for any repair, check the VIN for open recalls through the manufacturer or NHTSA. Recall remedies can cover inspection or replacement at no charge in qualifying campaigns, while crash damage and ordinary mechanical faults follow a different repair path. For dealerships and collision groups documenting customer communication, a practical car dealer review management strategy can help organize follow-up after safety repairs. Contact the service provider through its customer support page when you need confirmation about accepted parts, packaging, or warranty coverage.
The decision rule is simple. Never reuse a deployed pretensioner without qualified inspection and approved service. Always scan the SRS after reinstalling the belt. Record the vehicle-specific torque values and test results in the vehicle file.
Safety Restore offers mail-in service for customer-supplied seat belt mechanisms and SRS airbag control modules, including inspection, restoration, webbing replacement when needed, and return of accepted parts ready for reinstallation. If your Jeep belt is locked after a collision, visit Safety Restore to review the service option, identify the correct assembly, and start the repair process.