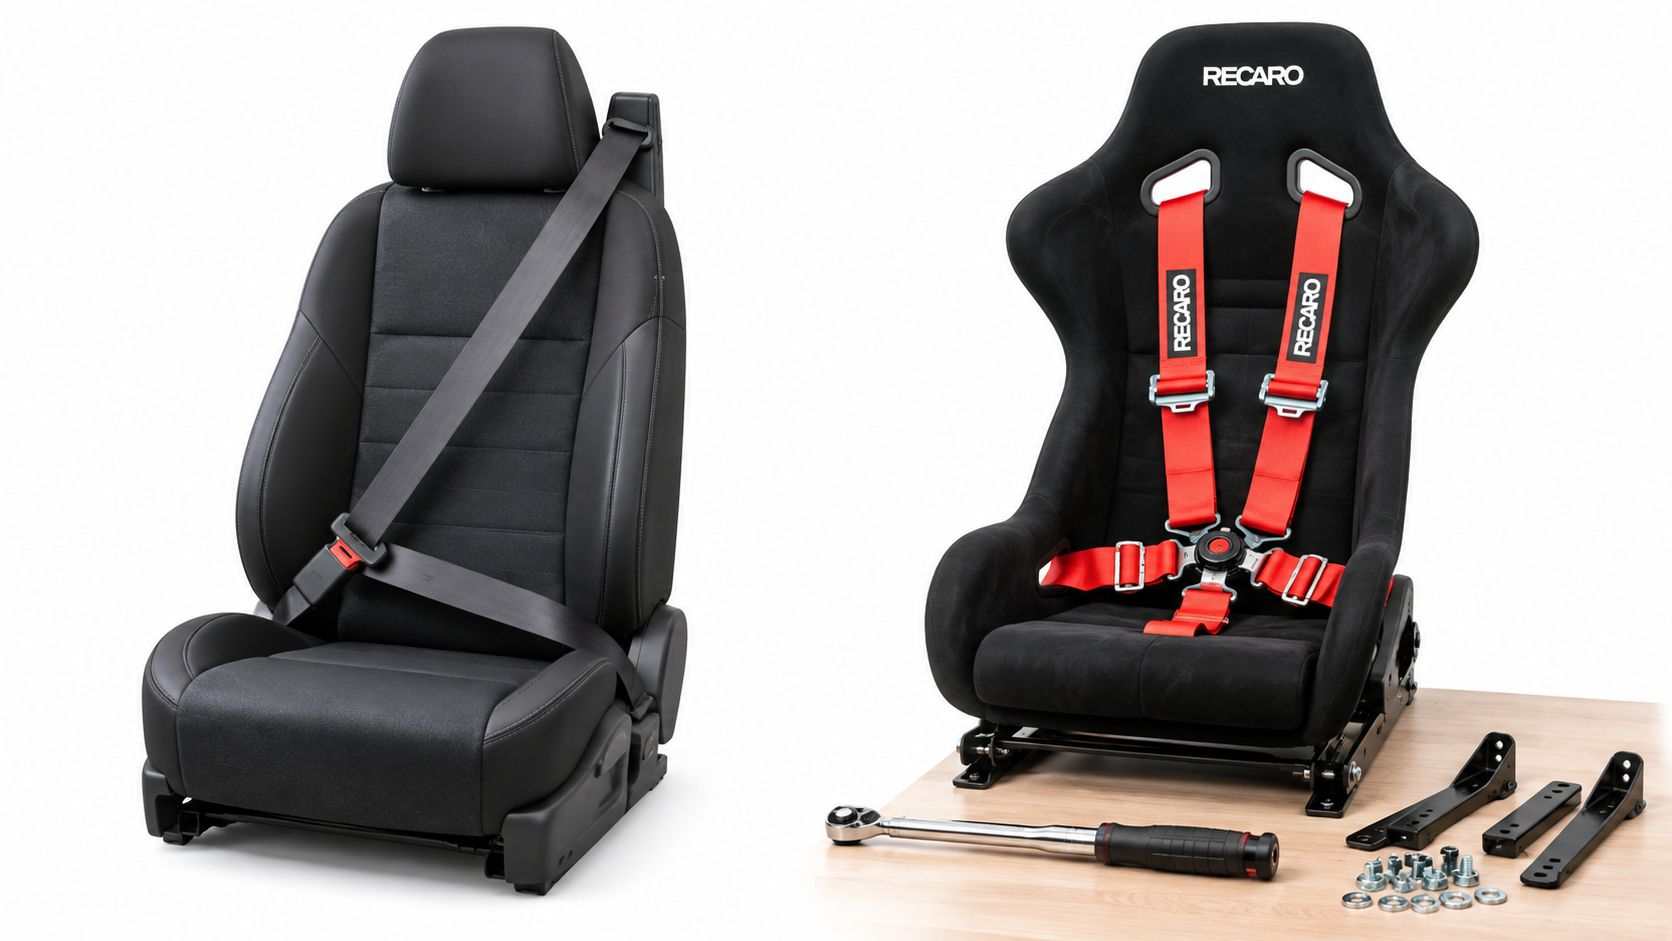
The most popular advice about a 4 point safety belt is also the most dangerous: more attachment points must mean more safety. They don't. A restraint is a complete crash-management system, and the belt, seat, mounting structure, airbag, head restraint, and occupant position all have to work together. Add a racing harness to a road car without checking those relationships, and you may improve torso control while creating a different injury pathway.
That distinction matters to collision shops and track-day drivers alike. The right question isn't whether a four-point harness looks stronger than a factory belt. Ask whether the belt is legal for the intended use, whether its geometry suits the seat, whether the mounting points can carry crash loads, and whether the original SRS system remains correctly integrated. A repairable OEM component may also be a better answer than replacing the entire restraint assembly without diagnosis.
| Application | What a 4 point system can do well | Main concern | Practical decision |
|---|---|---|---|
| Street vehicle | Adds torso retention in some controlled applications | Legal compliance, airbag interaction, submarining, seat compatibility | Retain and restore the OEM restraint system unless the jurisdiction and vehicle manufacturer support the modification |
| Track-day vehicle | Holds the driver more firmly during high lateral and braking loads | Incorrect belt angles, incompatible seats, inadequate head protection | Use a tested harness, compatible seat, approved mounting system, and event-compliant installation |
| Dedicated race car | Provides predictable restraint geometry when designed as a package | Installation, inspection, certification, and occupant protection | Follow the applicable competition rules and the harness manufacturer's instructions |
| Damaged OEM system | Original fitment and vehicle-specific integration remain available | Locked retractors, deployed pretensioners, frayed webbing, SRS faults | Diagnose the complete system before deciding between repair and replacement |
Table of Contents
- The Multi-Point Restraint Myth
- Biomechanics and Crash Protection Tradeoffs
- Street Legality and Track Compliance Rules
- Retrofitting Harnesses and Mounting Geometry
- Restoring Deployed and Damaged Restraints
- The Economics of Mail-In Safety Repairs
- Executing the 24-Hour Turnaround Workflow
The Multi-Point Restraint Myth
A four-point harness has two lap straps and two shoulder straps, but that simple description hides the engineering. The belt doesn't protect an occupant because it has more webbing. It protects the occupant by controlling motion, managing load paths, and keeping the pelvis and torso in positions the seat and supplemental restraint system can support.
The historical record makes the point clear. The first patent for a safety belt was granted to Gustave-Désiré Leveau in France on 11 May 1903, and the German Patent and Trademark Office identifies that early design as a four-point belt, FR331926. The RoSPA seat-belt history document also places early restraint development in aviation before later adaptation to vehicles, while Volvo introduced the familiar three-point design in 1959. The four-point concept therefore predates the three-point belt that became dominant in passenger cars.
That history doesn't make a four-point belt automatically suitable for a modern road car. Manufacturers developed the three-point system alongside inertia reels, pretensioners, load limiters, airbags, seats, and body structures. A racing harness usually changes the occupant's movement pattern, and a fixed-back competition seat changes it again. If the head and torso stop differently from the pelvis, the neck and chest can experience loads that the original vehicle system wasn't designed to manage.
Practical rule: Treat the belt, seat, mounting points, airbag system, and occupant as one restraint package. Never approve a harness based on belt count alone.
A harness can also create a false sense of security when the driver remains in a factory seat with poor belt routing. Shoulder straps that pass over the wrong part of the seat, lap belts that sit above the pelvic bones, or webbing routed around an unapproved tube can all compromise performance. A belt that feels tight in the workshop may still load the abdomen or allow the pelvis to move under it during a crash.
The three-point belt became the general road-car solution for good reasons, including usability, compatibility with vehicle interiors, and integration with passive safety systems. A four-point safety belt makes more sense when the vehicle, seat, mounting structure, and use case have been engineered around it. For a street car, the factory system often remains the most coherent safety package.
Biomechanics and Crash Protection Tradeoffs
The useful comparison isn't “weak belt versus strong harness.” It's different restraint geometry producing different occupant motion. A three-point belt allows controlled movement and works with the vehicle's airbag and seat design. A four-point harness can hold the torso more symmetrically, but it can also change head motion, abdominal loading, and pelvic retention if the seat and belt angles aren't correct.
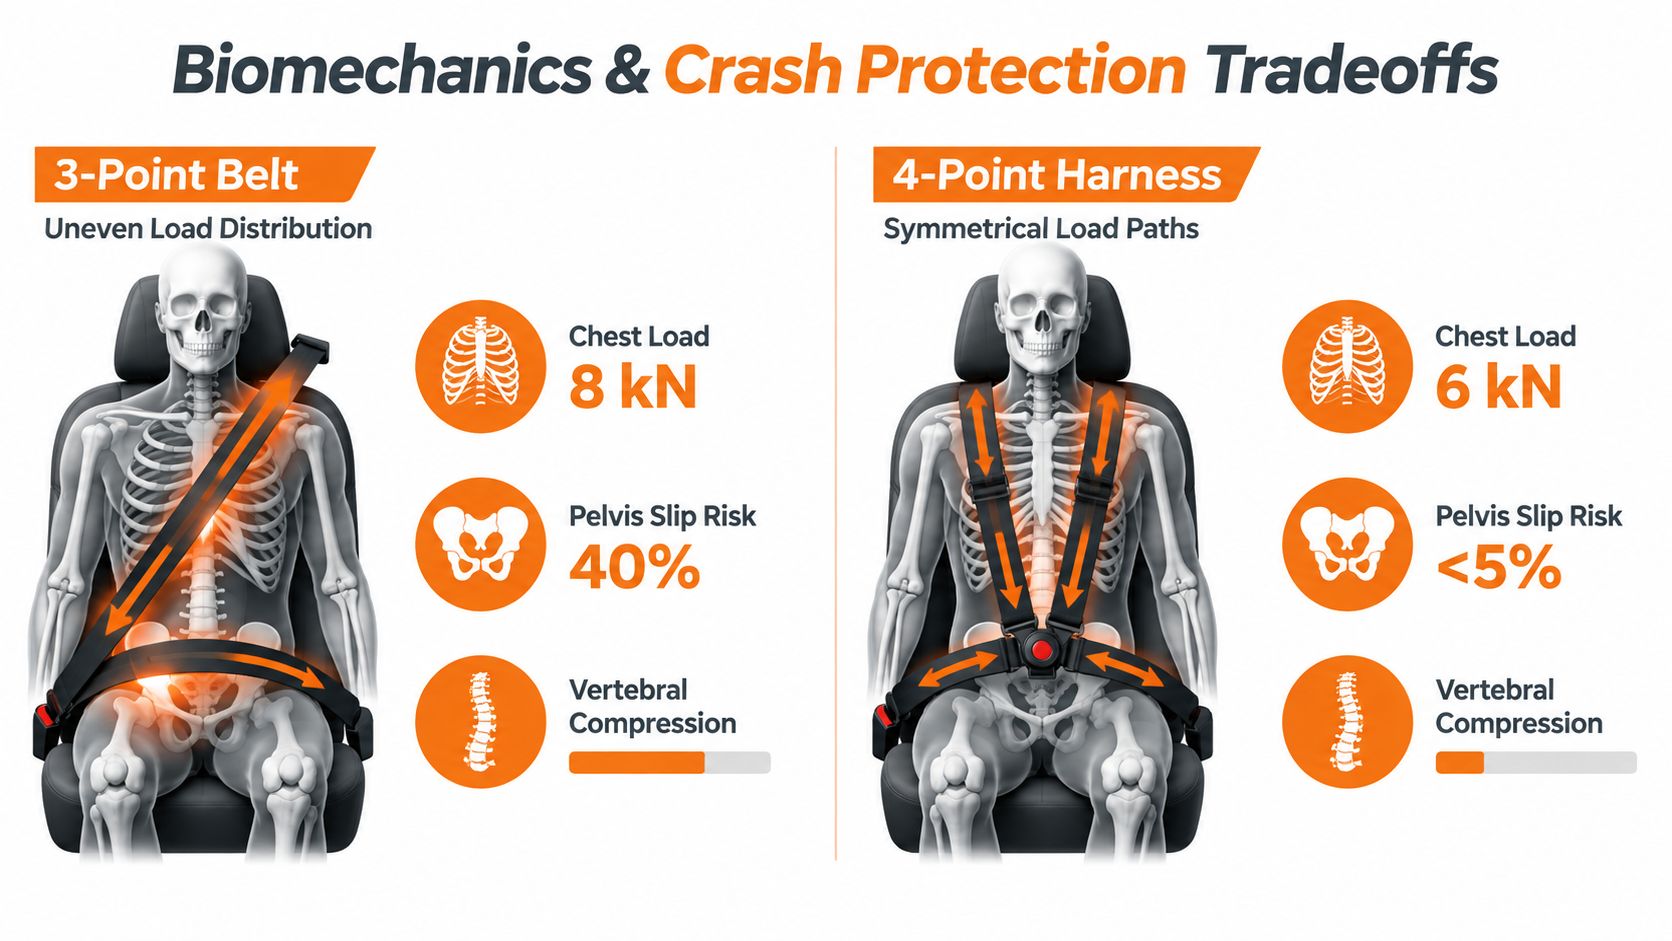
A biomechanics study of a V4 harness-style four-point system found that the design shifted load toward the clavicles and pelvis. Compared with the comparison setup, it reduced chest deflection by roughly 50%, with an estimated 5- to 500-fold reduction in thoracic injury risk depending on the load assumptions, according to the SAE study on four-point seat-belt biomechanics. In four of six post-mortem human subject sled tests at 40 km/h, chest compression was zero or negative, and rib fractures were nearly eliminated.
Those findings show where a four-point system can excel. It can keep the upper body from pitching forward and distribute force through the clavicles and pelvis rather than relying on one diagonal shoulder path. That control is valuable in environments with heavy braking, high lateral loads, and a seat designed to locate the occupant.
Where the harness can lose its advantage
The same belt geometry can create problems when the lower belt doesn't stay on the pelvis. If the lap section rides upward toward the abdomen, the occupant can slide beneath it, a motion commonly called submarining. The seat cushion, belt angle, buckle position, and occupant posture all influence that risk.
Research also complicates the claim that four points are always safer. The Materials paper on four-point and three-point restraint performance reports that frontal-crash simulations produced higher head accelerations with a four-point belt than with a three-point belt, even while torso control improved. Older biomechanical work likewise warned that some four-point geometries could allow the lap belt to migrate toward the abdomen.
Oblique impacts expose another tradeoff. In sled testing of a prototype suspender four-point belt, the model-predicted BrIC fell from 1.55 to 0.53, while maximum chest deflection fell from 50 mm to 38 mm, as reported in the IRCOBI conference paper. Those results are encouraging for head and torso control, but they describe a prototype and a specific test setup, not every aftermarket harness installation.
For a shop or builder, the takeaway is straightforward:
- Torso retention: Four-point systems can improve upper-body control when the shoulder and lap paths are correct.
- Pelvic retention: A low lap belt and suitable seat cushion matter more than the visual appearance of the harness.
- Head motion: Better torso control can coexist with higher head acceleration, so head protection and seat design remain critical.
- System testing: A harness should be selected as part of a compatible restraint package, not as an isolated upgrade.
Street Legality and Track Compliance Rules
Whether a four-point harness is legal on public roads depends on the jurisdiction, the vehicle, the original restraint equipment, and the inspection rules. There isn't a universal answer that can be applied to every state, province, or country. A harness marketed for track use doesn't become road legal merely because it has a recognizable buckle or attractive stitching.
The legal issue often begins with the factory belt. In Canada, removing or modifying an original seat-belt assembly so that it becomes partly or wholly inoperative is prohibited on highways, as discussed in DriveSmartBC's guidance on aftermarket seat belts. That principle illustrates the broader risk for road users: replacing or disabling an original restraint may affect inspection, insurance, liability, and the vehicle's compliance status.
Regulation developed unevenly. In the United States, the National Traffic and Motor Vehicle Safety Act of 1966 established federal safety standards and made seat-belt installation mandatory in new American vehicles beginning with the 1968 model year. In the United Kingdom, drivers and front-seat passengers weren't required to wear seat belts until 31 January 1983, according to the history of seat belts from Transfinder. These milestones help explain why the three-point belt became the standard road solution while four-point systems remained specialized.
Separate the road car from the track car
For a street-driven vehicle, don't assume that a harness replaces the OEM belt. Check the local statute, inspection requirements, insurance terms, vehicle manufacturer guidance, and the harness manufacturer's approval information. Keep the factory belt and airbag system functional unless a qualified authority confirms that the modification is permitted and safe for that exact vehicle.
A dedicated track car follows a different rulebook. Event organizers and sanctioning bodies may specify harness certification, mounting geometry, seat compatibility, belt age or inspection requirements, and whether additional head-and-neck protection is required. The car may also need a harness bar, roll cage, fixed-back seat, and other equipment that changes the entire restraint environment.
Use this compliance check before installation:
- Confirm the vehicle's intended use, street, track, commercial, or mixed.
- Identify the governing law, inspection regime, and event rules.
- Verify the belt's certification and installation instructions.
- Confirm that the seat and mounting points are approved for the harness.
- Decide whether the OEM three-point belt and SRS equipment must remain in service.
- Document the installation and inspect the system before every event.
If those answers aren't clear, the responsible repair is to retain the original system and obtain jurisdiction-specific advice before modifying anything.
Retrofitting Harnesses and Mounting Geometry
A four-point harness installation starts with the structure, not the belt. The belt must attach to points that can carry crash loads through the vehicle body or an approved reinforcement system. Wrapping webbing around an unverified tube, seat bracket, or decorative crossbar is not a substitute for a designed anchorage.
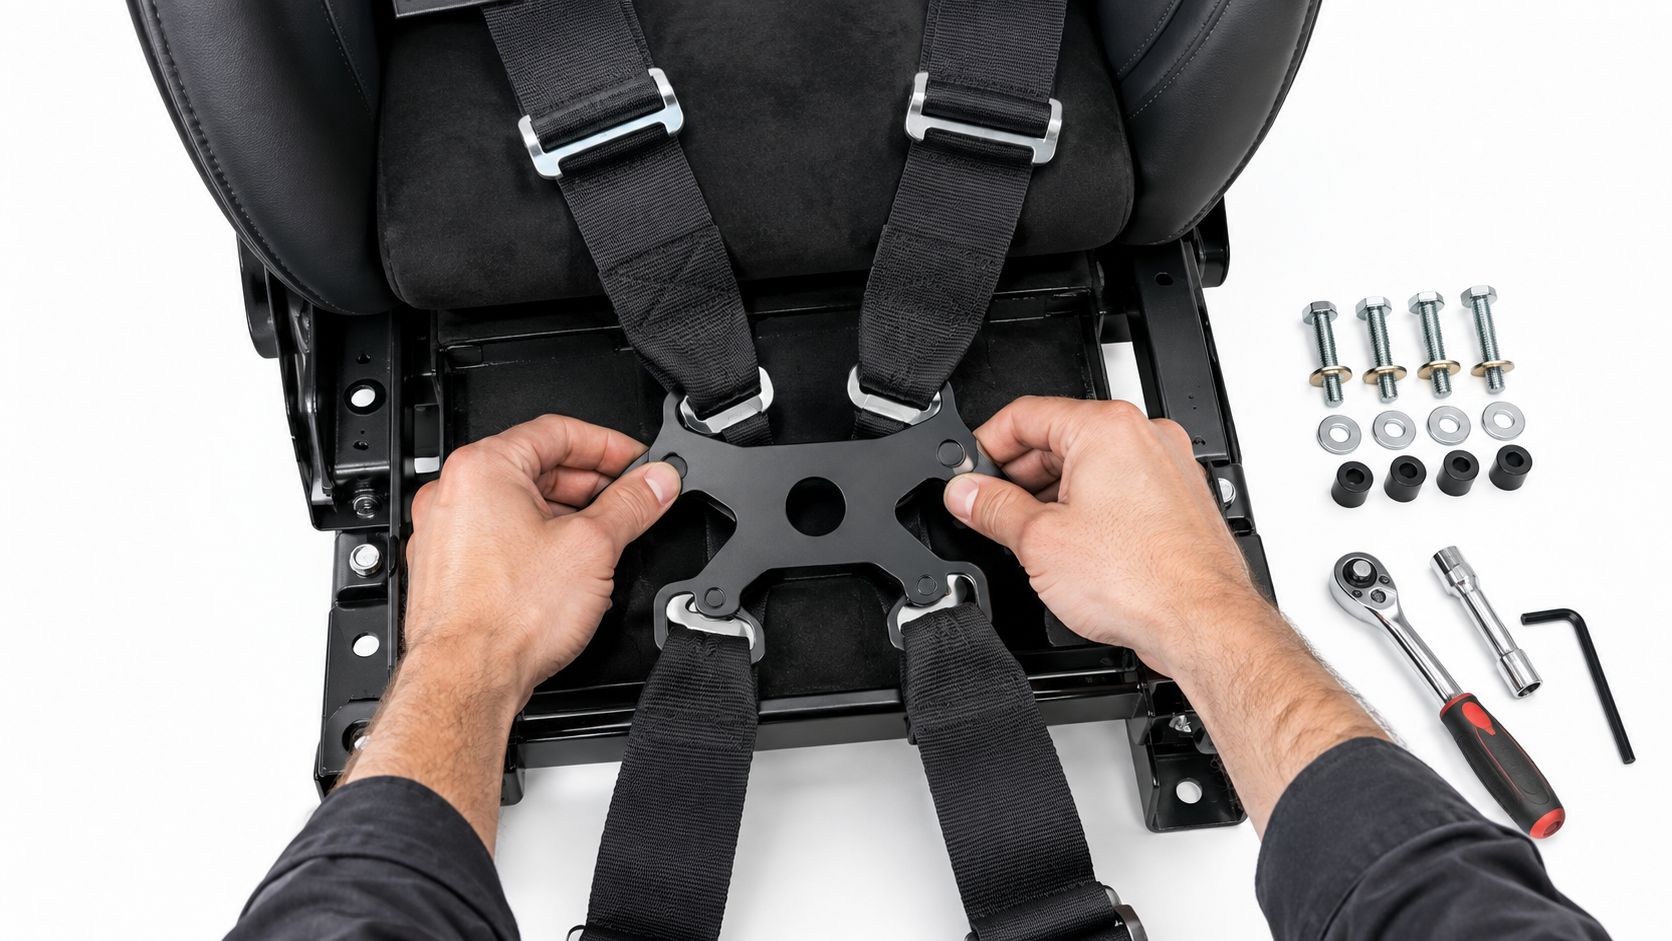
Begin with the seat in its final position. A belt angle that looks acceptable while the seat is loose can change after adjustment, and a shoulder strap that crosses a seat opening may contact the seat shell instead of the occupant. Follow the harness manufacturer's specified vertical and lateral routing, and never guess at the angle from a photograph.
Build the installation around the pelvis
The lap straps should sit low across the strong pelvic area, not across the soft abdomen. The seat cushion and side bolsters must allow the belt to remain low during impact. If the cushion shape encourages the occupant to slide forward or the buckle pulls the lap belt upward, the installation needs redesign rather than tighter adjustment.
A four-point harness also requires careful consideration of anti-submarining control. Some four-point systems use geometry designed to limit upward belt movement, but a generic four-point belt isn't automatically equivalent to a five-point or six-point racing harness. If the application requires a dedicated anti-sub strap, use the manufacturer's complete system and a compatible seat with the required openings and reinforcement.
Check each component before tightening hardware:
- Anchorage: Use vehicle-specific reinforced points, approved harness plates, a documented harness bar, or a cage system designed for occupant restraints.
- Shoulder routing: Keep both straps aligned with the seat and occupant, without sharp edges, twists, or unsupported deviations.
- Lap routing: Keep the belt low on the pelvis and clear of wiring, seat rails, and buckle interference.
- Seat compatibility: Confirm that the shell and belt openings support the intended strap path.
- Webbing condition: Reject cuts, burns, fraying, chemical damage, and stitching defects.
- Hardware: Match the eyelets, bolts, adjusters, and mounting plates to the belt system and vehicle structure.
Collision repairers should also inspect the surrounding floor, sill, tunnel, and seat reinforcement after a crash. A belt anchor can look intact while the sheet metal around it has stretched or buckled. If the original restraint assembly has damaged webbing or a failed mechanism, a specialist seat-belt strap replacement service may address the webbing, but the vehicle structure and installation still need independent inspection.
Workshop check: Set the seat, route the belt, load the adjusters by hand, and inspect every contact point before the driver sits in the car. The belt must remain aligned through the full seat adjustment range.
Restoring Deployed and Damaged Restraints
A post-collision restraint complaint rarely involves only one visible part. The webbing may look acceptable while the retractor is locked, or the belt may extend normally while a pretensioner remains deployed. Meanwhile, the SRS module can store crash data and hard fault codes that keep the airbag warning light on after body repairs are complete.
Start with diagnosis. Inspect the belt webbing for cuts, pulled stitching, burns, contamination, and abrasion. Test the retractor for smooth extension and controlled locking, then check the buckle, pretensioner connector, wiring, and mounting points. Never return a belt to service because it retracts on the bench if the pretensioner has fired or the assembly has absorbed crash loads.
Decide what can be restored
A professional repair workflow separates the replaceable webbing from the mechanical restraint components. Frayed, ripped, cut, torn, worn, or damaged webbing may require replacement. A locked retractor or deployed pretensioner requires examination of the internal mechanism and the deployment-related parts. The technician should preserve the original vehicle-specific housing and connectors when those components remain suitable for service.
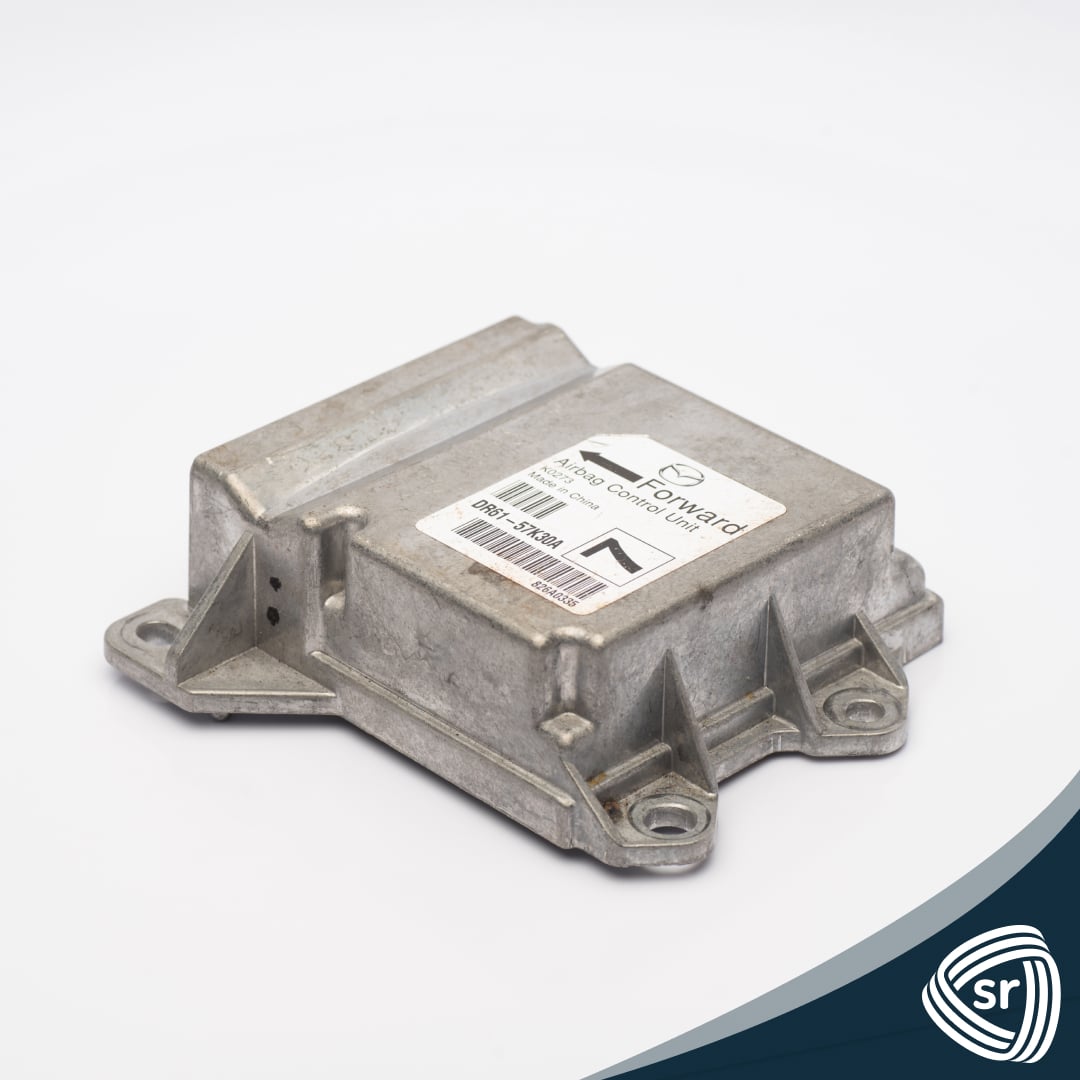
The SRS control module needs separate attention. After a collision, the module may retain crash data or hard fault codes even after airbags and belts have been physically repaired. A reset service can clear stored information so the original controller can be reused once the underlying collision repairs and diagnostic checks are complete. The SRS airbag module reset service is one example of a mail-in route for that specific component.
A sound return-to-service sequence looks like this:
- Record diagnostic trouble codes before clearing anything.
- Identify every deployed or damaged restraint component.
- Inspect the body structure and anchorages.
- Test wiring, connectors, buckle switches, and pretensioner circuits.
- Repair or replace the affected OEM mechanisms and webbing.
- Reset or replace the SRS module as required by the vehicle diagnosis.
- Reassemble the interior and scan the system again.
- Confirm that the warning light, belt operation, airbag system, and seat position all function correctly.
Don't bypass a pretensioner circuit with a resistor, ignore an airbag light, or install a used module without verifying compatibility and history. Those shortcuts can hide a fault rather than repair it. The objective isn't to turn off the warning lamp. It's to return the complete restraint system to a condition that can be inspected, diagnosed, and trusted.
The Economics of Mail-In Safety Repairs
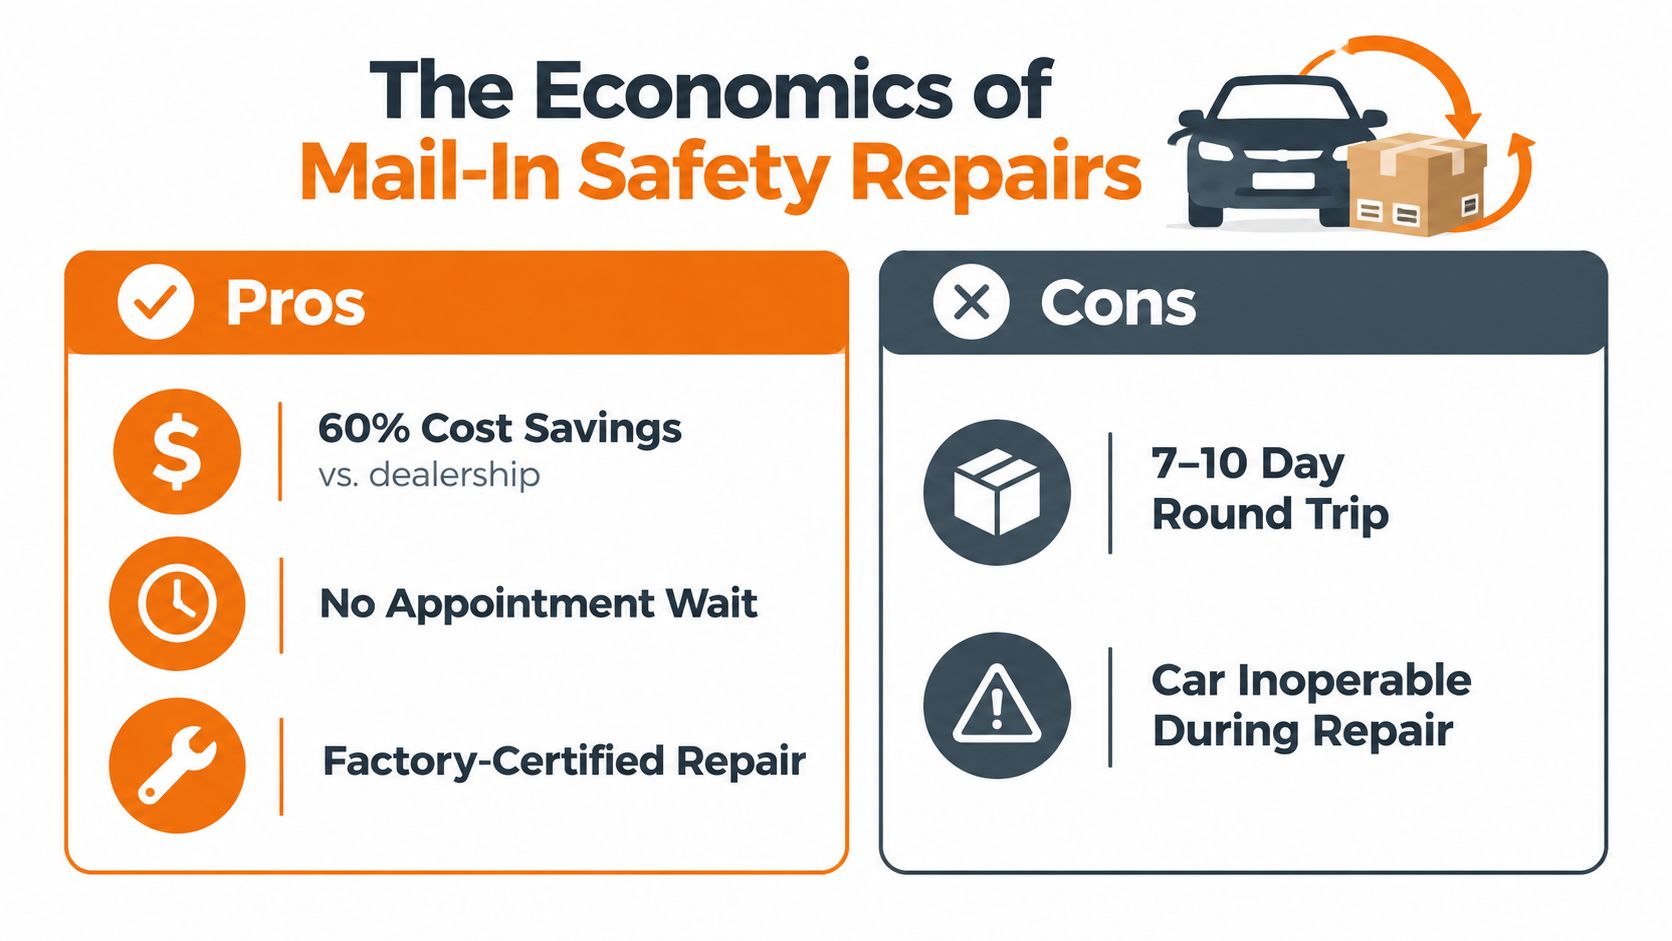
Replacing an entire OEM seat-belt assembly is often the first quote a vehicle owner receives, but it isn't always the only technical path. A repair shop should compare the condition of the housing, retractor, pretensioner, buckle, and webbing before ordering a complete replacement. Preserving a serviceable original assembly can maintain the vehicle-specific connector, trim fit, belt length, and mounting arrangement.
Mail-in repair becomes practical when the component is removable and the service provider clearly defines what it will inspect, repair, replace, and warranty. It also reduces the need to search for a discontinued part or accept an assembly from an unknown donor vehicle. The repair still has to match the vehicle application and the shop's post-repair diagnostic process.
Compare the full job, not just the part
A useful estimate includes labor for removal and reinstallation, shipping, diagnostic time, replacement hardware, programming or module service, and the cost of a failed repair attempt. A low-priced used belt may create additional work if the connector, trim, webbing color, or pretensioner configuration doesn't match.
Safety Restore offers mail-in repair for customer-supplied automotive seat-belt mechanisms, pretensioners, and SRS airbag control modules. Its published service model uses a flat $99 price per item, a typical 24-hour turnaround, and a lifetime warranty, with coverage for vehicles of any year, make, or model as described in its seat-belt and airbag repair information. Those terms are relevant to shops that need predictable estimating, but they don't remove the need for proper vehicle diagnosis and installation.
The decision matrix is simple:
- Repair the original assembly when the housing and vehicle-specific components are suitable, the failure is serviceable, and preserving factory fitment matters.
- Replace the assembly when the structure is damaged, the mechanism is beyond approved repair, the component has unknown history, or the manufacturer requires replacement.
- Use a specialist module service when the SRS controller has stored crash data or hard faults and the vehicle repair procedure permits reuse.
- Reject the job or escalate it when the part identification, crash history, or installation condition is uncertain.
Mail-in work isn't appropriate when the car can't be safely supported during removal, when the assembly is contaminated by fire or flood damage, or when the provider can't verify the repair scope. Shops should also document the part number, vehicle identification, diagnostic codes, photos, and post-installation scan. That paperwork protects the customer and gives the technician a repeatable workflow.
Executing the 24-Hour Turnaround Workflow
Downtime falls when the repair process starts with identification rather than disassembly by guesswork. Photograph the installed belt, label the left and right assemblies, record the part numbers, and scan the SRS before removing anything. That information helps the repair provider and prevents a shop from shipping the wrong component.
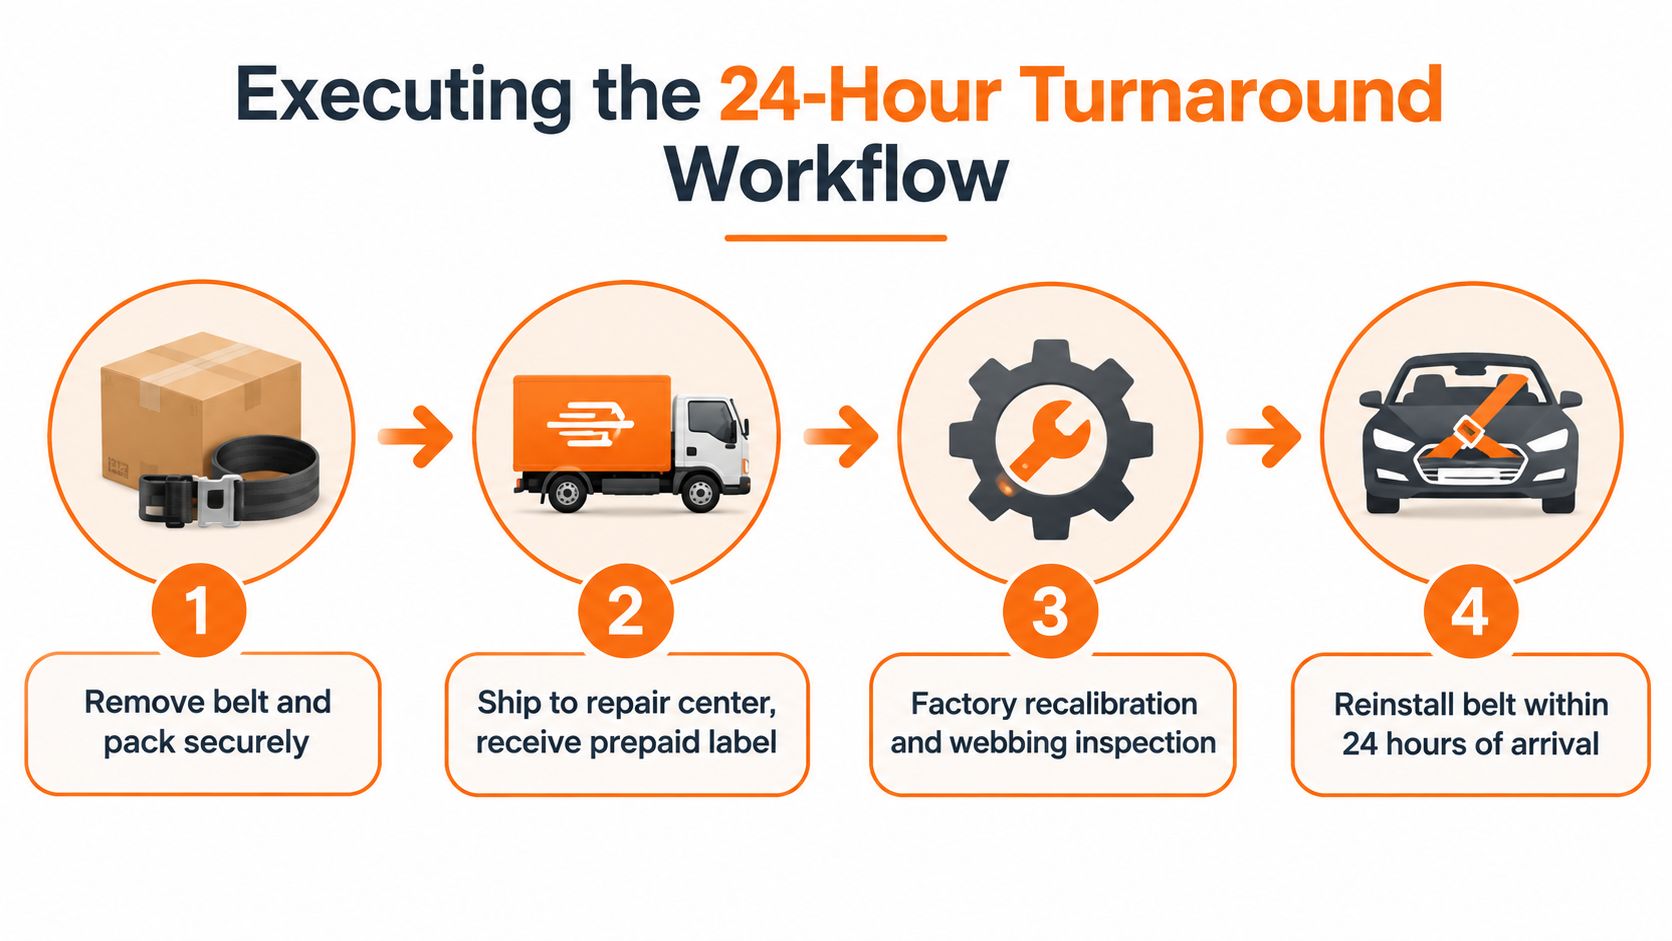
Use a controlled sequence:
- Make the vehicle safe. Follow the manufacturer's SRS disable procedure, disconnect power as specified, and wait the required time before working near connectors or pretensioners.
- Remove the correct component. Take out the locked belt, deployed pretensioner assembly, damaged webbing unit, or SRS module. Don't send unrelated trim or wiring unless the service instructions request it.
- Package it securely. Protect connectors, keep the assembly dry, prevent the retractor from being crushed, and include the order information inside the package.
- Ship and track the part. Use the repair center's shipping instructions and retain the tracking record.
- Reinstall after return. Torque the mounting hardware to the vehicle specification, route the belt exactly as designed, reconnect the SRS components, and inspect the webbing.
- Scan the completed vehicle. Confirm that the warning light behavior, belt operation, pretensioner circuits, buckle switches, and airbag module status are correct.
The advertised turnaround applies to the repair center's handling time, not necessarily the full door-to-door shipping period. A collision center should plan for packaging, carrier transit, diagnosis, and reinstallation rather than promising a return time it can't control.
A video can help owners understand the general removal and service workflow, but it doesn't replace the vehicle service manual or a qualified technician's SRS procedure.
A four-point harness is only one possible restraint choice, and it isn't a universal upgrade over the OEM three-point system. Before ordering parts, verify legality, seat and mounting compatibility, pelvic belt geometry, SRS integration, and the actual damage to the original components. For locked, deployed, or worn restraints, review the repair workflow and submit the correct parts through Safety Restore so your shop or vehicle can move from diagnosis to documented reinstallation without guessing.