
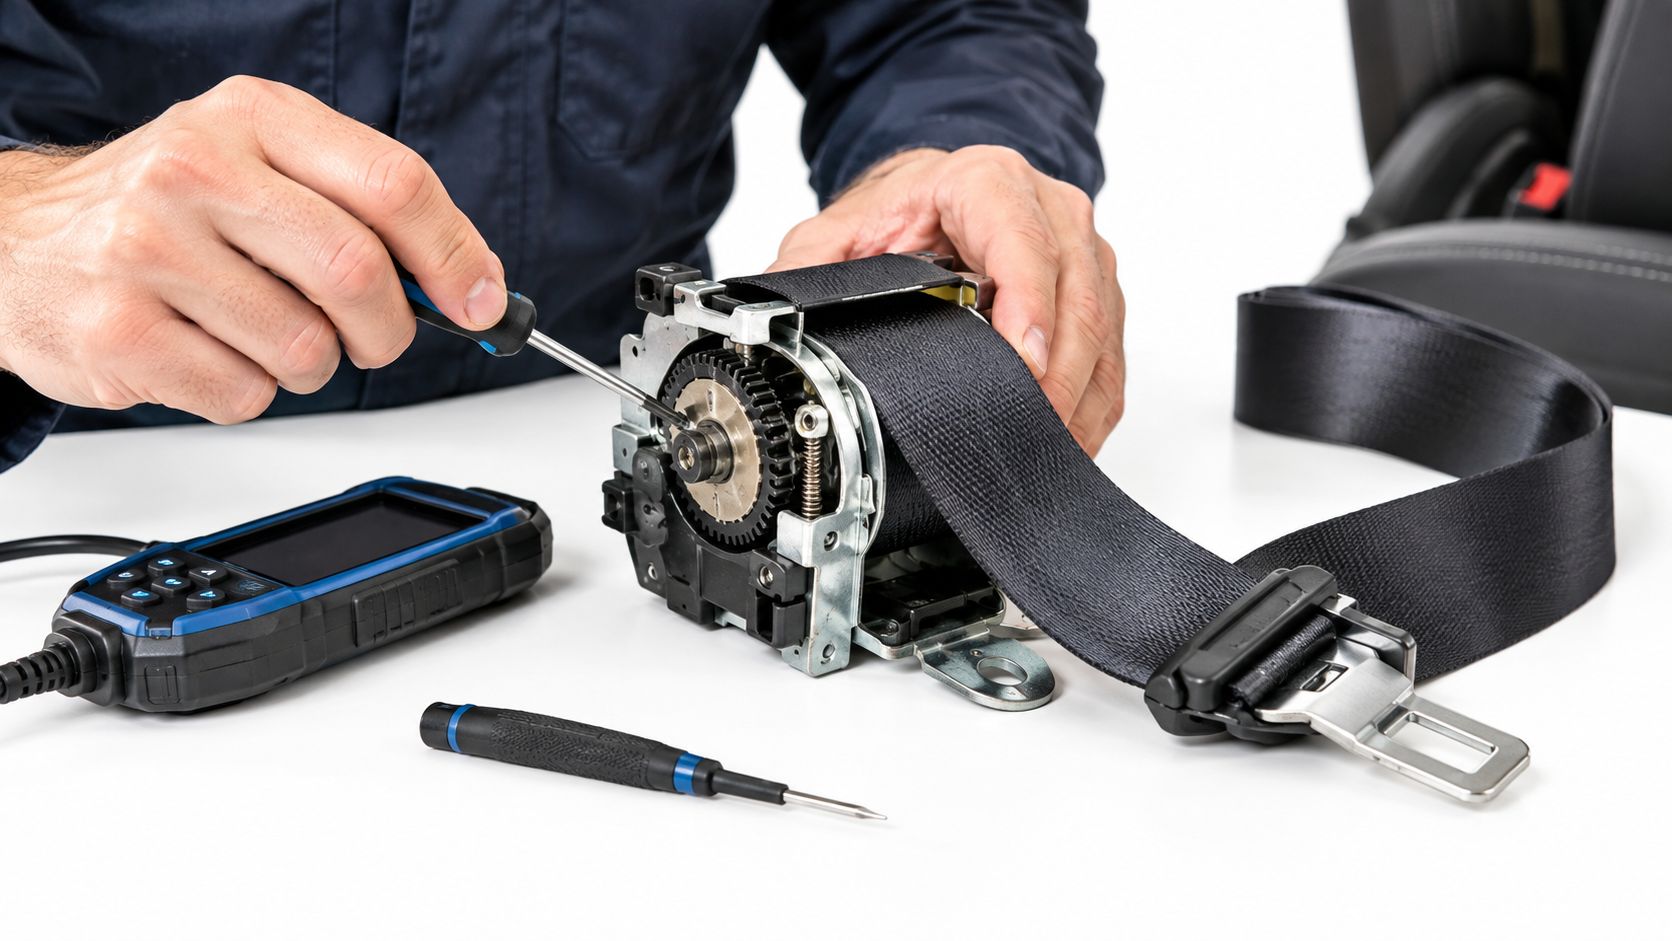
You pull the shoulder belt across your chest, hear a click, and then the webbing refuses to move. It may be stuck fully extended, frozen halfway out, or locked so tightly after a collision that you can't get into the seat. The natural reaction is to pull harder or remove the plastic cover, but either move can turn a diagnosable fault into a damaged restraint system.
Seat belt lock repair starts with identifying what locked. A folded belt may need a simple release, while a seized retractor or fired pretensioner needs controlled testing and professional service. The distinction matters because the belt is part of the vehicle's SRS architecture, not an ordinary spring-loaded accessory.
Table of Contents
- Identifying the Root Cause of a Locked Seat Belt
- Performing the Controlled Retractor Lock Test
- Diagnosing Pretensioner and SRS Circuit Faults
- Evaluating Dealership Replacement Versus Mail-In Repair
- Executing the Mail-In Repair and Reinstallation Workflow
- Prioritizing Safety and Long-Term Reliability
Identifying the Root Cause of a Locked Seat Belt
Seat belts have evolved from simple lap restraints into systems that combine webbing, inertia-reel retractors, locking pawls, pretensioners, sensors, and SRS wiring. Volvo engineer Nils Bohlin introduced the modern three-point lap-and-shoulder belt in 1959, and the United States began requiring lap-and-shoulder belts in new passenger cars by 1968. The Insurance Institute for Highway Safety's seat-belt history explains that this progression brought retractors and later pretensioned assemblies into common vehicle design.
That history explains why a locked belt can have several completely different causes. Start by sorting the symptom into one of three categories.
A webbing obstruction or normal locking mode
A twisted shoulder belt, folded edge, or section trapped against the trim can make the retractor behave as if it has failed. Look along the entire visible length of the webbing. Check whether the belt is feeding straight through the upper guide, whether the edge is folded, and whether the belt is pinched between the seat and pillar trim.
Some vehicles also use an automatic locking mode for child-seat installation. A belt can appear stuck because the retractor has entered that mode or because the vehicle is parked at an angle that activates the tilt-sensitive lock. Don't yank repeatedly. Feed the webbing back slowly while keeping it aligned, then allow the retractor to take up slack under control.
A mechanical retractor failure
A worn or contaminated retractor may retract slowly, stop partway, click, grind, or lock during an ordinary extension. Rust, debris, weakened spring force, and damage to the locking mechanism can all produce inconsistent behavior. A belt that works once and then jams is not reliable just because it moved during one attempt.
Inspect the webbing for fraying, cuts, burns, glazing, heavy staining, or mold. Cleaning the surface won't restore compromised fibers. If the webbing itself is damaged, the repair decision includes re-webbing or replacement, not just reconditioning the spool.
A crash-triggered pretensioner deployment
A belt that locked during an accident may remain frozen because its pretensioner fired. It can also appear to work again while the SRS warning light remains illuminated. The belt's apparent movement doesn't prove that the pretensioner, locking mechanism, or electrical circuit is functional.
Seat belts remain a major safety issue. The United Nations Road Safety Fund knowledge kit reports that belts reduce death risk by 40 to 50% for drivers and front-seat passengers and by about 25% for rear-seat passengers. The same source reports 91.9% observed front-seat belt use in the United States in 2023, while unrestrained occupants represented 49.2% of passenger-vehicle occupant deaths. A restraint that locks incorrectly or has lost its pretensioning function deserves the same caution as any other SRS fault.
Practical rule: If the belt locked during a crash, or the SRS light is on, don't treat it as a simple tangle until the circuit and pretensioner have been checked.
Never open a sealed retractor or disturb a pyrotechnic pretensioner on the vehicle. These units contain spring-loaded and, in some designs, explosive components. A visible obstruction is the only category that justifies a cautious user-level release attempt.
Performing the Controlled Retractor Lock Test
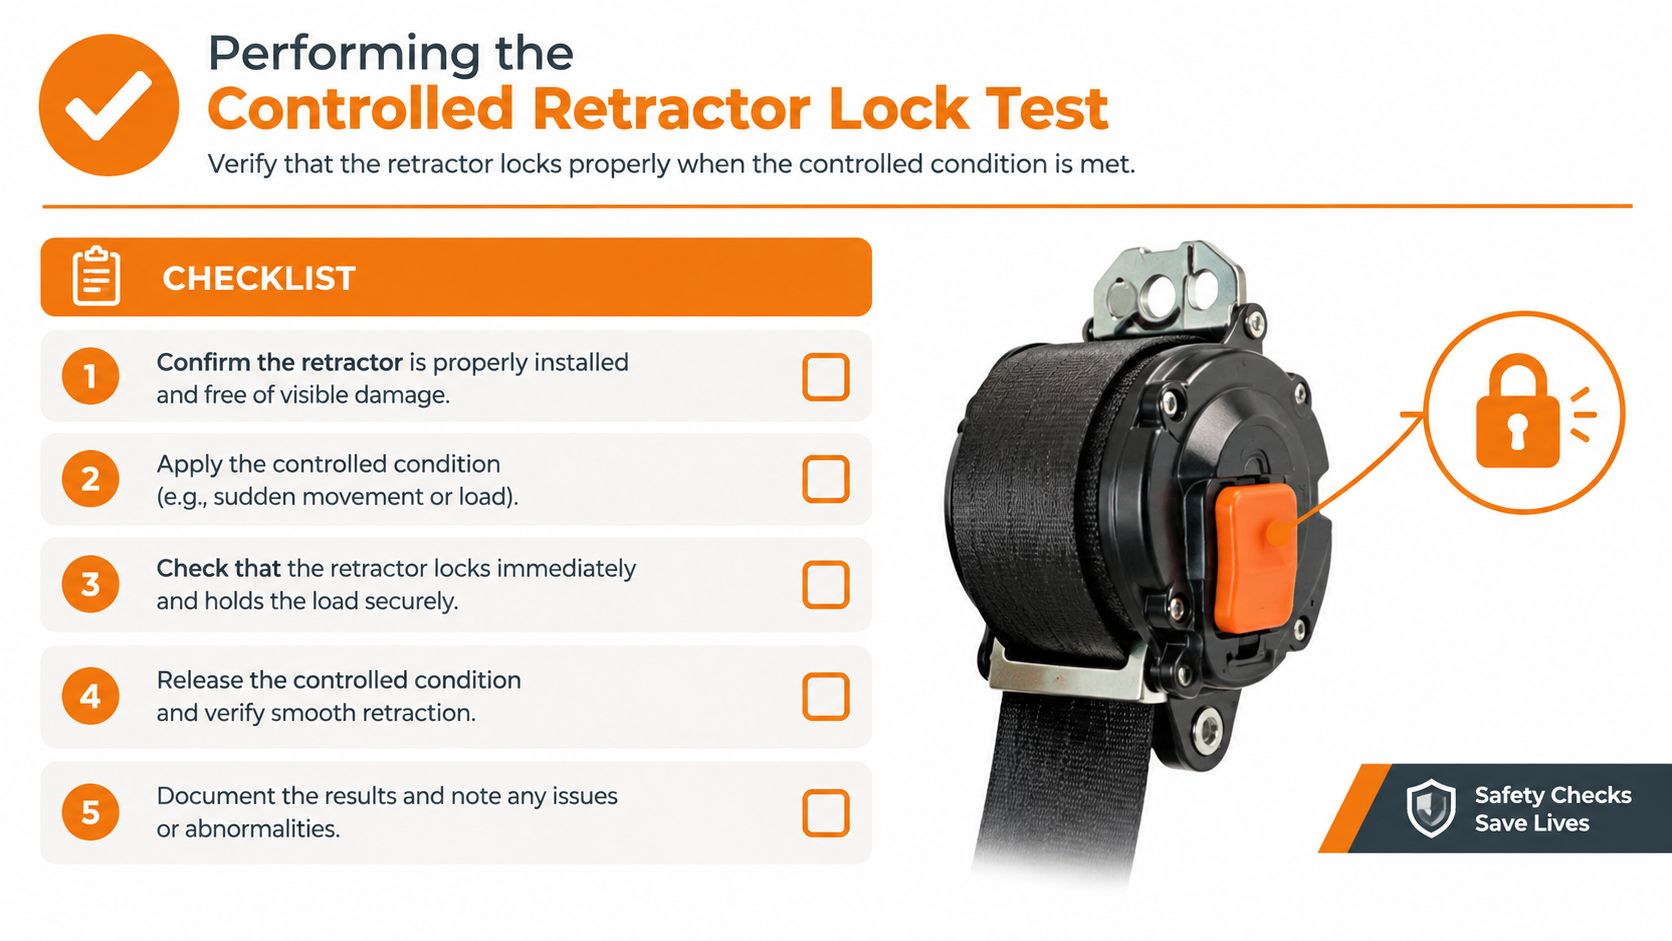
Once the webbing path is clear, test the retractor without jerking it repeatedly or striking the housing. The purpose is to confirm two separate functions: smooth controlled retraction and immediate locking under abrupt movement. Both must work consistently.
The correct test sequence
Park the vehicle on a level surface and keep the belt aligned with its normal wearing path. Then follow this sequence:
- Pull the webbing out slowly until it reaches full extension. It should move steadily, without binding, scraping, or sudden stops.
- Let the belt retract under control. Guide it lightly so the webbing doesn't fold or slap against the trim. It should rewind smoothly without bunching or leaving excessive slack.
- From near the normal wearing angle, give the belt a quick, sharp tug. The inertia mechanism should lock immediately.
- Release the tension and confirm that the belt resumes smooth retraction rather than staying jammed.
- Repeat the complete lock check through the required test cycles.
The controlled retractor diagnosis procedure describes this slow-extension, controlled-retraction, sharp-tug sequence and notes that an OEM procedure may require five successive lock checks. If the assembly fails to lock during any cycle, the unit is treated as noncompliant and replaced or professionally serviced rather than adjusted until it happens to work.
Reading the result correctly
A proper lock is immediate and repeatable. A delayed lock, a lock that occurs only at one angle, or a belt that remains locked after the tug indicates a fault rather than a borderline pass. Don't interpret one successful pull as proof of safety when the next cycle produces a different result.
| Test result | Likely meaning | Correct response |
|---|---|---|
| Webbing feeds smoothly and locks on every cycle | Mechanical function appears normal | Investigate SRS codes if a warning light remains |
| Belt retracts slowly or bunches | Friction, contamination, weak spring, or damaged webbing | Stop using the assembly and arrange inspection |
| Belt fails to lock during a sharp tug | Locking mechanism is unreliable | Treat the retractor as noncompliant |
| Belt locked during a collision | Possible pretensioner deployment or crash damage | Scan the SRS and don't force the spool |
| Belt works mechanically but the SRS light stays on | Electrical fault or stored crash data may remain | Perform electronic diagnosis before return to service |
The test doesn't prove that a deployed pretensioner is safe. It only evaluates the visible mechanical response. A post-crash assembly can pass a casual pull test and still require professional bench inspection.
Diagnosing Pretensioner and SRS Circuit Faults
A seat belt can feel mechanically normal while the vehicle still reports an SRS fault. That happens because the retractor is only one part of the restraint circuit. The pretensioner, wiring, connectors, control module, and crash data all influence whether the system is ready to protect an occupant.
Scan before removing or replacing parts
Use a scan tool that can access the SRS or airbag control module. A basic engine OBD2 reader often won't communicate with restraint modules, so confirm that the tool supports the specific vehicle system before relying on its result.
Record the diagnostic trouble code and the affected seating position. The useful distinction is whether the module reports an electrical circuit problem or stored crash information. Common circuit descriptions include high resistance, low resistance, a short to ground, a short to battery, or a fault that appears after a connector or harness has been disturbed.
The seat belt pretensioner diagnostic guidance recommends retrieving SRS codes first, then inspecting connectors and wiring before replacement. That order prevents a technician from condemning a good belt because of a damaged harness or corroded terminal.
Separate wiring faults from deployment events
A resistance or short code may point to a connector, terminal, harness, or pretensioner circuit. Inspect the wiring visually and follow the vehicle's service procedure. Don't probe a live pyrotechnic circuit casually, install a resistor to imitate a pretensioner, or bypass a warning light. Those shortcuts may hide the fault without restoring the restraint's ability to operate.
Crash data is a different problem. If the module has recorded a collision or the pretensioner has deployed, clearing the code alone won't rebuild the fired device. A scanner can communicate with the module, but it can't restore a consumed pretensioner or verify a damaged retractor.
A code clear is not a repair. The SRS light should go out because the fault has been corrected and verified, not because the warning was erased.
Post-deployment retractors and pretensioners are commonly handled as assemblies. Some service procedures require replacement when a unit fails its functional test rather than adjustment in place. The safest repair path is to remove the affected unit according to the vehicle-specific procedure, have the mechanism and pretensioner evaluated on a bench, and address the SRS module separately if it retains crash data.
After reinstallation, scan the vehicle again. Confirm that the original fault has not returned, inspect the connector seating, and repeat the controlled lock test. A vehicle isn't ready for normal use while the belt remains questionable or the SRS system continues to report an unresolved fault.
Evaluating Dealership Replacement Versus Mail-In Repair
A new dealership assembly is the straightforward option, but it isn't the only responsible one. It can involve a high parts price, uncertain availability, and replacement of hardware that may still be structurally suitable for restoration. The correct choice depends on the crash state, housing condition, webbing condition, and whether the pretensioner and locking mechanism can be professionally rebuilt and tested.
What a new assembly provides
Dealership replacement offers a new assembly matched to the vehicle's catalog specification. That can make sense when the housing is cracked, the mounting area is damaged, the webbing is structurally compromised, or the unit cannot be supported by a qualified repair facility.
The trade-off is that the owner gives up the original hardware and fitment. A replacement may also be delayed by sourcing problems, especially for older or less common vehicles. Before ordering, verify the exact seating position, connector configuration, pretensioner stage, and part number. A visually similar belt isn't automatically compatible with the vehicle's SRS strategy.
What mail-in restoration changes
A specialized mail-in service works on the customer's original removable assembly. Depending on the diagnosis, technicians may restore the locking mechanism, replace pretensioner components, service the retractor, or replace damaged webbing. The original mounting geometry, trim fit, and manufacturer identification remain with the unit.
This approach is economically attractive when the shell and mounting points are sound but the internal mechanism or pretensioner has failed. It also avoids treating every locked belt as a full new-assembly purchase. The service still needs to include bench testing, not just cosmetic cleaning or a code reset.
The post-crash distinction is documented in this seat belt reset and repair guide, which describes cases where a belt appeared to function after an accident but bench testing still identified a deployed pretensioner. The practical lesson is simple: appearance and hand feel are useful clues, not final certification.
Before choosing either route, ask the provider how it handles the following:
- Deployment events: Can it service the specific pretensioner design and stage?
- Webbing damage: Does it inspect for fraying, burns, contamination, or cuts?
- Functional validation: Does it test immediate locking, smooth retraction, and electrical continuity?
- Vehicle-side faults: Will it distinguish a belt problem from an SRS module or harness problem?
- Return condition: Will the unit come back ready for correct reinstallation, with its original fitment preserved?
For ordering details, review the provider's seat belt service ordering process before removing the assembly. A clear order description helps prevent sending the wrong position or selecting a service that doesn't match the hardware.
Executing the Mail-In Repair and Reinstallation Workflow
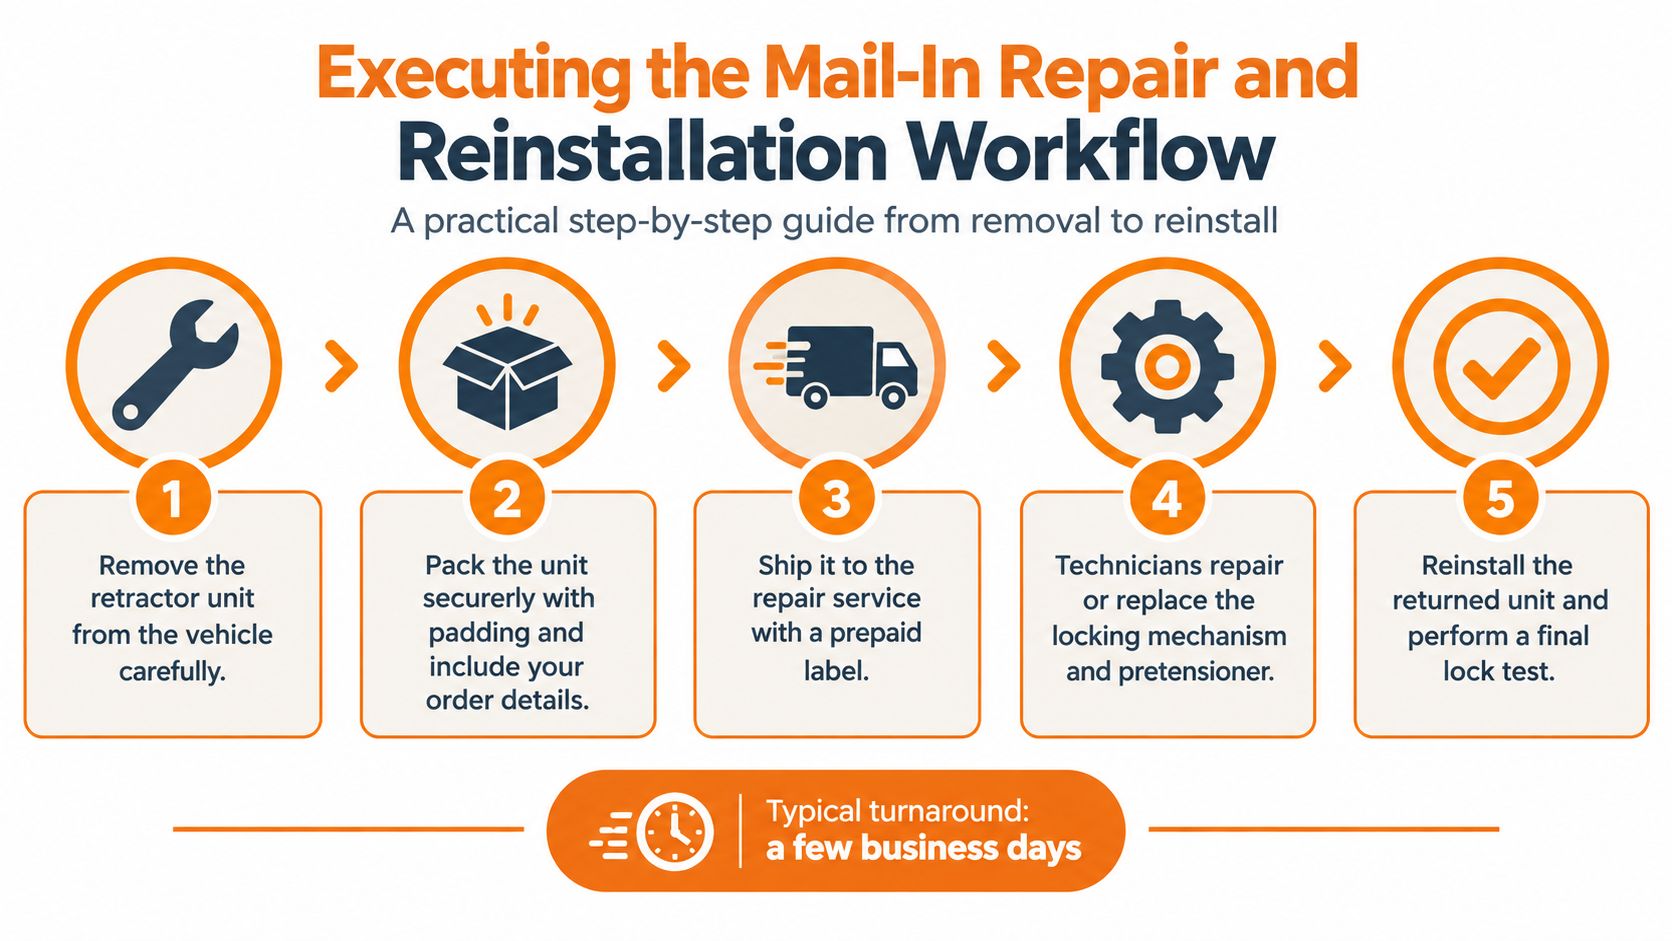
The repair decision only works if removal and shipping are handled carefully. Seat belt assemblies include connectors, reels, pretensioners, and mounting hardware that can be damaged by impact or loose movement inside a box. Treat the part as a safety device from the moment it leaves the vehicle.
Remove the assembly without disturbing the SRS
Follow the vehicle-specific service instructions. In general, the battery is disconnected before SRS connectors are handled, and the vehicle is left undisturbed for the waiting period specified by the manufacturer. Don't unplug a pretensioner with the electrical system active, and don't use improvised tools to release a connector's secondary lock.
Remove the trim and mounting bolts methodically. Photograph connector routing and mounting orientation before unbolting the retractor. Keep the assembly intact, protect the electrical connector, and don't open the housing to inspect the spring or pyrotechnic section.
Prepare the order and package
Describe the symptom accurately. “Locked after crash,” “slow retraction,” “SRS light on,” and “belt fails sharp-tug test” point technicians toward different inspection paths. Include the vehicle identification details and seating position, then select the service that matches the assembly's pretensioner configuration.
Pack the retractor with firm padding on every side. The reel shouldn't be able to swing inside the box, and the connector shouldn't bear the weight of the unit. Include the required order information so the facility can identify the part when it arrives.
Reinstall and verify
When the repaired unit returns, compare its connector, mounting points, webbing path, and identification with the part removed from the vehicle. Install the fasteners according to the manufacturer's torque procedure, route the webbing through every guide, and reconnect the SRS connector securely.
Don't assume the job is complete because the belt retracts. Perform the controlled lock test, then scan the SRS module. If the warning light remains on, record the new code rather than repeatedly clearing it. The remaining fault may be in the airbag control module, wiring, buckle, sensor, or another restraint component.
Shop-floor checkpoint: The vehicle returns to service only after the belt passes its physical test and the SRS scan confirms that no unresolved restraint fault remains.
For questions about the correct service, part configuration, or shipping preparation, use the provider's technical contact page. A photo of the connector and retractor label can help support staff identify the correct service before the part is removed.
Prioritizing Safety and Long-Term Reliability
A seat belt isn't repaired when it merely clicks into the buckle or retracts into the pillar. It has to extend smoothly, lock immediately under abrupt movement, maintain the correct webbing path, and communicate correctly with the SRS. Those requirements create a clear decision boundary between a harmless user correction and a safety-critical repair.
Try a user-level release only when the evidence points to a visible webbing obstruction or a normal locking mode. Keep the belt straight, remove folds from the path, and allow the retractor to rewind gradually. If the belt still binds, retracts weakly, makes abnormal sounds, or locks inconsistently, stop testing and have the assembly evaluated.
Use the failure evidence to choose the repair path
A mechanical fault without crash involvement may be suitable for retractor restoration if the housing, mounting points, and webbing remain serviceable. Damaged webbing requires replacement or re-webbing because surface cleaning doesn't reverse cuts, burns, fraying, or contamination.
A belt that locked during an accident belongs in the post-crash category even if it later seems normal. The pretensioner may have fired, the retractor may have sustained internal damage, or the SRS module may retain crash data. A qualified facility must determine whether to rebuild or replace the assembly and whether the module needs separate service.
The technical information on seat belt repair decisions can help a shop or owner prepare the right questions about testing, component compatibility, and the boundary between restoration and replacement.
Don't trade a short delay for an unverified restraint
The historical safety record supports careful repair rather than casual improvisation. NHTSA estimates that seat belts saved 457,578 lives in the United States from 1968 through 2019, including 20,443 lives in 2019, as reported in the IIHS material cited earlier. Those figures don't certify any individual belt, but they show why reliable restraint function deserves more than a temporary workaround.
Ask any repair provider what it tests, which components it replaces, how it handles deployed pretensioners, and what warranty applies to the restored assembly. A lifetime warranty and OEM-quality restoration standards can make a professionally tested original unit a sensible alternative to sourcing a complete new assembly, provided the facility rejects hardware that cannot be safely restored.
The final checklist is short:
- Visible tangle only: Correct the webbing path and retest carefully.
- Inconsistent mechanical lock: Remove the assembly from service and arrange bench diagnosis.
- Crash-triggered lock or SRS fault: Scan the system and send the affected unit for professional evaluation.
- Damaged webbing or housing: Replace the compromised component or assembly.
- Warning light after repair: Diagnose the remaining SRS fault instead of masking it.
If your seat belt is locked, deployed, or failing the controlled test, Safety Restore offers mail-in repair for seat belt retractors and pretensioners, along with SRS airbag module reset and webbing replacement services. Visit the service site, identify the affected seating position and symptom, and arrange professional evaluation before putting the vehicle back on the road.
