If the seat belt webbing and loop have been cleaned and still won’t retract, the next thing to do is to learn how to fix a car seat belt retractor.
Even if you’re not an automotive expert, this is a DIY project worth doing. It does need some careful dismantling, but it is doable with a little patience and charity.
Prior Experience
If you’ve never removed this trim panel before, Google how to do it for your specific vehicle. It’s also good to contact a specialist or consult a manual. Otherwise, you’ll most likely break a plastic clip or something, resulting in the panel swaying or rattling when you return it. It could even fall off at some point.
Furthermore, because many trimming has a precise dismantle pattern, applying force would result in damage and additional costs.
Patience
Patience is essential if you want to learn how to fix a car seat belt retractor. Getting agitated when removing the trim panels will certainly result in damage.
If you use force, pull panels off, damage clips and holders, or even shatter the entire panel, you’ll have to buy a new one or return the old one in any way you can. Make sure to do the following:
- a) Remove the rubber door seal from the door. Slowly peel it away from the automobile body to avoid damaging it. It will open a split between the plastic and metal on most autos, allowing the trim tools to be inserted.
- b) Remove the panel with care. It may put up a fight against holders and clips, so take your time.
Verify That the Problem Is With The Seat Belt Retractor
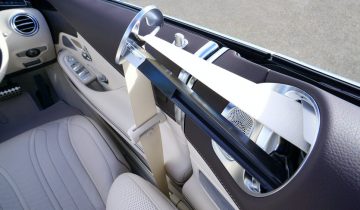
The seat belt retractor is visible after the panel is removed. It’s towards the bottom of the B pillar.
This is an excellent time to double-check if the retractor is the source of the problem. After all, if you want to learn how to fix a seat belt retractor, you must first understand that it is the source of the problem.
As a result, double-check that the belt slides easily through the loop. Then unbuckle the seatbelt and let go. If the retractor is slowly winding and there is no other obstruction, it is almost certainly the issue.
Retract the Seat Belt As Much As Possible
Pull the seat belt as far as it will go, and the spot where the fabric is linked to the metal spool will be visible at the end.
At this stage, it could be retracted more easily. Hold the belt near the seat belt loop with a tight squeeze if this is the case.
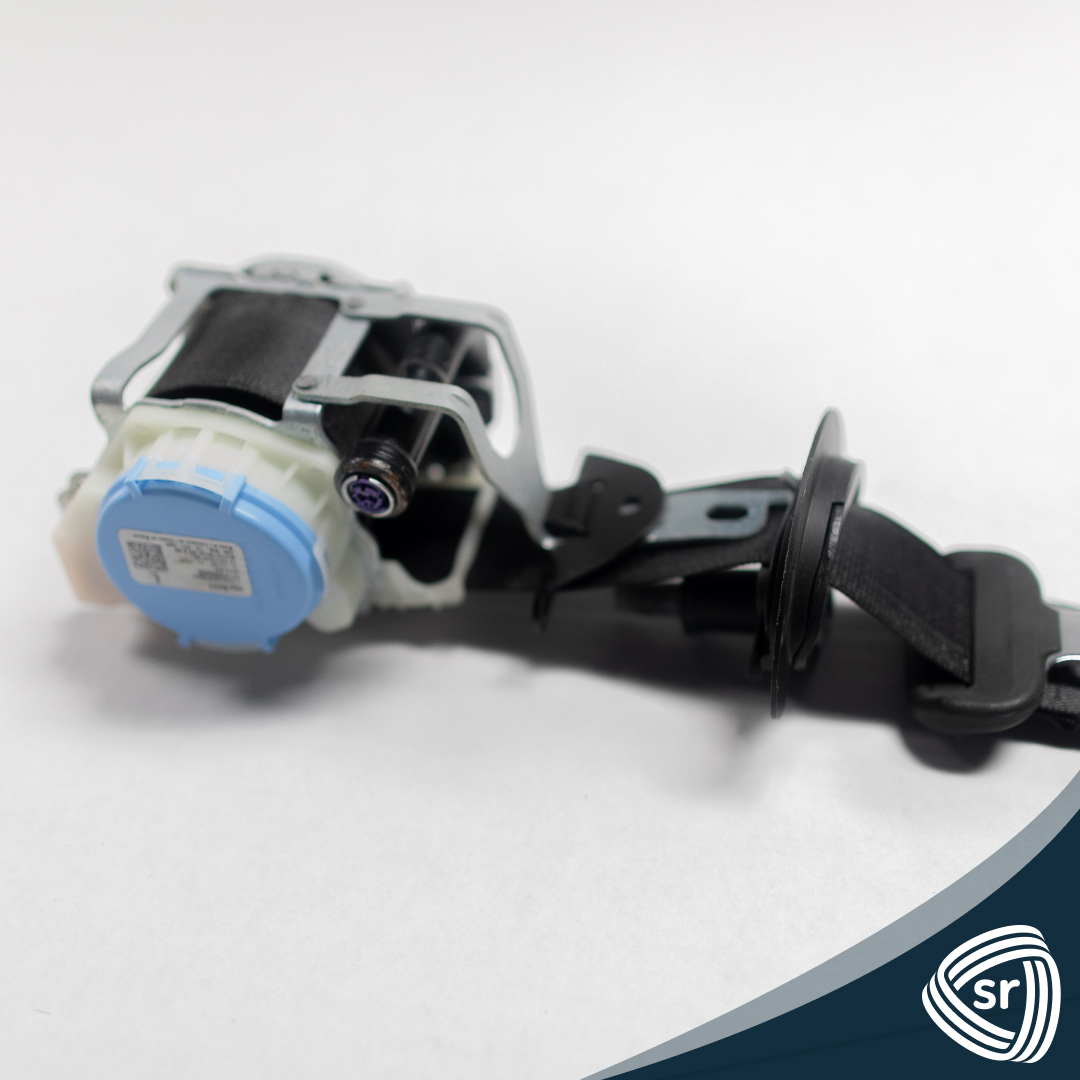
Spray The Seat Belt Retractor With Wd-40 Or A Silicone Based Spray
Ensure to clean the area where you will do a seat belt replacement, then lubricate the retractor.
The most effective method is to apply WD-40 spray (at least from my own experience). A silicone-based spray is the next best thing.
Apply the spray between the retractor’s revolving metal spool and the retractor’s plastic component. Don’t flood it; instead, use a few quick sprays.
If this was the source of the issue, you should see an instant improvement. The retractor should start drawing the belt back into position with more tension.
Retract and let go of the belt a couple of times while spraying extra WD-40 on it for even better results. This will aid the spray’s penetration and lubrication.
Carry on like this until the seat belt retracts properly and fully. Before returning the trim panel, double-check that everything is in working order.
Conclusion
Replacing the trim panel and rubber door seal is the next step. If you’ve learned how to perform seat belt repairs and it still doesn’t function, the retractor may be defective. If you want to save time and effort, consult with a seat belt repair specialist.
Safety Restore specializes in performing seat belt repairs and airbag modules as one of the world’s leaders in post-accident restorations. We can also replace webbing and repair instrument clusters. Repair your seat belt today!