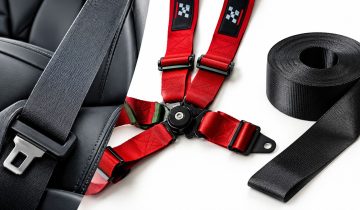
A 40-vehicle fleet can look manageable on a spreadsheet and still lose a van for a week because nobody booked the next service, a defect stayed on a driver's clipboard, or a restraint part was waiting in transit. With cargo vans, half-ton pickups, and special-service sedans sharing one bay, a useful maintenance program has to do more than list oil changes. It needs clear triggers, named owners, controlled parts, and a plan for crashed vehicles that keeps repair work moving while a seat belt or SRS module is away.
Fleet vehicle maintenance works best when the next action is obvious to the driver, supervisor, technician, and night shift. Put the schedule where people can use it, then connect each check to a work order and a decision about whether the vehicle can safely return to the route.
Table of Contents
- A Fleet Inspection Schedule You Can Post
- How to Stand Up the Maintenance Program
- Which Vendor Owns Each Repair
- How Parts Move Through Their Lifecycle
- Seat Belt and SRS Repairs Without Bay Time
- Start This Month With the Overdue List
A Fleet Inspection Schedule You Can Post
Put a working schedule on the wall, not a policy memo no one checks at the bay door. A daily inspection catches obvious defects before a unit leaves; recurring service handles wear that builds gradually. The collision row matters just as much: a vehicle can look drivable after a minor impact while a belt or airbag system is no longer ready to protect its occupants.
| Trigger | Checks | Fail if | Owner |
|---|---|---|---|
| Daily pre-trip | Lamps, tires, leaks, wipers, horn, belt latch and retract | Inop lamp, leak, bald tire, or belt that sticks | Driver, reviewed by supervisor |
| Weekly | Fluids, battery terminals, brake-pedal feel | Low fluid, corroded terminals, soft or long pedal | Shop or lead driver |
| 5,000 to 7,500 miles or six months, whichever comes first | Oil and filter, tire rotation, brake-pad thickness | Service trigger reached, uneven tire wear, or pads at the shop's replacement limit | Technician |
| 15,000 miles or annual | Suspension, belts, hoses, filters, alignment complaints | Play, cracks, or a pull the driver reported twice | Technician plus inspection station if required |
| After any collision | Airbag lamp, belt travel, pretensioner | Lamp on, locked retractor, or fired pretensioner | Fleet manager routes to mail-in restraint repair |
For stop-and-go routes or vehicles that spend long periods idling, keep the oil-service trigger toward the shorter end of the interval. Use whichever comes first, the odometer or the calendar, so a low-mileage spare doesn't age out of routine care. Follow the vehicle maker's requirements where they call for earlier service.
Make each check usable
Drivers need to know what “check the tires” means. Have them look for damage and uneven wear, verify pressure against the vehicle's placard, and flag a tire that's losing air or nearing the tread limit set by your inspection rules. Under the nose, look for fresh fluid; at the driver's seat, check that the horn works and each belt latches, extends, and retracts without sticking.
The weekly check is a quick screen, not a substitute for diagnosis. Low fluid needs a cause, not just a top-up. A soft or unusually long brake pedal means the unit stays out of service until a qualified person checks it.
Post-collision rule: Don't clear a vehicle for the route just because the body damage looks minor. Check the warning lamp, belt operation, and pretensioner status, then record the finding.
Use the same work-order system that tracks fuel-card assignments to store each vehicle's trigger, owner, next due date, and open defects. A driver's report should become a tracked job, not a note that disappears at shift change. For any row that fails, identify who can remove the vehicle from service and who confirms the repair before it returns.
How to Stand Up the Maintenance Program
A schedule becomes useful only when each unit has a next due date and a person responsible for acting on it. Set up the roster in one sitting, then give the finished version to the night supervisor as well as the day team. That handoff prevents the system from depending on one manager's memory or availability.
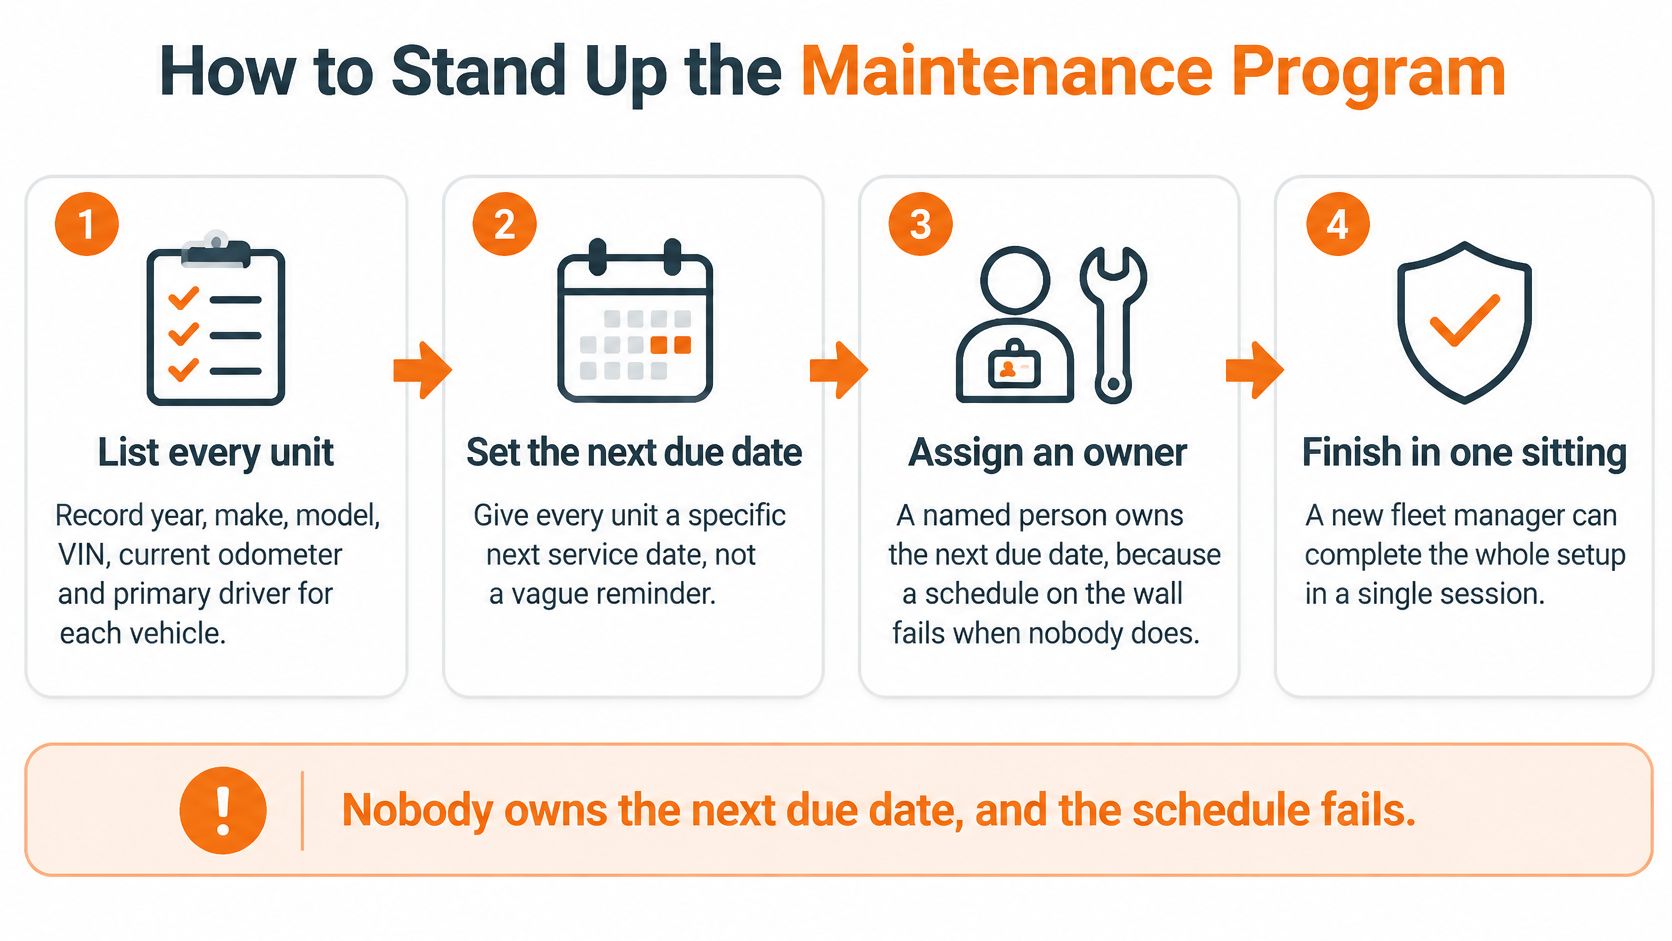
Build the unit register. List every vehicle's year, make, model, VIN, current odometer, primary route, and last three repair orders. Add the primary driver or route where it helps the shop plan access. Missing history makes it harder to spot repeat failures, check what was already replaced, or confirm whether a complaint is new.
Mark severe-duty units. Flag vehicles whose week is dominated by city stops, towing, or long idle periods. Keep those units at the short end of applicable service intervals. Otherwise, a route that works a van harder than its mileage suggests can push it past a sensible service point.
Create recurring jobs with a backup owner. Enter the daily, weekly, mid-interval, and annual checks as recurring tasks. Give each one a primary technician and a named backup. Add collision restraint checks as a separate workflow, so they don't get buried inside general bodywork. For removable seat belt and module work, make the routing rule clear; Safety Restore's supported seat belt repair vehicle list can help staff identify eligible makes before packing a part.
Reserve capacity before a unit is due. Book bay hours ahead of the due mile or date, and stagger appointments so routine work doesn't take the whole fleet out at once. If several vehicles would otherwise sit waiting for service, keep a small loaner pool. A wash can also be scheduled around fleet availability rather than treated as an unplanned stop; the VIP Car Wash unlimited wash club is one option to review when deciding how to handle recurring fleet washes.
Close the job against the defect sheet. Don't close a work order because someone wrote “fixed” in a dispatcher note. Require the signed defect sheet and a clear record of what was inspected or repaired. Brakes, tires, steering, and restraints can't be deferred by a note that leaves the original fault unresolved.
Set two short review routines. Every Monday, clear open defects and assign next actions. Every Friday, chase work that has passed its due trigger. A spare truck that barely moves still needs calendar-based attention because batteries, belts, and fluids age while it sits.
Keep the register in the system people already use for fleet operations, not in a separate file only one person can open. If a manager is away, the backup should be able to see the next due task, the defect status, and the person who can make the repair decision.
Which Vendor Owns Each Repair
Sending every job to one vendor feels simple until the dealer quote turns a repairable restraint part into a full assembly, or a routine oil change occupies a bay needed for a vehicle that can't safely return to service. The opposite shortcut is no better: the cheapest available shop shouldn't be making decisions about safety-critical work.
| Work | First vendor | Target turnaround | Switch when |
|---|---|---|---|
| Oil, filters, rotations | In-house bay or quick lane | Same day | Bay is over capacity for more than a week |
| Brakes and tires | One independent with a fleet account | 1–2 days | Repeat comebacks, missed parts updates, or labor terms change without notice |
| Collision body | Body shop on a fleet account | Booked slot, often several days | Shop would release a unit with a lamp or locked belt |
| Seat belt or SRS module | Mail-in repair of the original part | About one day after receipt, plus shipping | Quote is a full assembly or the part is discontinued |
| Annual safety inspection | Licensed station | Scheduled appointment | Restraints fail and need the mail-in path the same day |
Set the handoff rules
Keep basic oil, filter, and rotation work in-house if the bay can handle it, or use a quick lane when it can't. For brakes and tires, a single independent shop with a fleet account gives you a consistent contact and a written labor rate. Require a call when a part delay will push the repair beyond the promised window; silence leaves dispatch guessing whether to hold a route open.
Collision work needs a release rule, not just a completion date. The body shop shouldn't return a unit with an airbag warning lamp on or a locked belt, even if the panels and paint are finished. A restraint repair is a separate job: your shop removes and reinstalls the original module or belt assembly, while a mail-in specialist repairs the removable part.
For an SRS module, Safety Restore's airbag module reset service is one mail-in option. Keep the vehicle moving through body or mechanical work while the part is away, rather than letting a dealer bay sit occupied waiting for a replacement assembly. The specific repair path depends on the fault and the condition of the original part, so don't treat a reset as a substitute for completing the underlying collision repair.
Review each vendor on turnaround, repeat repairs, and whether the invoice matches the estimate. Switch when the work repeatedly comes back unfinished, a quote jumps to full replacement without a sound reason, or downtime outlasts the route's spare-vehicle cover. Drop a vendor after repeated missed safety deadlines, not just because one noisy complaint landed on a busy day.
How Parts Move Through Their Lifecycle
A part can stop a route long before it fails on the vehicle. If the right filter isn't on the shelf when a service is due, the unit waits. If the wrong belt retractor is ordered, the wait can stretch while staff sort out fitment. Track each item from request through installation or scrap so missing stock and misplaced returns don't turn into recurring downtime.
Set bin rules for fast movers
Start with the items your shop uses often: oil filters, wipers, common brake pads, and bulbs. Set minimum and maximum quantities from your own recent use, not a catalog's generic suggestion. When stock reaches the minimum, reorder early enough for the next scheduled maintenance wave.
Tag each delivery with the date received, the unit number if it's already assigned, and the vendor. Use the oldest acceptable stock first. Check packaging and condition before installation, and don't put an opened, damaged, or contaminated item back into a bin as usable stock.
Cores need their own routine. Put returned cores in a clearly marked holding area and send them back promptly, while the work order and vendor credit are still easy to match. If cores sit without an owner, the shop loses track of both the part and the return.
Keep restraint parts tied to the vehicle
Don't bulk-stock retractors and SRS modules as if they were common bulbs. Restraint components are vehicle-specific, and a part that looks similar may not fit or function correctly in another unit. Order against the vehicle's details, identify the unit on receipt, and make sure the repair order follows the part through removal, shipment, return, and reinstallation.
Retire parts that are damaged, superseded, or past the manufacturer's shelf-life limit. Write the reason on the bin card and update the inventory record so a later shift doesn't put the item back into service. Once a quarter, count the stockroom against the system and investigate any restraint component that left without a vehicle number attached.
A parts process should answer three plain questions: what's on hand, what vehicle a reserved item belongs to, and who is responsible for the next move. If staff can't answer those questions at the shelf, the inventory record isn't doing its job.
Seat Belt and SRS Repairs Without Bay Time
A crashed van can look ready to go while its belt is locked and its airbag warning lamp remains on. Treat the restraint system as its own workflow, separate from the body estimate, and keep the vehicle moving through other repairs while the removable part is away.
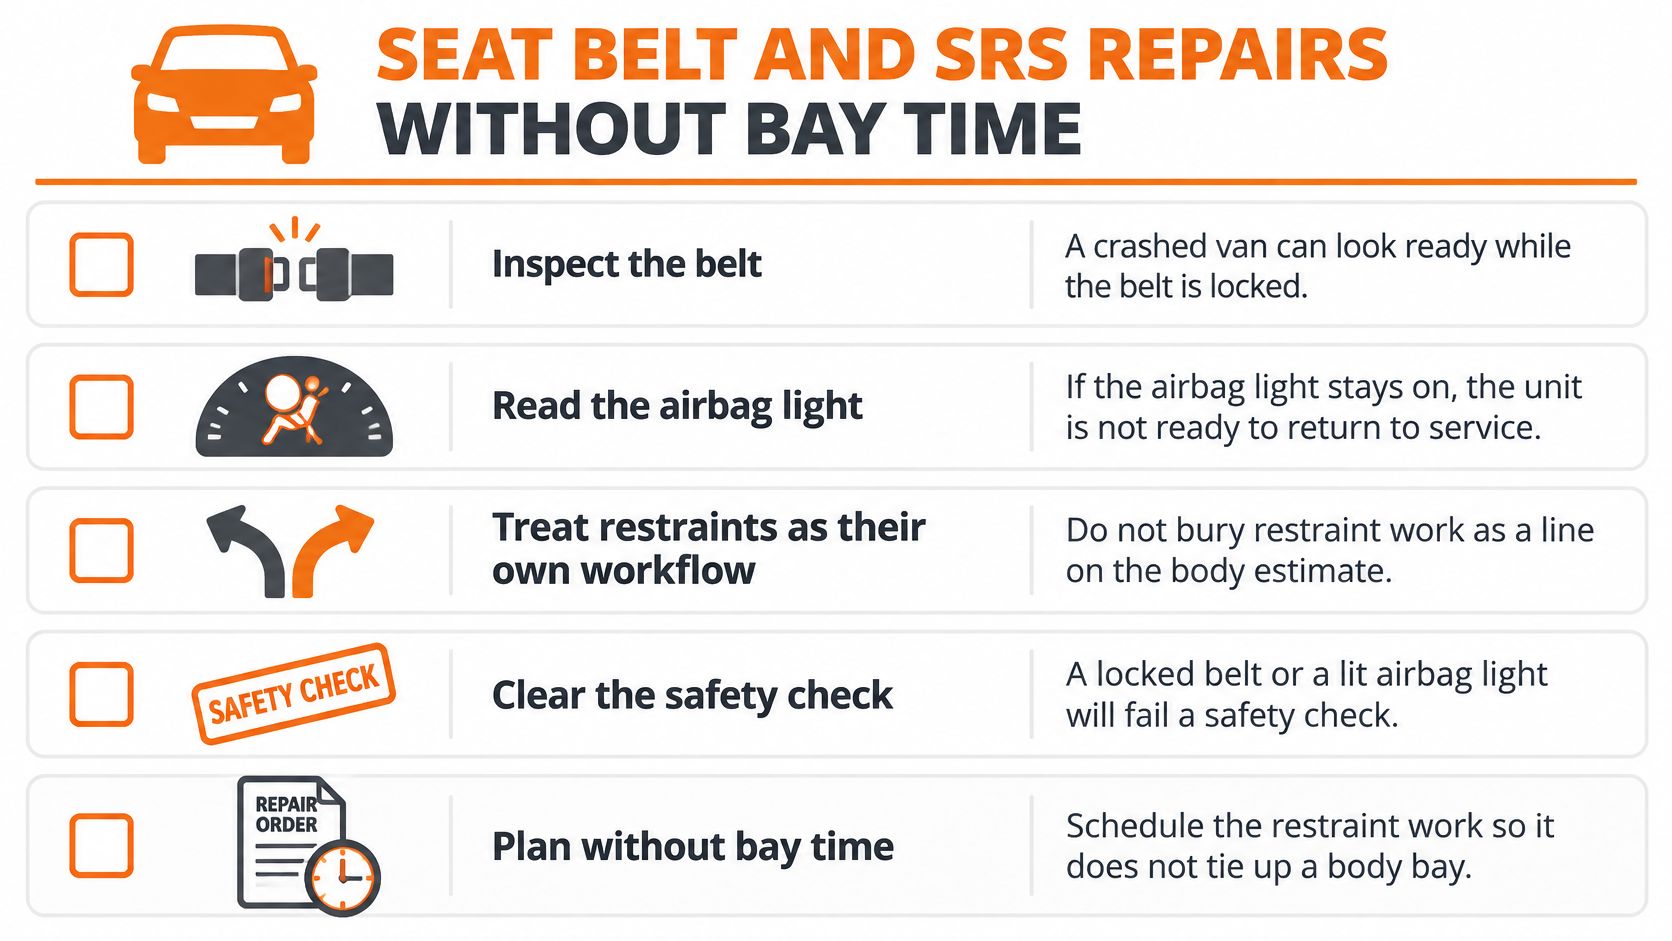
Record the condition after impact. Note the airbag lamp status and check whether each belt extends, latches, and retracts. Record whether a pretensioner fired. Don't assume that a belt working before the collision still works afterward.
Make the vehicle safe to work on. Disconnect the battery before anyone unbolts an SRS module or retractor. Follow the vehicle's service procedure for disabling the system and handling restraint components. This is not a job for improvising around energized SRS wiring.
Remove and identify only the failed part. Depending on the diagnosis, that may be the control module under the console or front seat, or a belt assembly. Label it with the unit number, year, make, and model, and keep the work order with the part. A box with an unmarked module is a delay waiting to happen.
Choose repair or replacement based on the part and fault. When the original component can be restored, a mail-in repair can avoid waiting on a full replacement assembly. Safety Restore repairs customer-supplied seat belts and SRS modules; its process requires the customer to remove the part with the battery disconnected and send it in for repair. For webbing replacement, see Safety Restore's seat belt webbing replacement service.
Keep other work moving. While the part is in transit, continue the body or mechanical work that doesn't require it to be installed. Don't leave a vehicle occupying a bay solely because a parcel is on its way.
The shop-floor handoff should include the quantity of parts, vehicle details, unit number, and a return contact. Safety Restore says it repairs and ships customer-supplied parts back within a day of receipt. File the returned paperwork with the repair order, then reinstall the part after the rest of the work is complete.
Do not stitch or “web” a belt in the shop as a workaround, and don't clear codes with a generic scan tool and send the driver out. A cleared warning isn't proof that the fault is repaired. After reinstallation, verify the airbag lamp behaves as required by the vehicle's procedure, check that the belt retracts, and perform a firm tug test to confirm it locks.
Use this workflow to keep the repair moving, not to bypass diagnosis. If the original component is damaged beyond repair or the underlying system fault remains, resolve that issue before returning the unit to service.
A short visual checklist can help the night shift follow the same handoff:
Remove the part safely, label it to the unit, ship it with the repair details, and verify it after reinstallation.
Start This Month With the Overdue List
Don't try to fix every weakness in the maintenance program at once. Start with the ten units furthest past an oil trigger, due for tire attention, or carrying an open defect sheet. Give each one a work order and a named owner, then use the first repair wave to test whether scheduling, vendors, stock, and restraint handling work together.
Assign the next action. Tie each vehicle to its posted trigger, owner, and due point. If mileage and calendar timing don't match, act on whichever comes first; keep severe-duty vans toward the short end of their service range. That prevents the overdue list from becoming another static spreadsheet.
Book the correct repair path. Route oil work to the in-house bay or quick lane, brakes and tires to the fleet-account shop, and collision work to the body vendor. Provide a loaner when a route would otherwise sit idle. Record the promised completion date on the work order so dispatch knows when to plan around the vehicle.
Check stock before the work starts. Confirm that the filters, pads, and bulbs needed for the ten jobs are available above minimum. Reorder a fast-moving item before the work wave begins. Don't add retractors or modules to a general bulk order; match restraint parts to the specific vehicle and fault.
Separate restraint work immediately. Any unit with a lit airbag lamp, stuck belt, or fired pretensioner needs a documented restraint repair path. Label removable parts with the year, make, model, and unit number, and keep other appropriate repairs moving while the part is away. For Safety Restore's mail-in process, the customer places an order, ships the removable part with contact information and order confirmation, and receives it back after repair. Include the vehicle details and a return contact in the package so the part can be matched and returned correctly.
Close only with confirmation. Require the signed defect sheet and record the repair that resolved the reported issue. A dispatcher note alone doesn't show that the original defect was corrected or that the unit is ready for service.
Review the list the following Friday. Count how many of those units are back on route and identify what held up the rest: a missed booking, an unavailable part, a vendor delay, or an incomplete inspection. Fix the specific handoff that failed before adding another large batch of work.
The overdue list should get shorter because the process is working, not because someone deleted old tasks. When every unit has a trigger, owner, and next action, the schedule becomes a working tool for dispatch and the shop instead of a reminder that maintenance is behind.
Safety Restore repairs customer-supplied seat belts and SRS airbag modules by mail, so your shop can keep other work moving while the original part is away. Add the restraint workflow to your maintenance and collision process, and visit Safety Restore to start an order for a removable part.